
project role
Feature overview
Functional positioning
Project Role is used to view the role list under the current project, and enter the interface related to role addition, modification, deletion and status. This function is located on the [Project Role] tab of the [Member Role Management] page and is displayed side by side with the [Project Members] tab.
Simple understanding: Here you can check the name, permission characters, description, display order and status of the project role, and view the selection or backfill screen of the role form and menu tree.
Main features
- Role information display: List displays role name, permission description, permission characters, display order, status and creation information.
- Role Form: You can open a new or modified pop-up window to view the basic fields, status, menu tree and permission description of the role.
- Permission configuration: Each role can be bound to specific menu permissions to control the accessible and operable scope within the project.
- Character status control: Supports controlling whether the character is available through the status switch.
Scope
This page explains the project role list, query controls, new/modify pop-up windows, normal/deactivated options, menu tree selection status, field backfilling, and deletion and list status entries in the context of the current project.
Preliminary steps
Preconditions
- Logged in to the qData platform.
- The [Projects] at the top has been switched to the project that needs to be viewed.
- It has been confirmed that what you need to view this time is the [Project Role] tab.
- If you need to maintain role permissions, the scope of responsibilities of the role within the project has been clarified.
Navigation path
Data Development > Project Basic Management > Member Role Management > Project Role
Page overview
After entering the [Project Roles] tab, the top of the page displays the query area, toolbar, role list, and paging in order. The list status column is a switch, and the operation column provides [Modify] and [Delete].
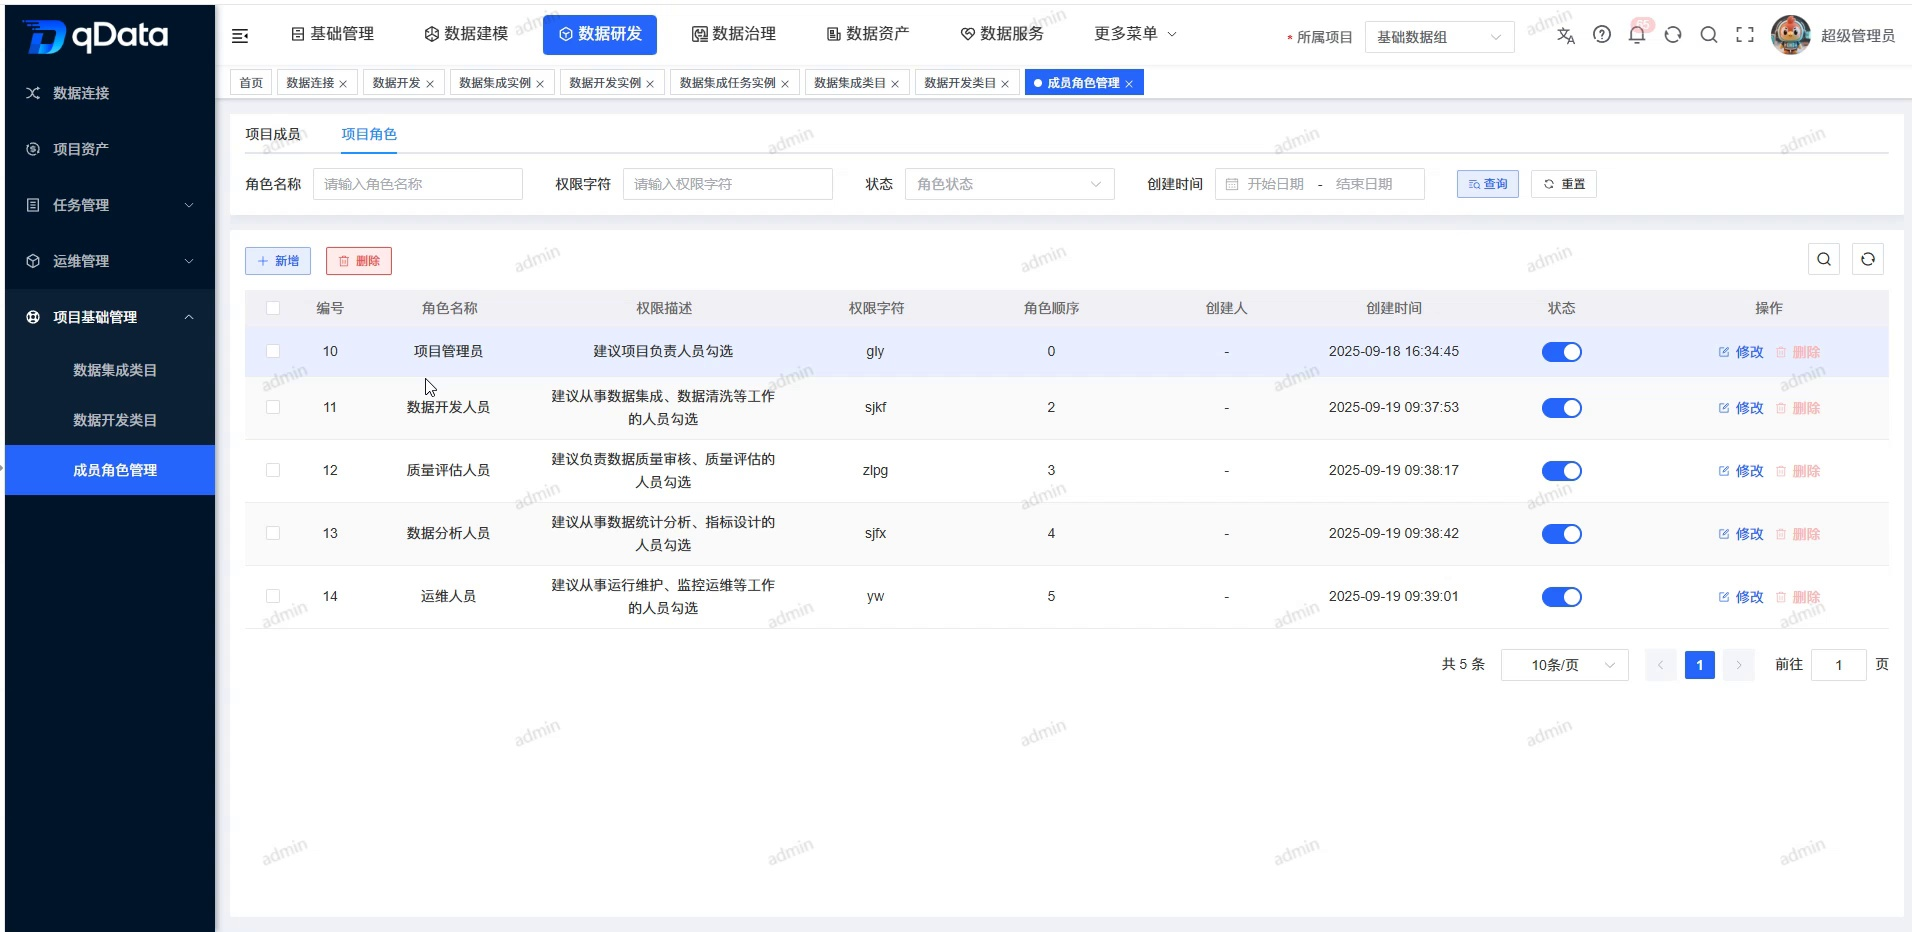
list field
| Field Name | Description | Required or not |
|---|---|---|
| Number | The number of the current role record. | Not applicable |
| Role Name | The display name of the current role. | Not applicable |
| Permission description | Description of the purpose of the current role. | Not applicable |
| Authorization character | Character identifier of the current role. | Not applicable |
| Display order | The order value of the current character record. | Not applicable |
| Status | Use a switch to display the current character status. | Not applicable |
| Creator | The creator of the current role record. | Not applicable |
| Creation Time | The creation time of the current role record. | Not applicable |
| Operation | Provides [Modify] and [Delete] entrances. | Not applicable |
Recommended operating procedures
View roles: Enter the [Project Roles] tab -> Check the query control and role list -> View the name, permission characters, display order and status -> Open [Modify] as needed to view the backfill.
View the new interface: Click [New] -> View role fields and default values -> View normal/deactivated options -> Expand the menu tree and view the node selection status -> Click [Cancel] to exit if not submitted.
Verification operation entrance: Return to the role list -> Check the status switch -> Check the in-line [Modify] [Delete] and the toolbar [Delete] -> Carefully perform deletion or status switching according to actual authorization.
Functional operation instructions
View Query Controls and Role List
- Enter the [Member Role Management] page.
- Select the [Project Role] tab.
- View the "Role Name", "Permission Character", "Status" and "Creation Time" query controls.
- Check the [Query] and [Reset] buttons.
- Check the role name, permission description, permission characters, display order and current status in the list.
- View the total number, number of items per page, page number and go to specified page control in the paging area.
Open the new role form
- Click [New] on the toolbar.
- View the "Add New Character" pop-up window.
- View the basic fields and required identifiers of the role.
- Check the default value of Role Order.
- View the status options, menu permission tree, and permission description text field.
- Check the [Cancel] and [OK] buttons at the bottom.
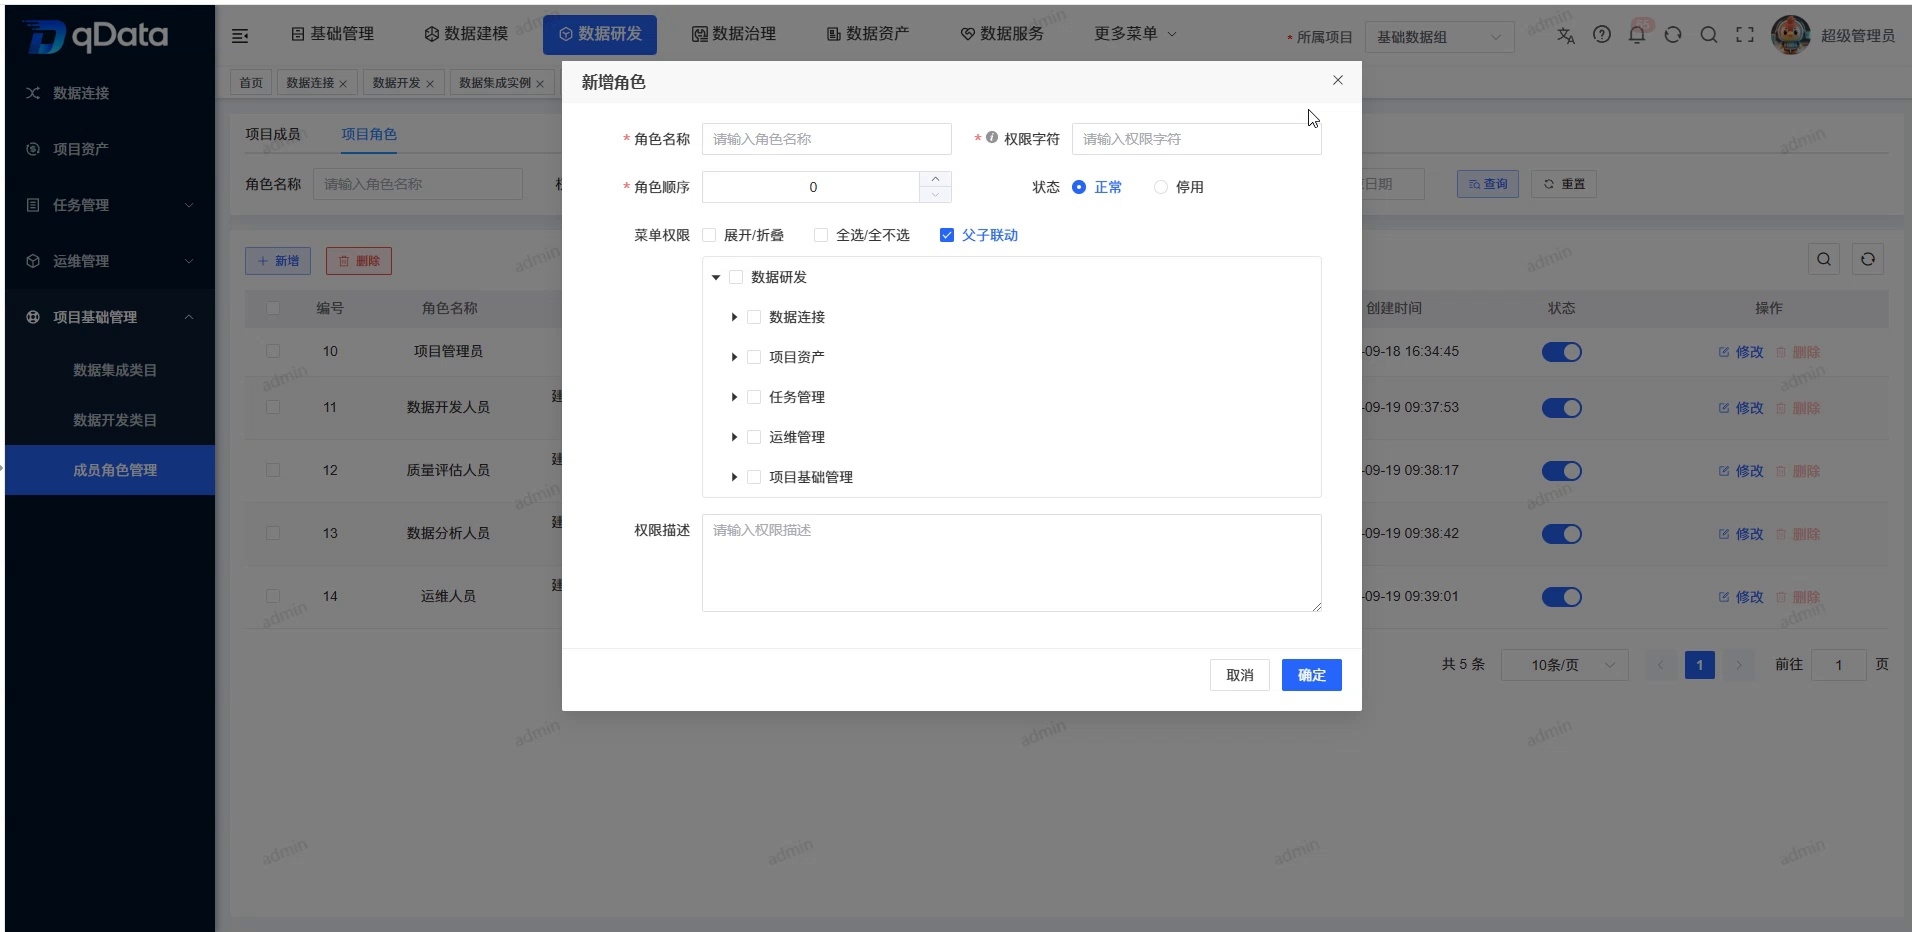
View normal and disabled options
- Locate "Status" in the character pop-up window.
- Check the two single options of "Normal" and "Disable".
- Select the corresponding status according to whether the role is enabled.
- If you do not want to continue, click [Cancel] to exit.
View menu tree selection status
- Locate "Menu Permissions" in the role pop-up window.
- View the [Expand/Collapse] [Select All/Deselect All] [Father-Child Linkage] controls.
- Expand the "Data Research and Development" node.
- View the lower-level menu nodes and their checkboxes.
- Check a visible node.
- Check the selected status of the node.
- Check the half-selected status of the parent node.
View modified role backfill
- Click [Modify] in the target role row.
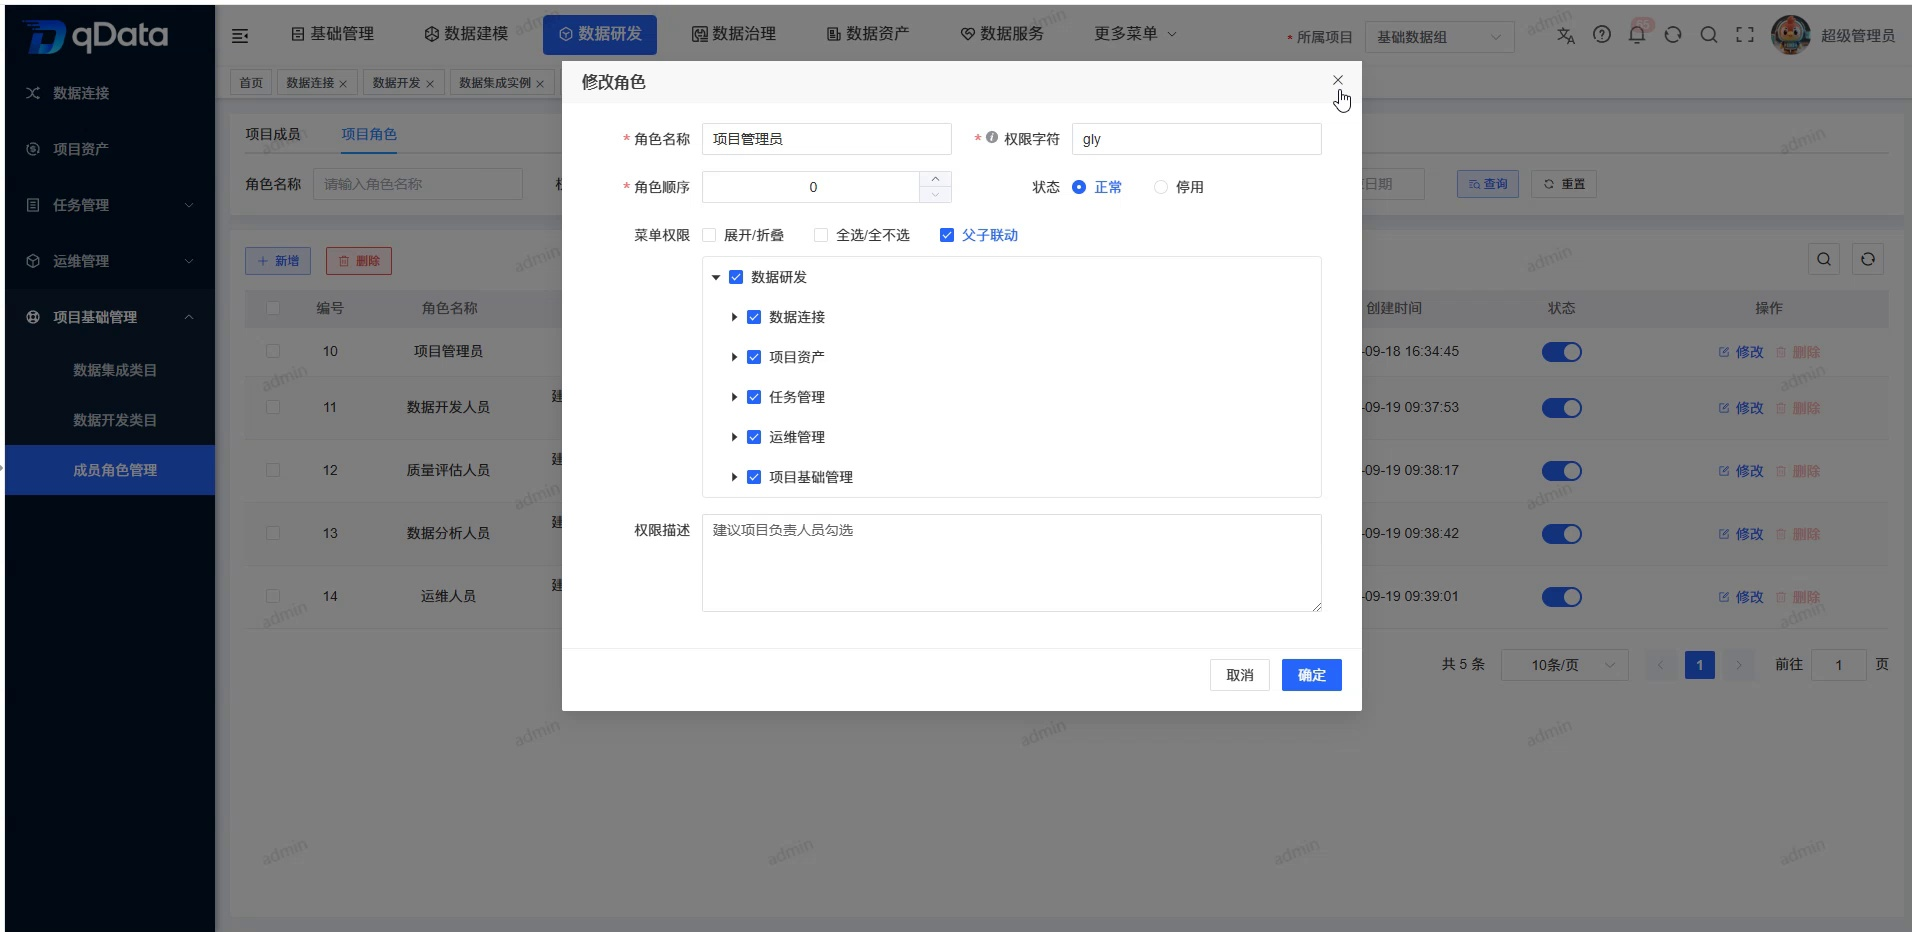
- View the "Modify Role" pop-up window.
- Check the role name, permission characters, role order and status backfill.
- Check the selected status of the node in the menu tree.
- Check the permission description and character count.
- If you only check the backfill this time, click [Cancel] to exit; if you need to save the changes, click [OK].
View deletion and list status entry
- Return to the [Project Roles] list.
- Look at the switch in the status column of each record.
- Check [Modify] and [Delete] in the operation column.
- Check the table checkbox and toolbar [Delete].
- If you need to deactivate the role, you can operate the switch in the status bar.
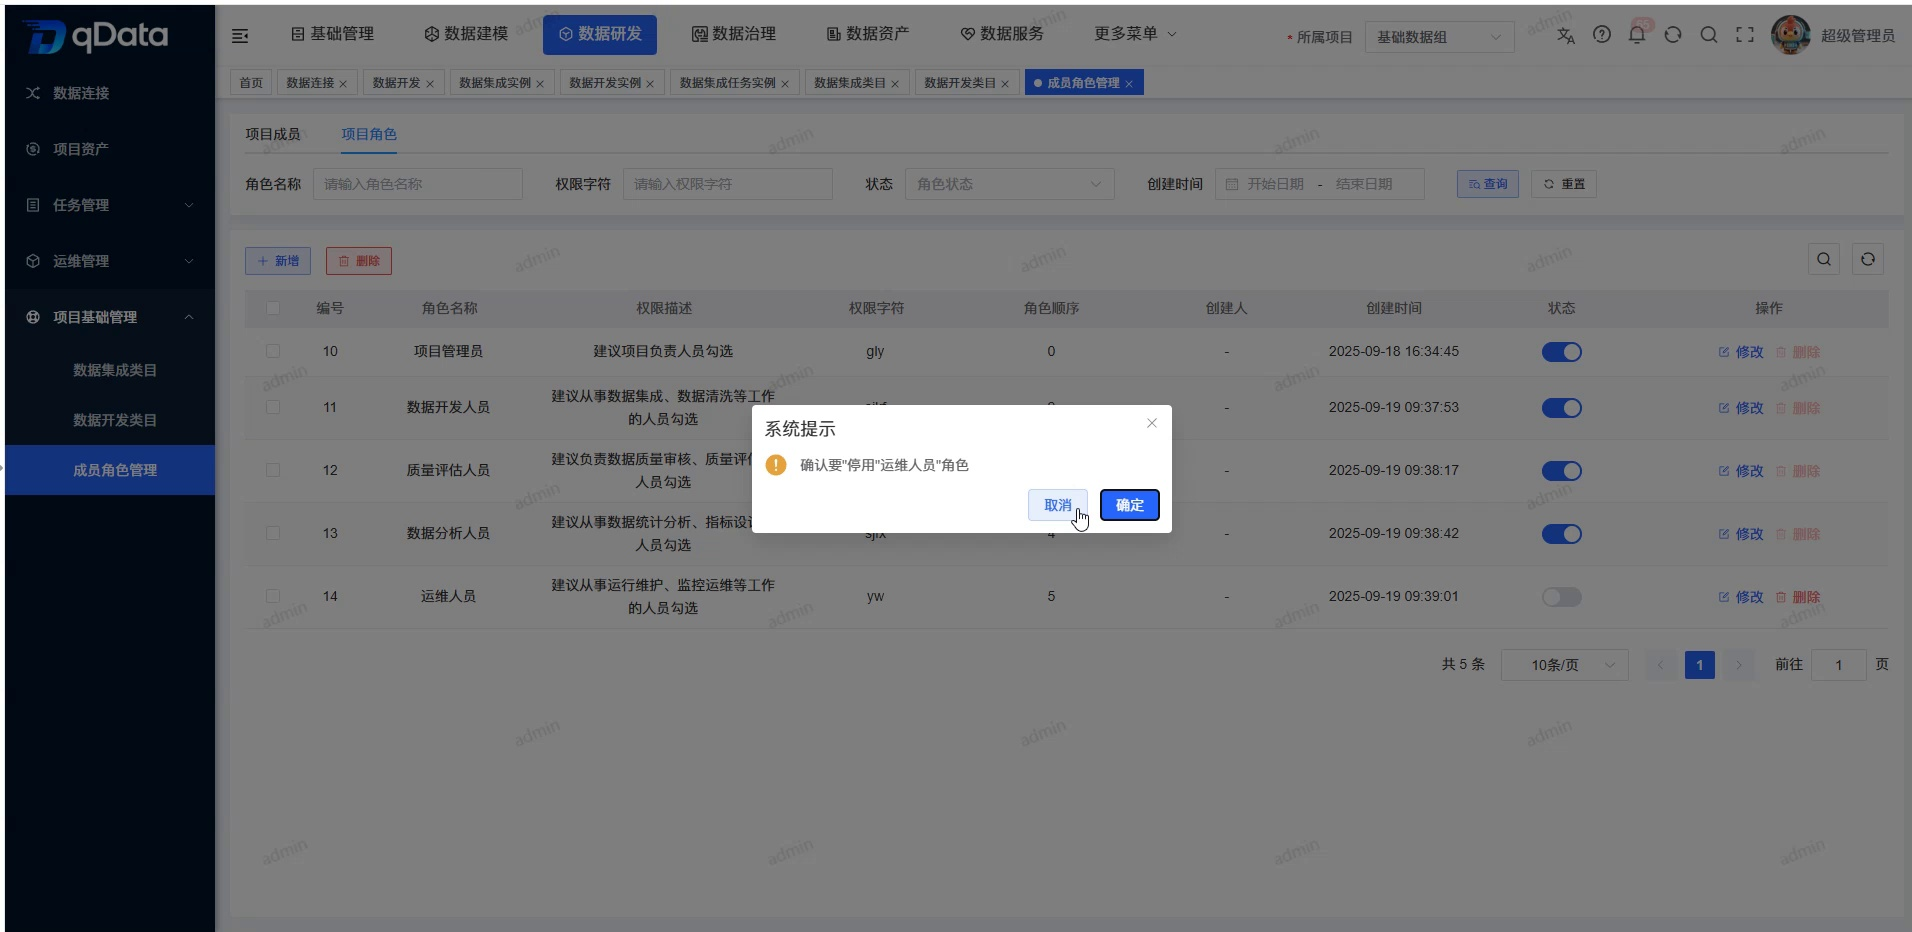
Before deleting or deactivating a role, you should confirm whether the role is still used by project members to avoid affecting the scope of permissions of current project members.
FAQ
**What permissions can be configured for project roles?**The
project role configures the accessible and operable scope through the menu permission tree. The specific nodes are subject to the actual display on the system page.Will deactivating a character delete the character?
will not. Disabling only changes the character status but does not delete character records.What should I pay attention to before deleting a character?
should first confirm whether the role is still assigned to project members to avoid affecting member rights management after deletion.
Summarize
The project role page is used to view the basic information of roles in the current project, and provides relevant entrances for adding, modifying, menu tree selection, status and deletion. When using, you should focus on checking role fields, status options, menu tree selections and modification backfilling .