
Intelligent Q&A
Feature overview
Functional positioning
Intelligent Questioning is a chat-style data query workspace. Users first limit the data scope of this session, then ask questions in natural language, and view intelligent insights, visual charts, detailed data and Text2SQL in the same answer.
Simple understanding: First tell the system "which tables can be queried", and then directly enter the business question, and the system will display the answers, charts, details and SQL in one session.
Usage suggestions
When using it for the first time, it is recommended to complete the configuration of the data range, model and answer method in order, and then send a clear question. After obtaining the results, first read the intelligent insights, and then check the results using [Detailed Data] and [Text2SQL].
Main features
- Natural language questions: After inputting business questions, answers are generated through a streaming process.
- Data range constraints: New sessions need to select a data source, fact table, and at least one related dimension table.
- Manual association supplement: When the system cannot automatically identify the table association, you can set the corresponding relationship between the fact table fields and the dimension table fields.
- Multi-modal results: The same answer can include intelligent insights, [Visualization], [Detailed Data] and [Text2SQL].
- Result Actions: Supports downloading PNG charts, exporting XLSX details, and copying SQL or message text.
- Session Management: Supports search, switch, pin, rename and delete historical conversations, and can manage messages in the current conversation.
Scope
This page is suitable for page users who have entered the qData platform and need to perform natural language queries within the selected data range and check the results. The page relies on available data sources, table field metadata, model services and intelligent query services.
Preliminary steps
Preconditions
- You have logged in to the qData platform and can see the [Intelligent Questioning] entrance.
- Available data sources and fact tables have been prepared.
- At least one related dimension table for use with the fact table has been prepared.
- The current environment has returned at least one available model.
Navigation path
Intelligent question number
Page overview
After entering [Intelligent Questions], the left side of the page is for new conversations, historical searches and conversation lists; the main area is used to configure the data range, view messages and answers; the bottom input area provides question input, models and answer methods. The page displays "This function is generated by qData intelligent questions, and the answers may not be correct.".
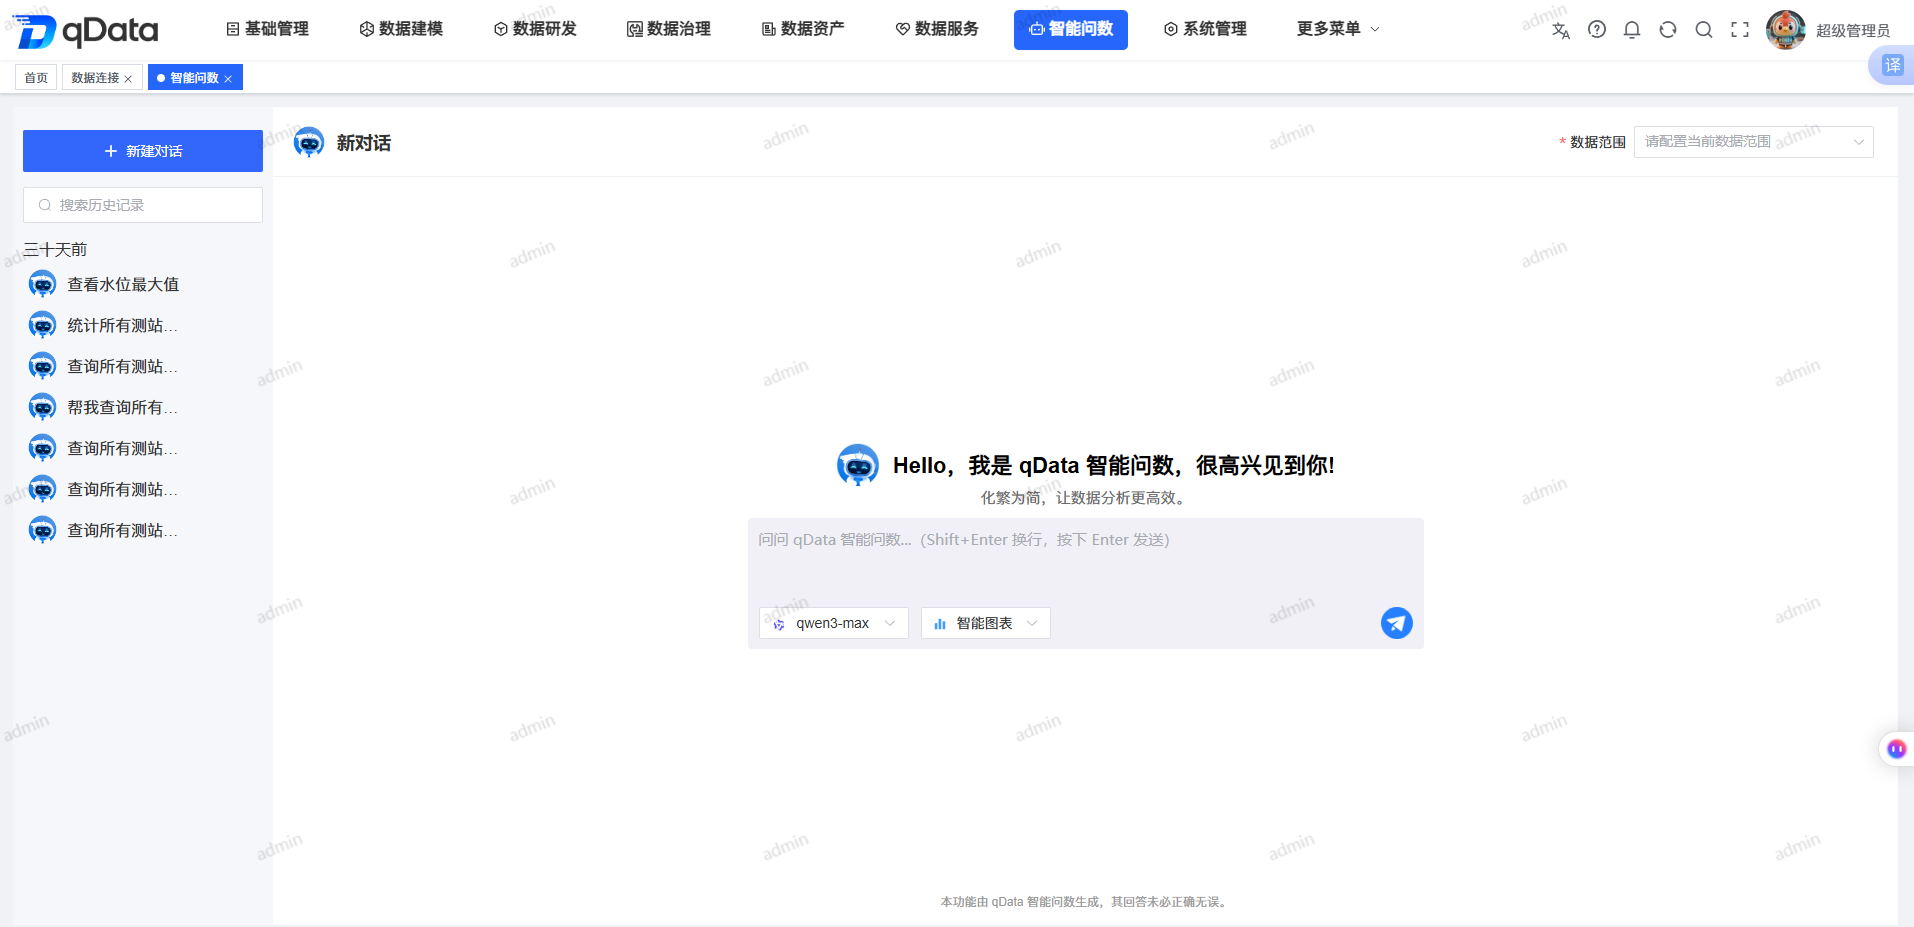
The core areas of the page are as follows:
| Region | Main content | Instructions for use |
|---|---|---|
| Historical conversation area | [New conversation], [Search history], conversation grouping and conversation operations | Used to start new conversations or manage existing conversations. |
| Data range area | Data source, fact table, related dimension table | Configurable in new conversations; read-only echo in historical conversations. |
| Message workspace | User questions, assistant answers, and results cards | Used to read conversations and manage individual messages. |
| Result tab | [Visualization] [Detailed Data] [Text2SQL] | Whether the tab appears depends on the returned content of the current answer. |
| Question input area | Question input, model, answer method, send or stop entrance | Model and answer method take effect every time they are sent. |
Recommended operating procedures
Number of first questions: Click [New Conversation] -> Configure data range -> Confirm range -> Select model and [Smart Chart] -> Enter and send questions -> Check the answer results.
Association supplement: received a prompt that the association cannot be automatically recognized -> open [Set Association] -> configure at least one complete mapping -> save -> resend the question.
Result verification: Read intelligent insights -> View [Visualization] -> Check [Detailed Data] -> View [Text2SQL] on demand.
Continue analysis: Search and switch historical conversations -> Continue using the current model and answer method -> Download, export or copy the results as needed.
Functional operation instructions
Create a new conversation and configure data scope
- Click [New Conversation] on the left.
- Confirm that the title of the main area changes to "New Conversation".
- Expand [Data Range].
- Select a data source.
- Search for and select the fact table.
- Select one or more related dimension tables.
- Click [Confirm scope and start Q&A].
- Confirm that the data range panel is collapsed.
New conversation save time
Clicking [New Conversation] will only enter the front-end blank state and will not immediately add a background session; clicking [Confirm Range and Start Q&A] will only confirm the current selection. When the verification is passed and the question is sent for the first time, the system creates a background session and saves the data range.
Existing historical sessions can expand the data range and view bound data sources, fact tables, and related dimension tables; these controls are read-only in the current page. When you need to adjust the scope, create a new conversation.
Set up manual relationships
When sending for the first time, if the system prompts "The association cannot be automatically recognized, do I need to manually set the association?", handle it as follows:
- Confirm in the prompt that manual settings are required.
- Open [Set Association].
- Locate the fact table fields that need to be associated.
- Select a dimension table for the field.
- Select the corresponding dimension table field.
- Complete at least one "fact table field - dimension table - dimension table field" mapping.
- Click [OK].
- The confirmation page prompts "Set association successfully."
- Resend the original question.
| Field Name | Description | Required or not |
|---|---|---|
| Fact table field name | Field name in the current fact table, read-only display. | Not applicable (system display) |
| Chinese name of fact table field | Chinese description of fact table field, read-only display. | Not applicable (system display) |
| Fact table field type | Data type of fact table field, read-only display. | Not applicable (system display) |
| Dimension table | Specify the target table from the selected associated dimension table. | Condition required |
| Dimension Table Fields | Select target fields that match fact table fields. | Condition required |
Choose a model and answer method
- Expand the model drop-down box below the input area.
- Select the model used for this send.
- Expand the answer method drop-down box.
- Select [Smart Chart].
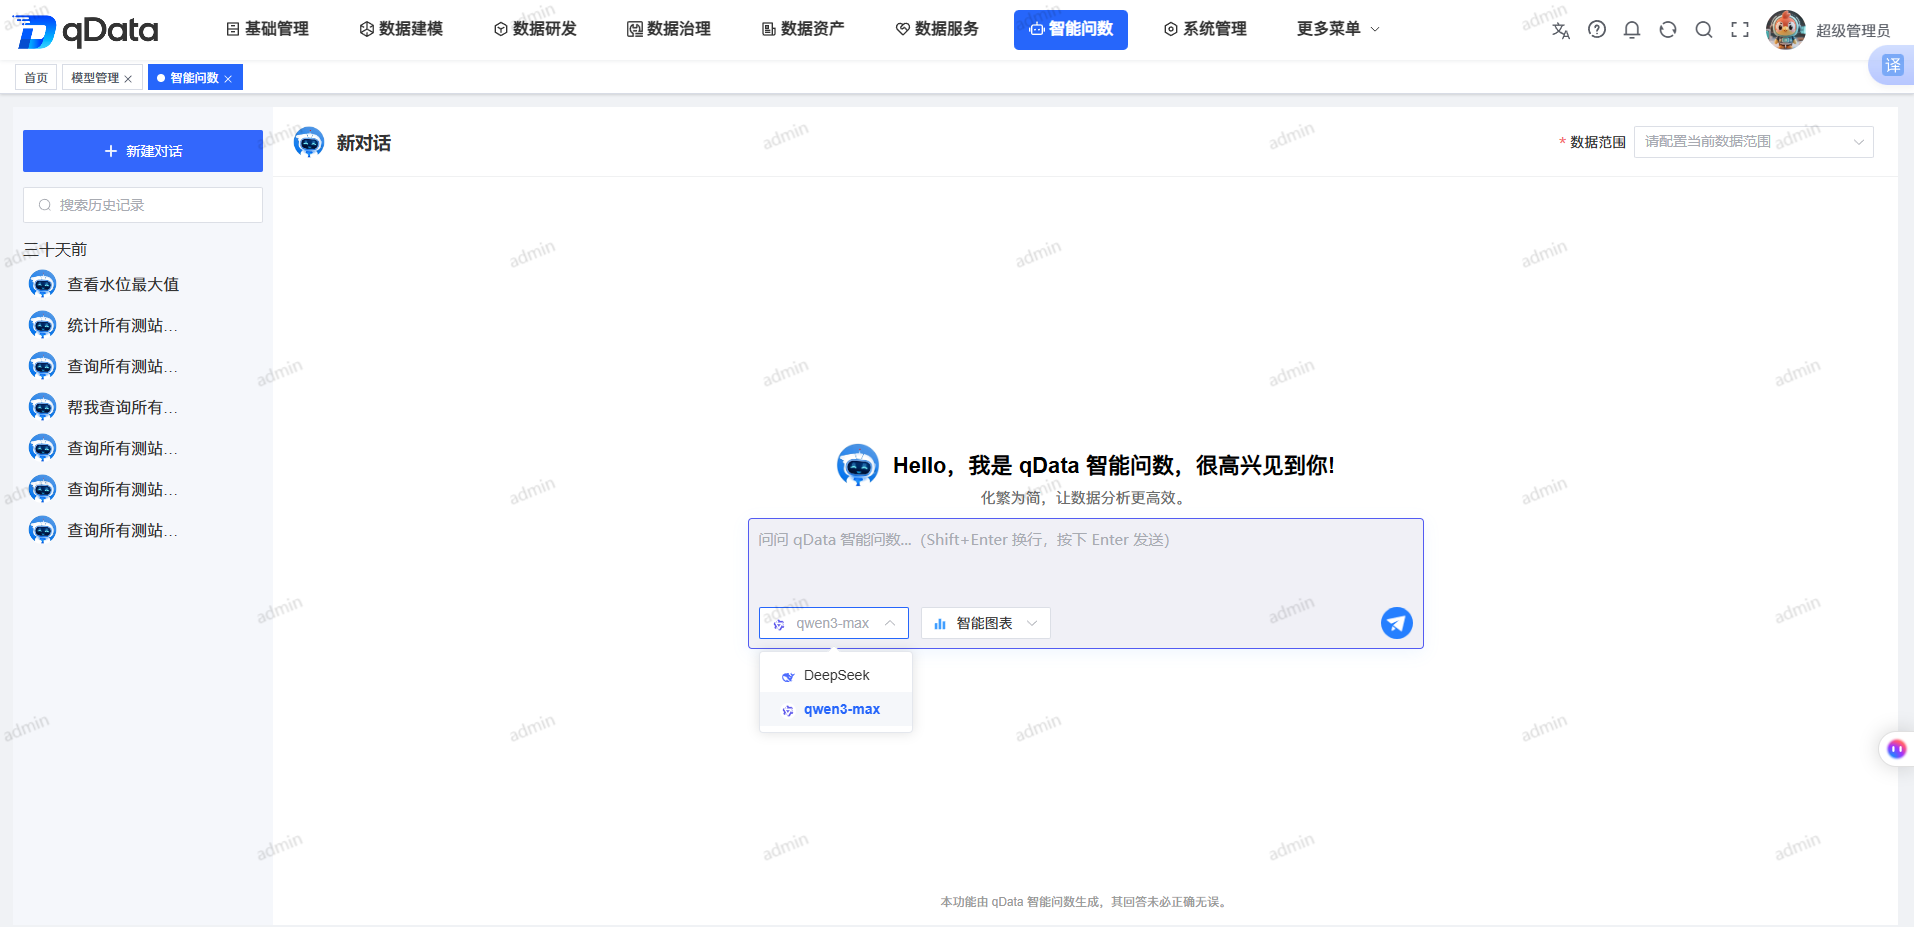
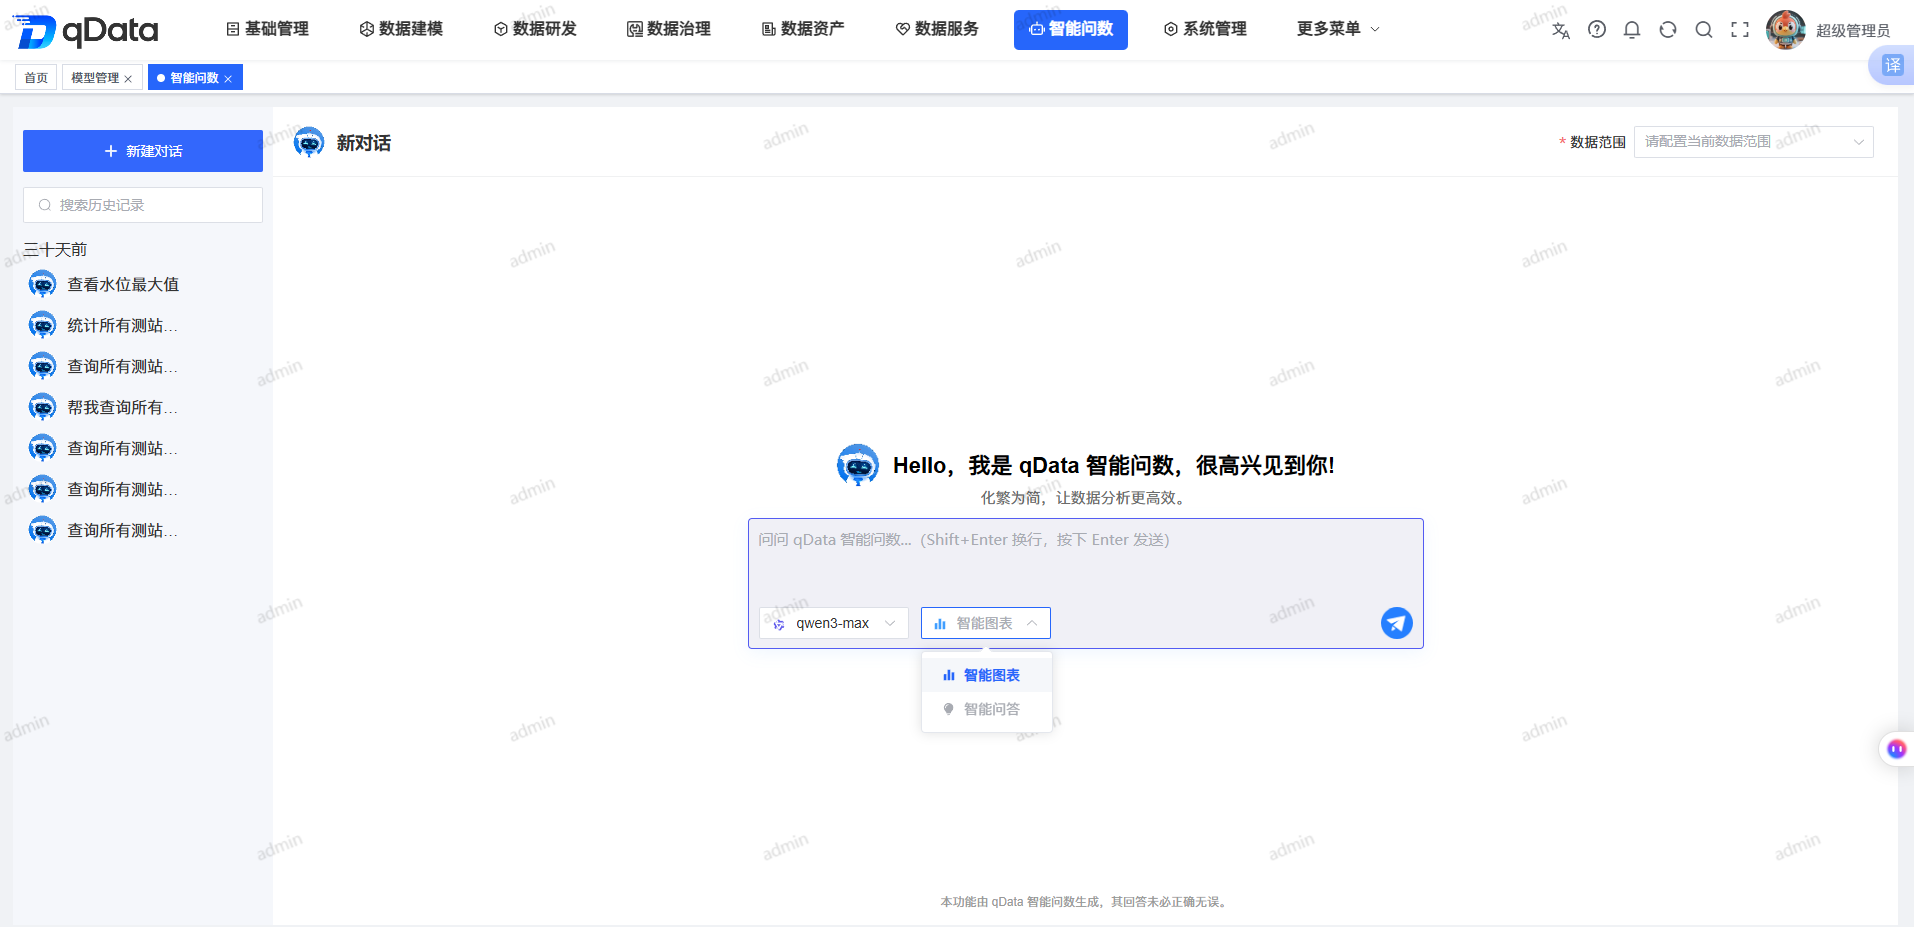
The list of models is returned by the current environment's model service. When the list is not empty, the system will select the first item in the return order, and the user can also switch to other available models. The model and answer method are only effective for this sending; switching historical sessions will not restore the options used in the session.
Enter and send a question
- Enter a natural language question in the question input box.
- When you need to wrap the line, press Shift+Enter.
- When you need to send, press Enter or click the send icon.
- Wait for the page to respond with the streaming process update.
- After the generation is completed, view the refreshed message and result card.
The first effective sending will create a background session, and the initial title of the session will be the first 10 characters of the first question; subsequent sending will reuse the current session. When the question is empty, the data range is incomplete, or the answer method is not selected, the system will prevent sending and display the corresponding prompt.
During the generation process, the normal sending entrance will be switched to [Stop]. After clicking [Stop], the system terminates the current request, exits the generation state, and retains some of the results that have been generated before stopping.
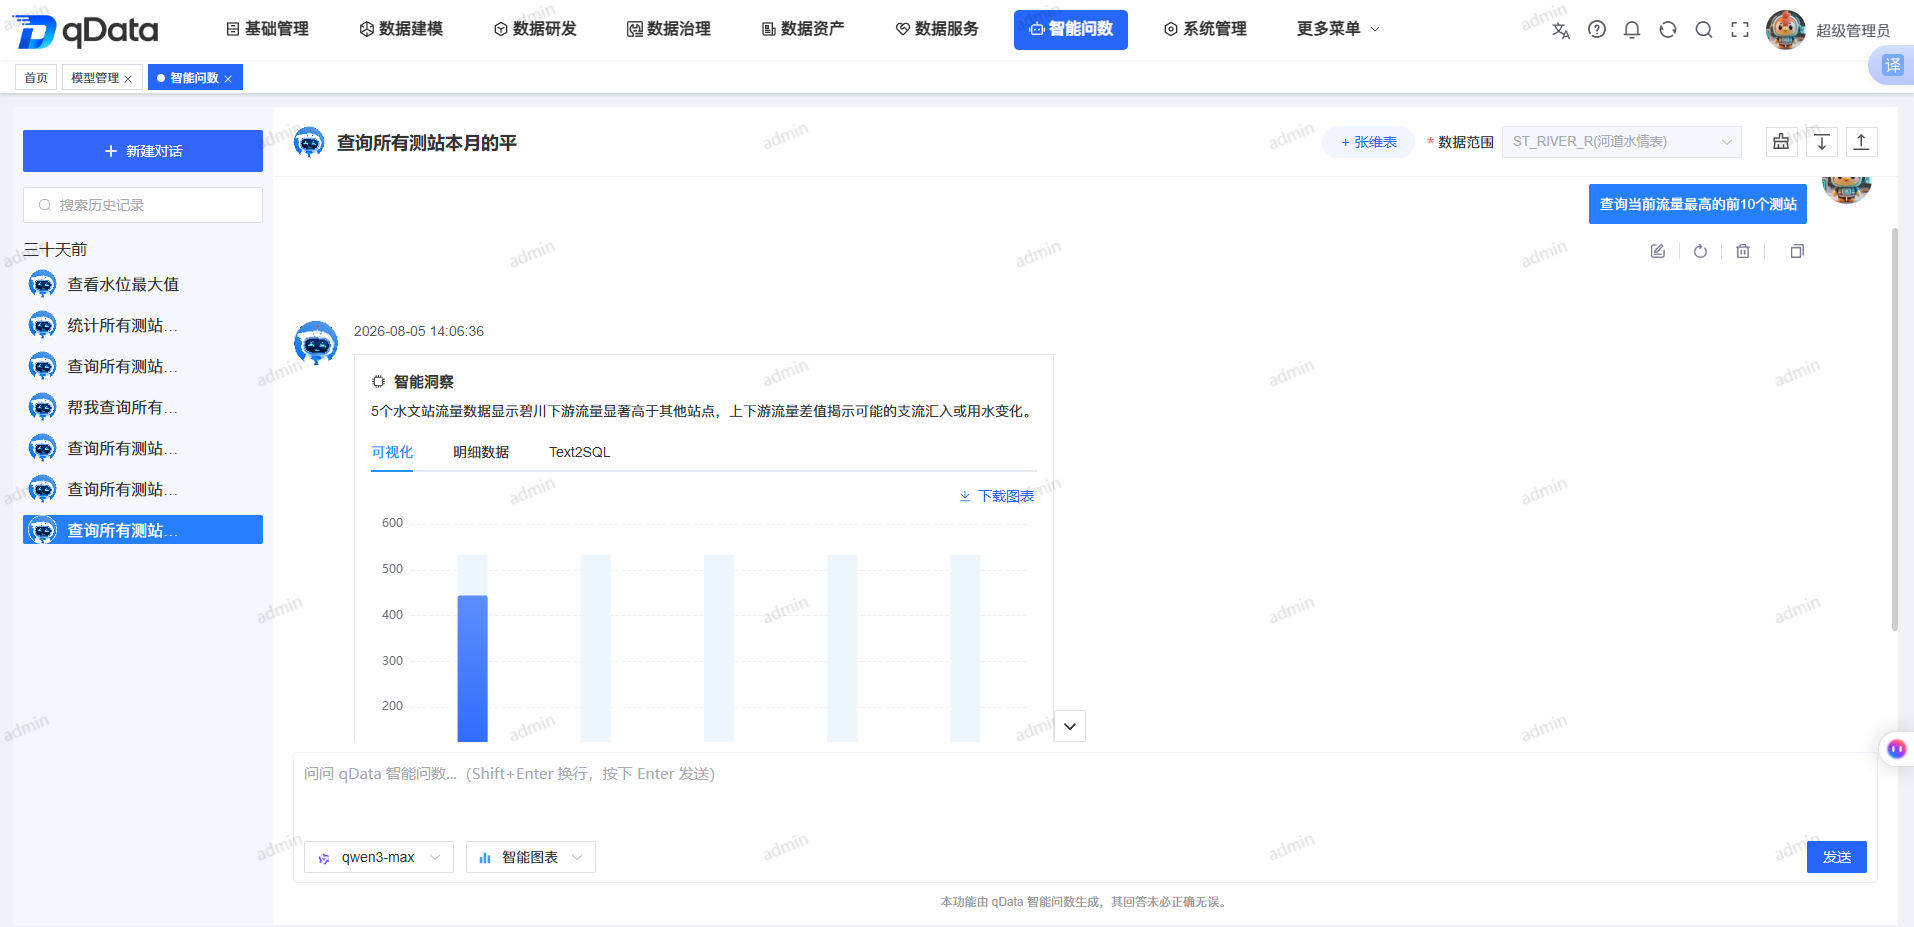
View intelligent insights and visualizations
- Read the smart insights in Assistant Answers.
- Open the [Visualization] tab.
- View the chart generated by the system based on the returned content.
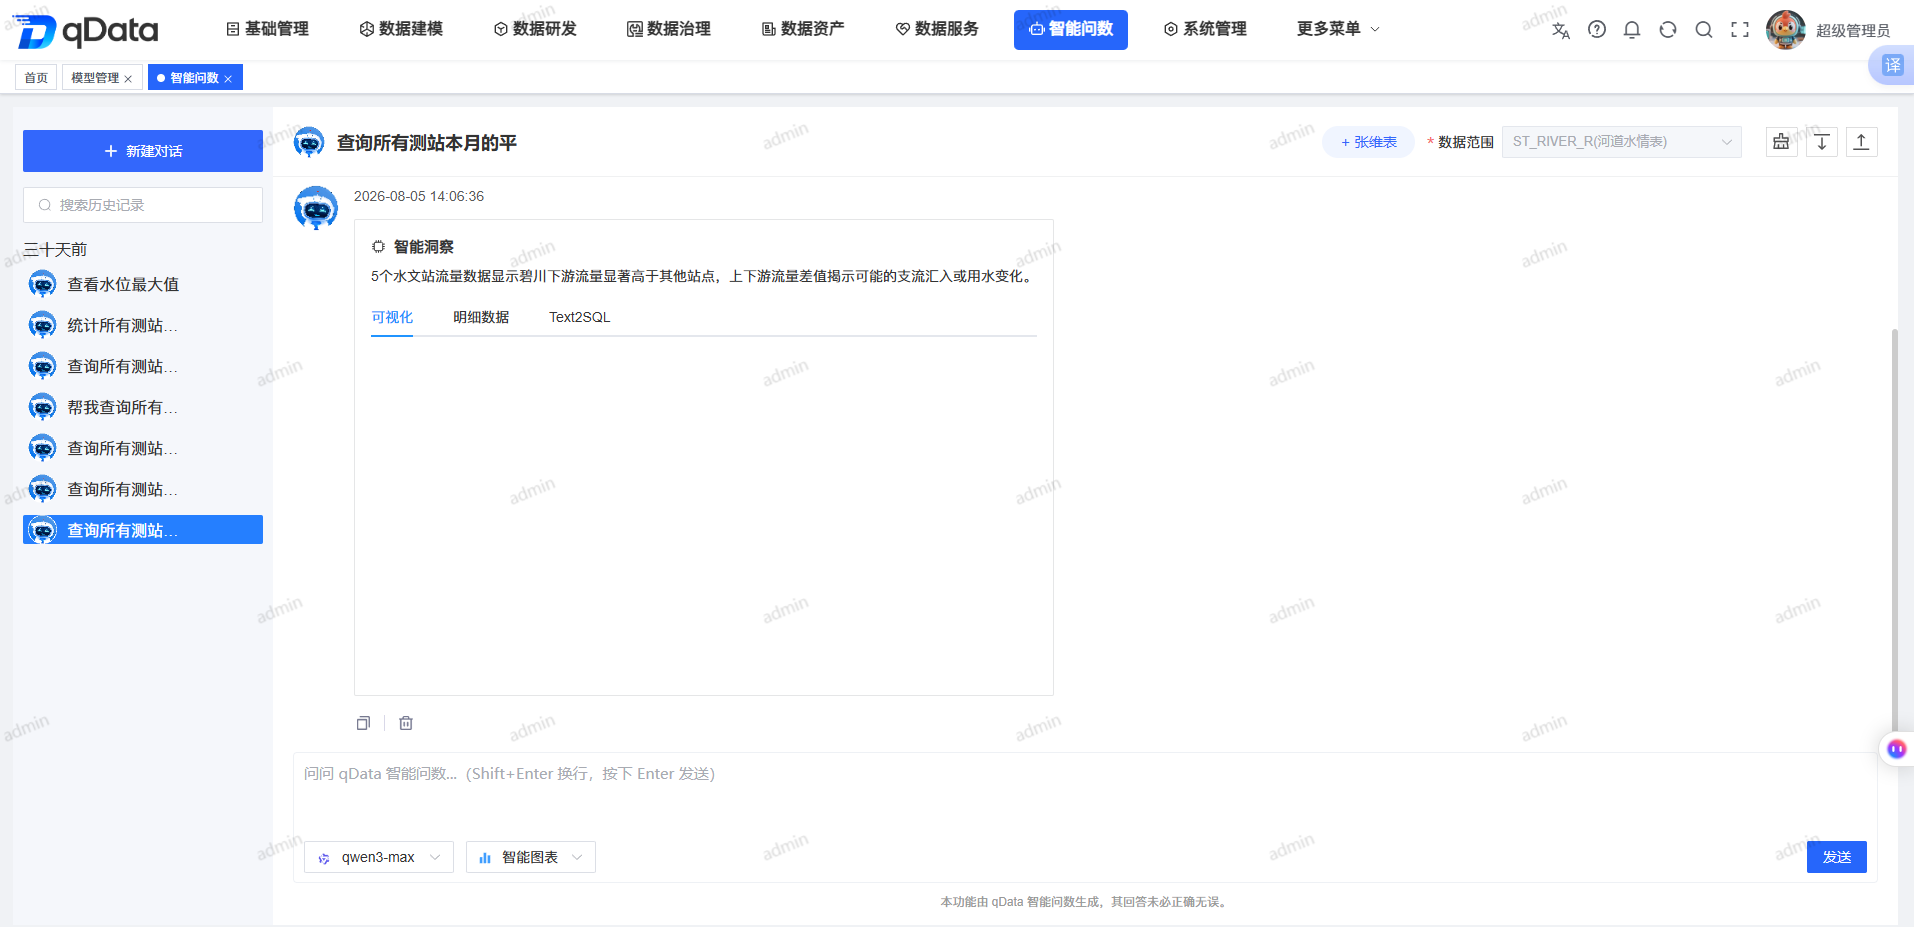
- If the chart area displays "No data yet", continue to check the smart insights or other available tabs in the same answer.
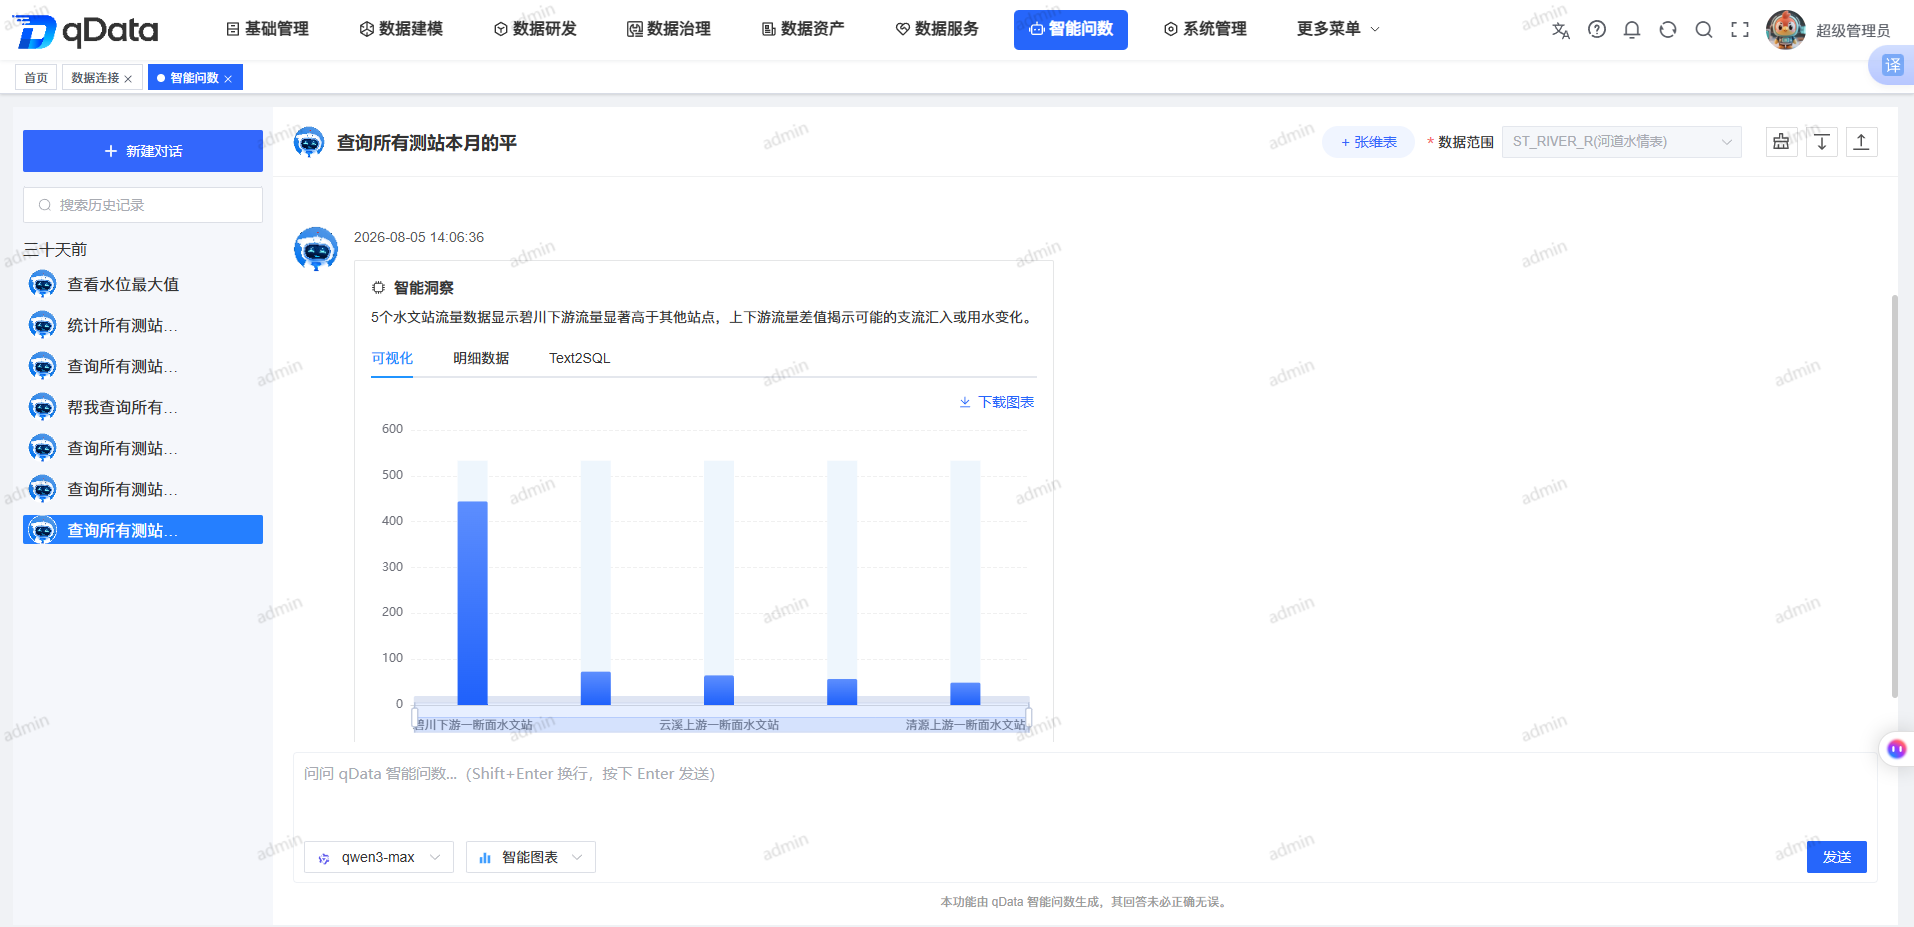
The system will determine the chart type based on the returned content. The current page does not provide an entrance to manually switch the chart type. When a single result tab has no data, other content that is still valid in the same answer will not be cleared.
View detailed data
- Click [Detailed Data] in the result card.
- View the dynamic fields and data rows returned by the current answer.
- Use the paging area to browse additional data.
- Switch to 10, 20 or 50 items per page as needed.
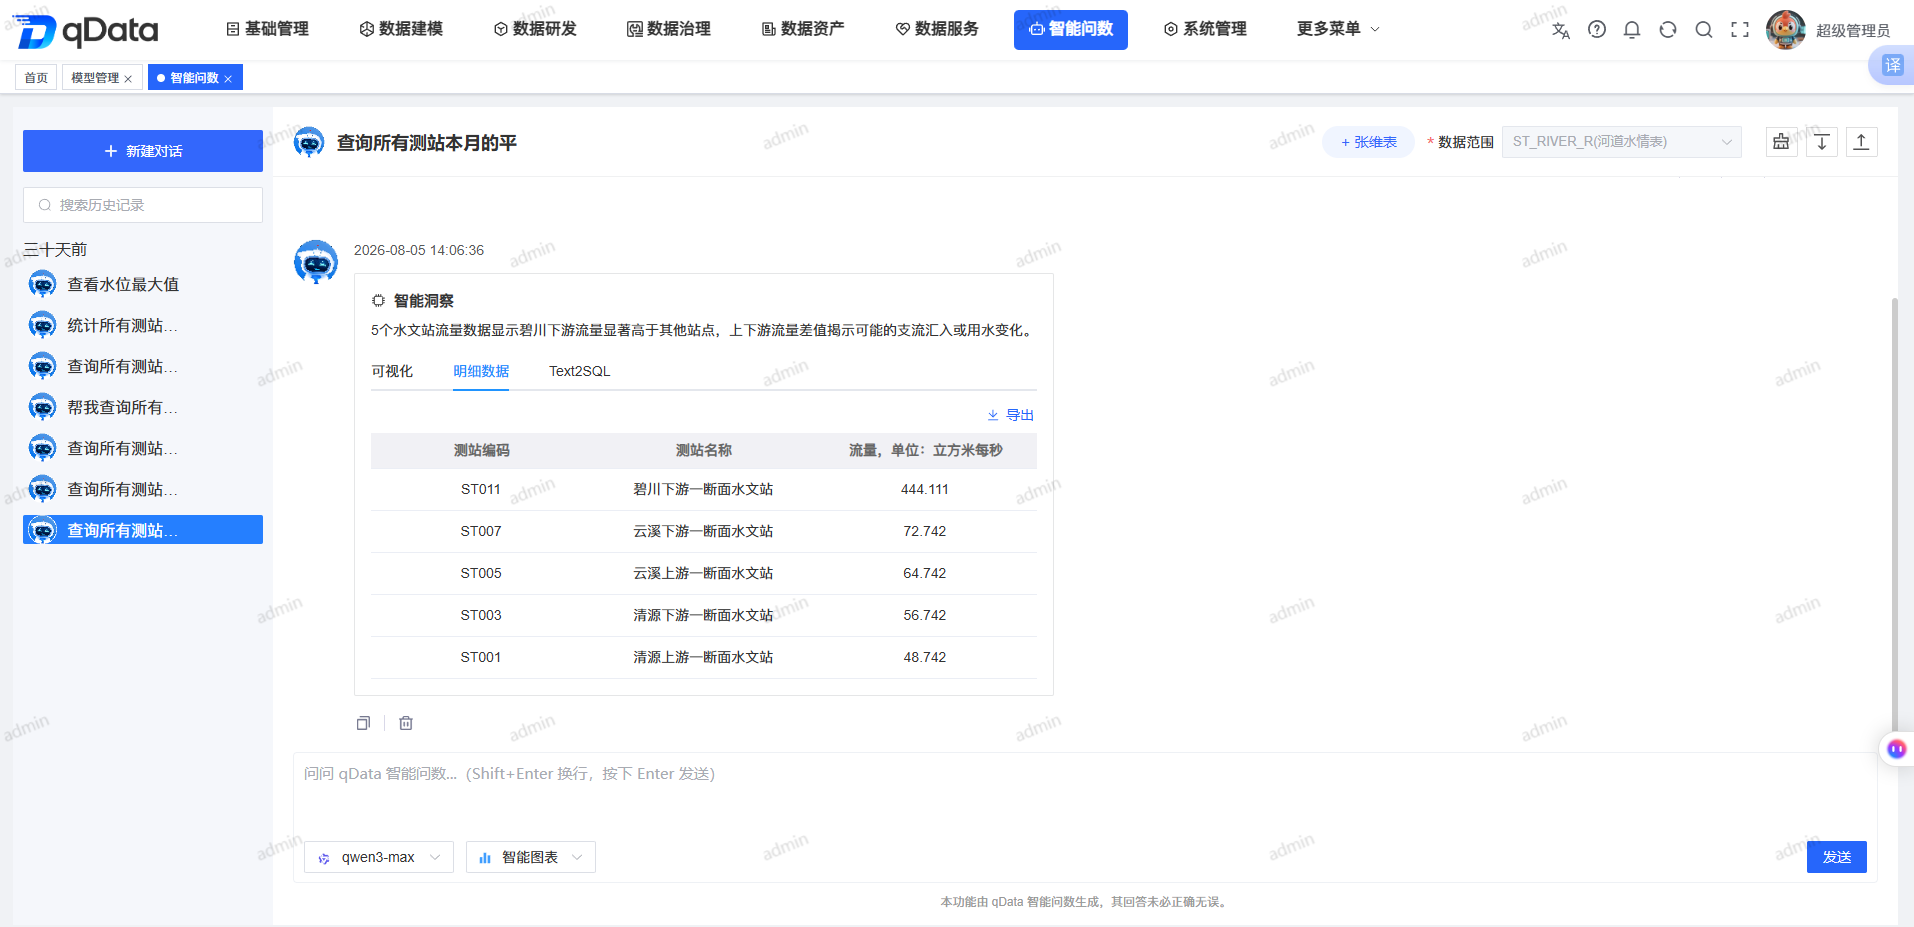
The detail columns will dynamically change with the results returned by the current question. The field names and data content in the screen recording do not mean that other queries will use the same structure.
View and copy Text2SQL
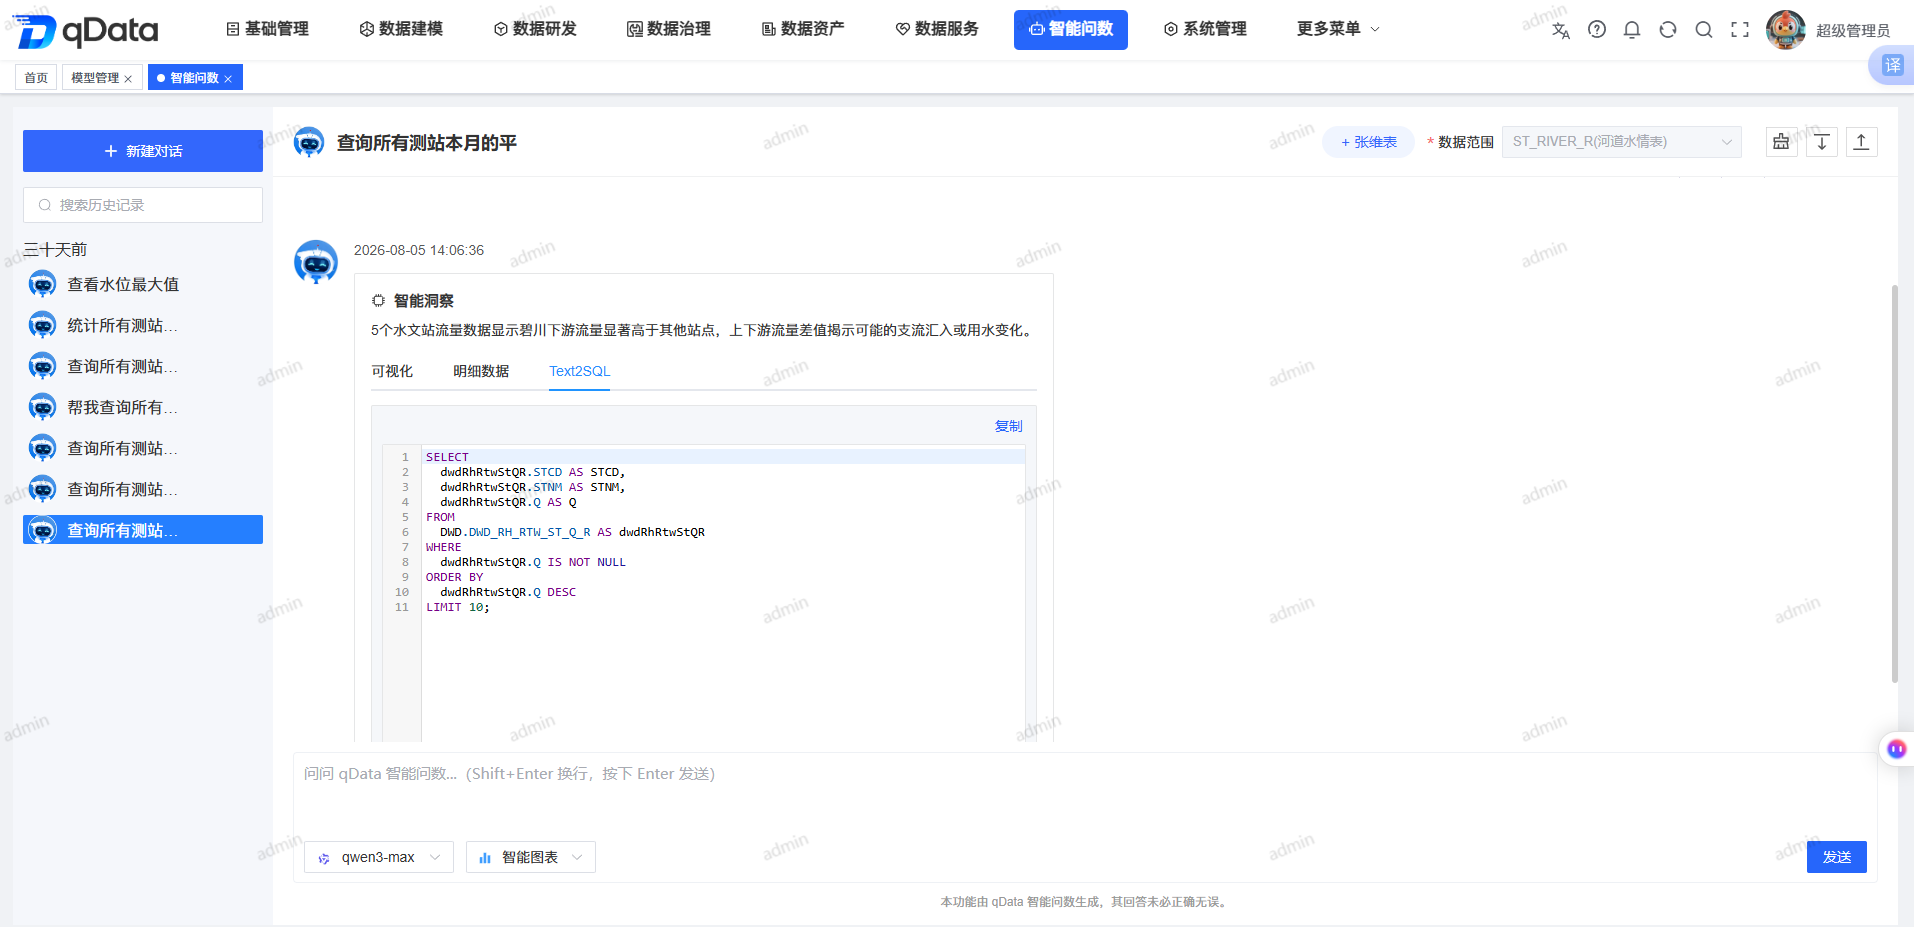
When the answer contains SQL, the result card will display the [Text2SQL] tab.
- Click [Text2SQL].
- View the read-only SQL corresponding to the current answer.
- Click the copy entry in the SQL area.
- The confirmation page prompts "Copy successful!".
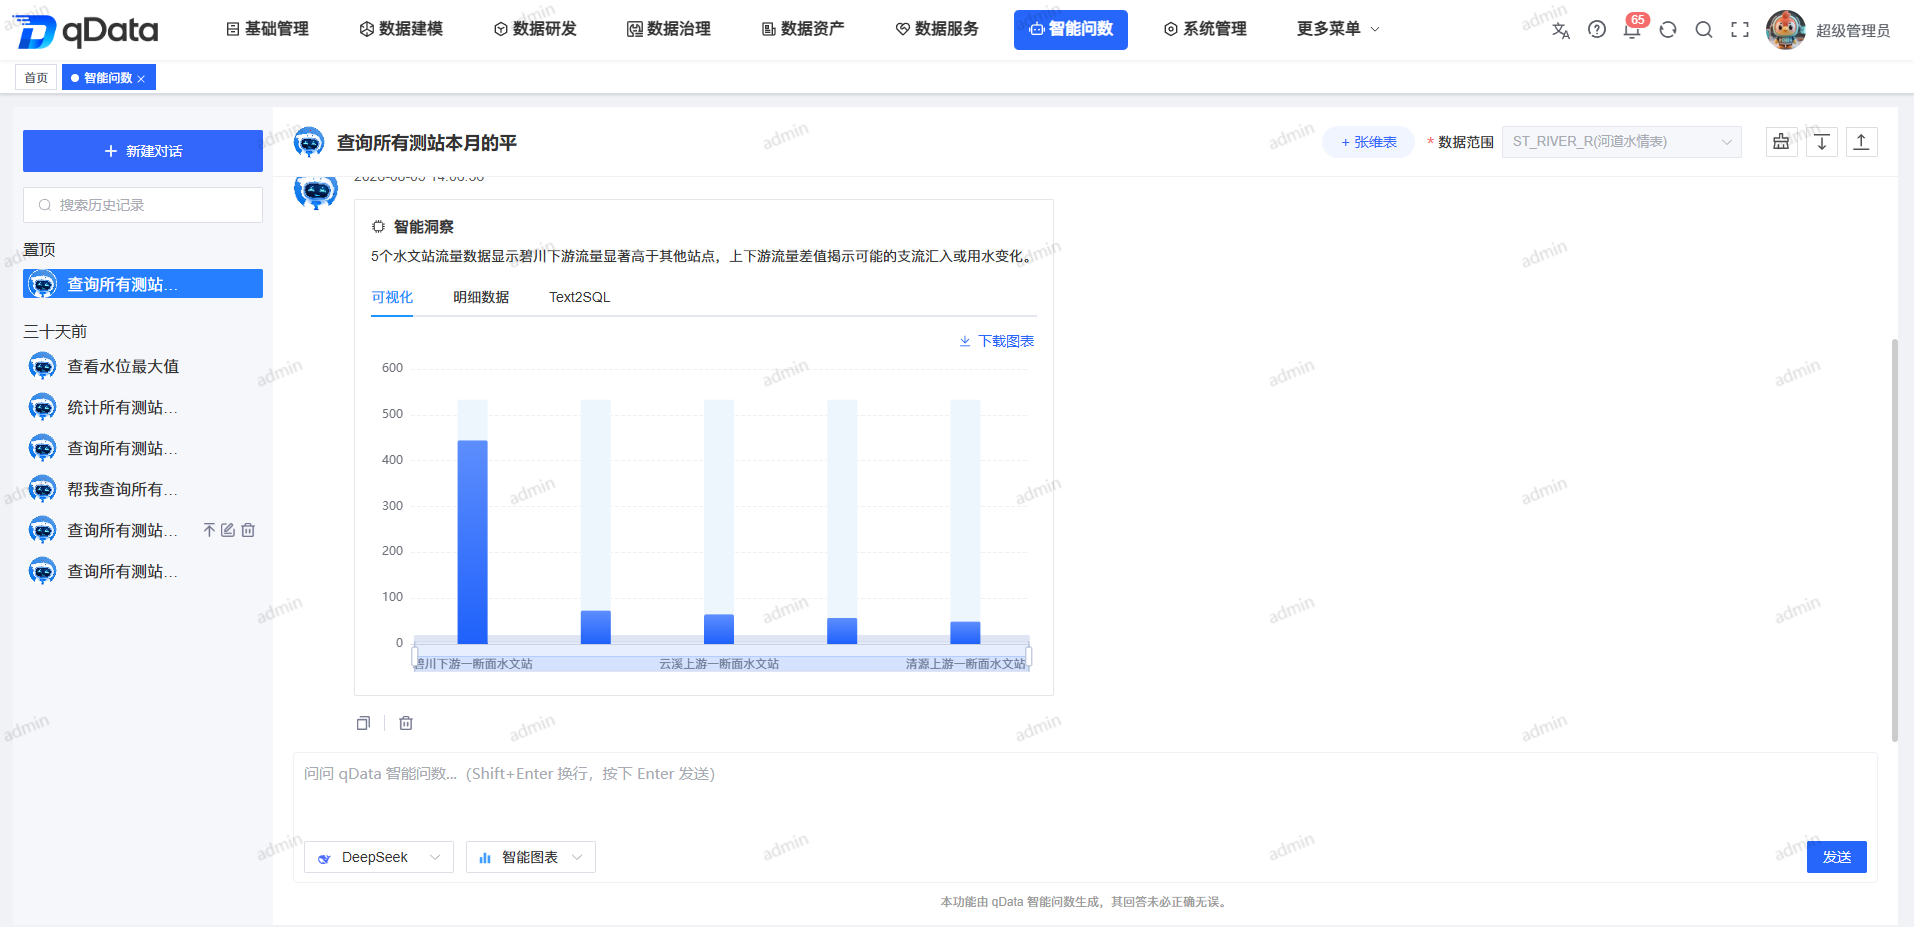
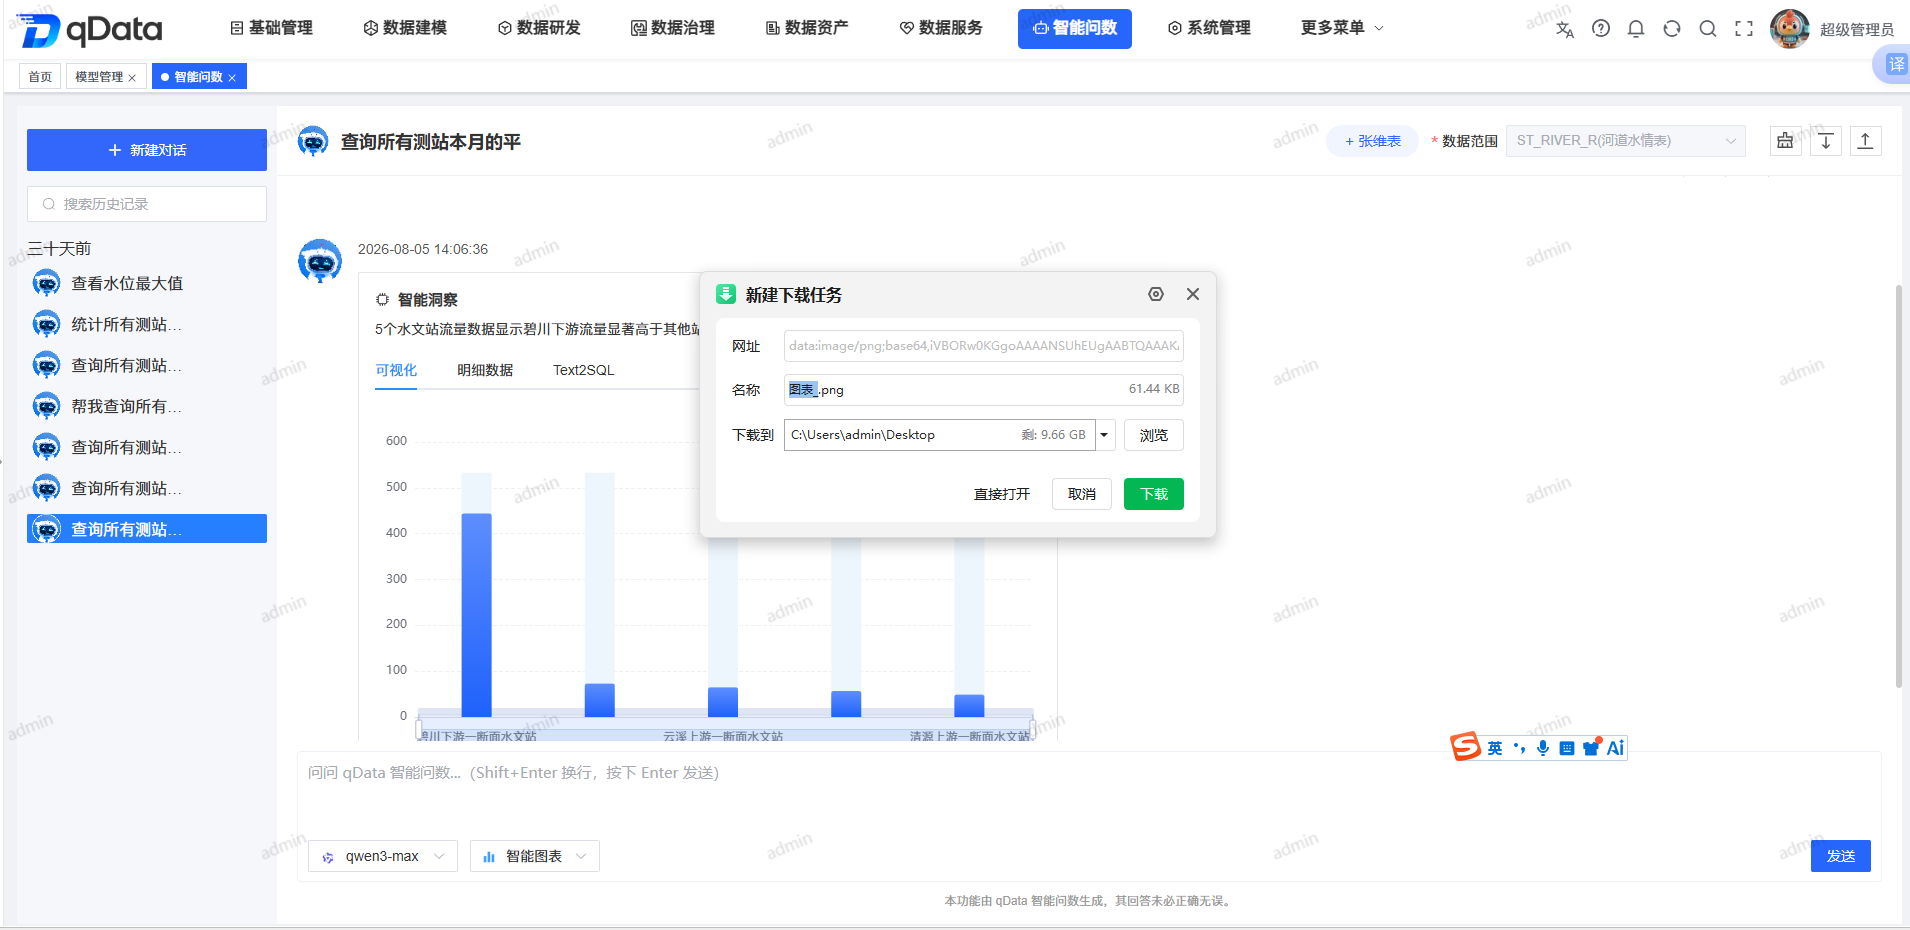
Download chart
- Open the [Visualization] tab containing a valid chart.
- Click [Download Chart].
- Wait for the browser to complete the download.
- Confirm that the downloaded file is a PNG image that can be opened normally.
Export detailed data
- Open the [Detailed Data] tab.
- Click [Export].
- Wait for the "Exporting, please wait..." mask to disappear.
- The confirmation page prompts "Export successful!".
- Confirm that the downloaded file is an XLSX file.
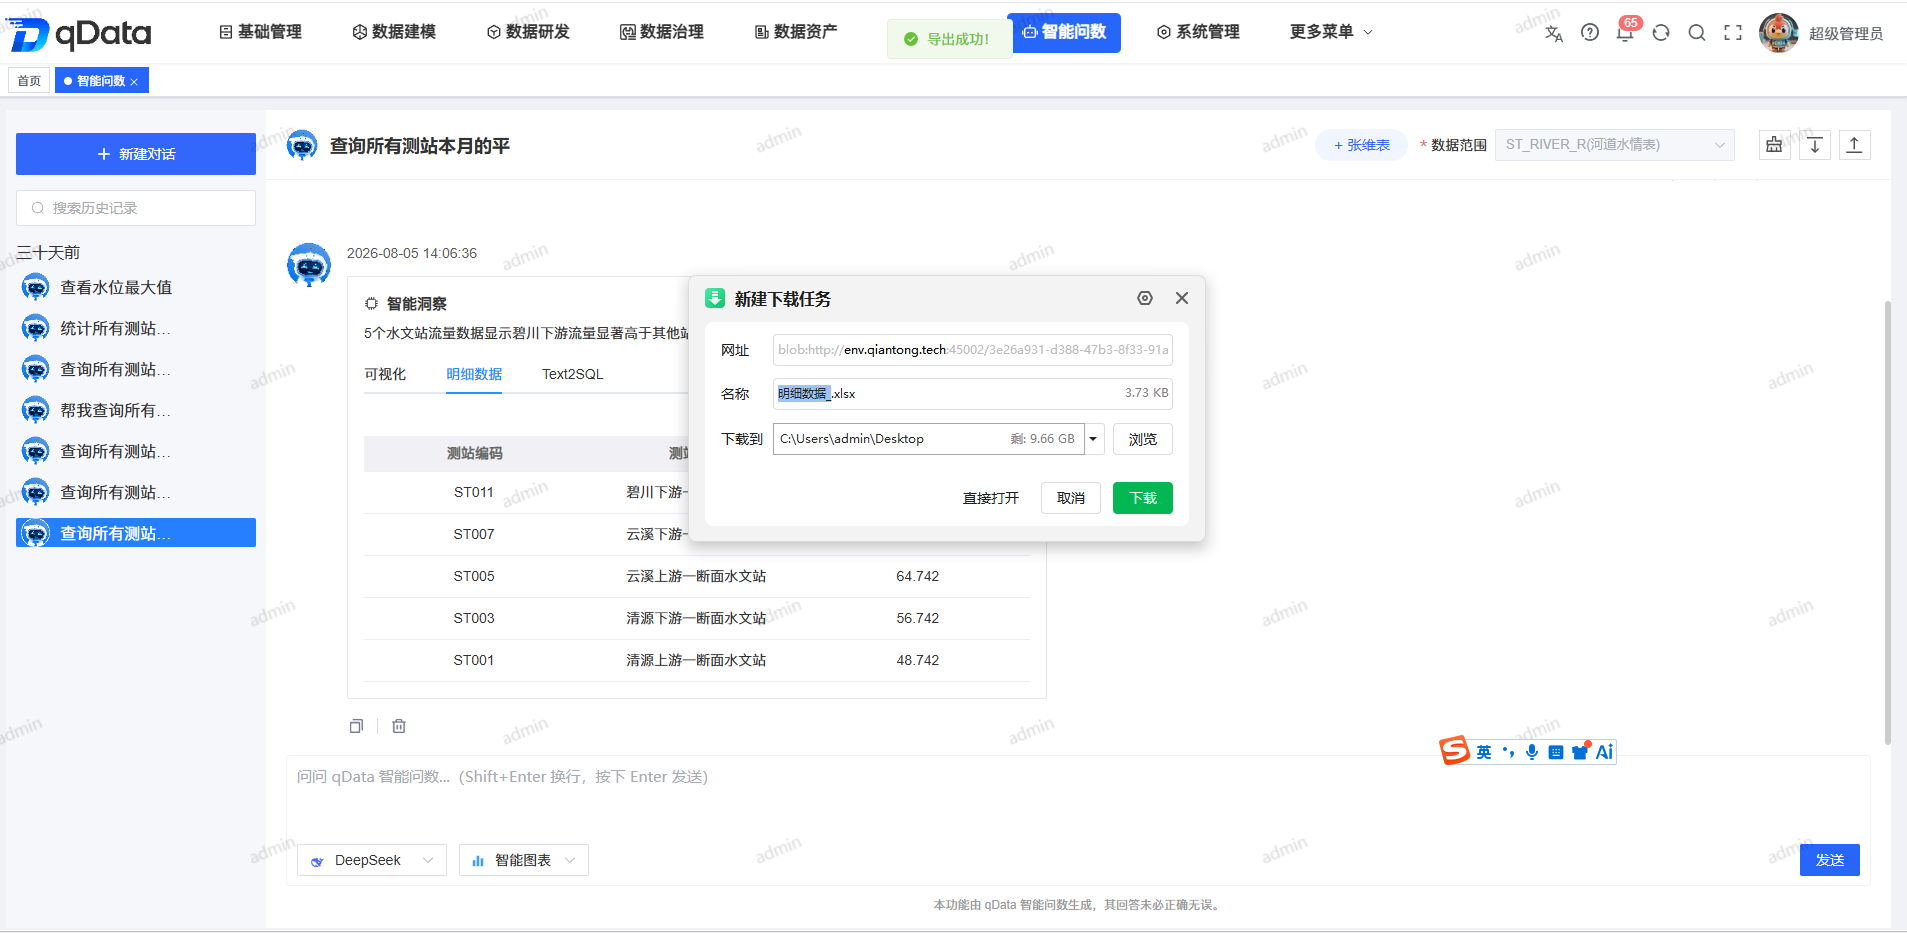
When the export fails, the system turns off mask processing and prompts "Export failed, please try again!". This page does not define export capacity, file retention periods, masking, watermarks, or rules for external file dissemination.
Manage current session messages
The operation entry below the message will be displayed according to the message type and its location. Available operations include copy, delete, and refresh and edit for the last user message.
- Copy Message: Copies the current user message or assistant text. Charts, details, or SQL will not be copied at the same time.
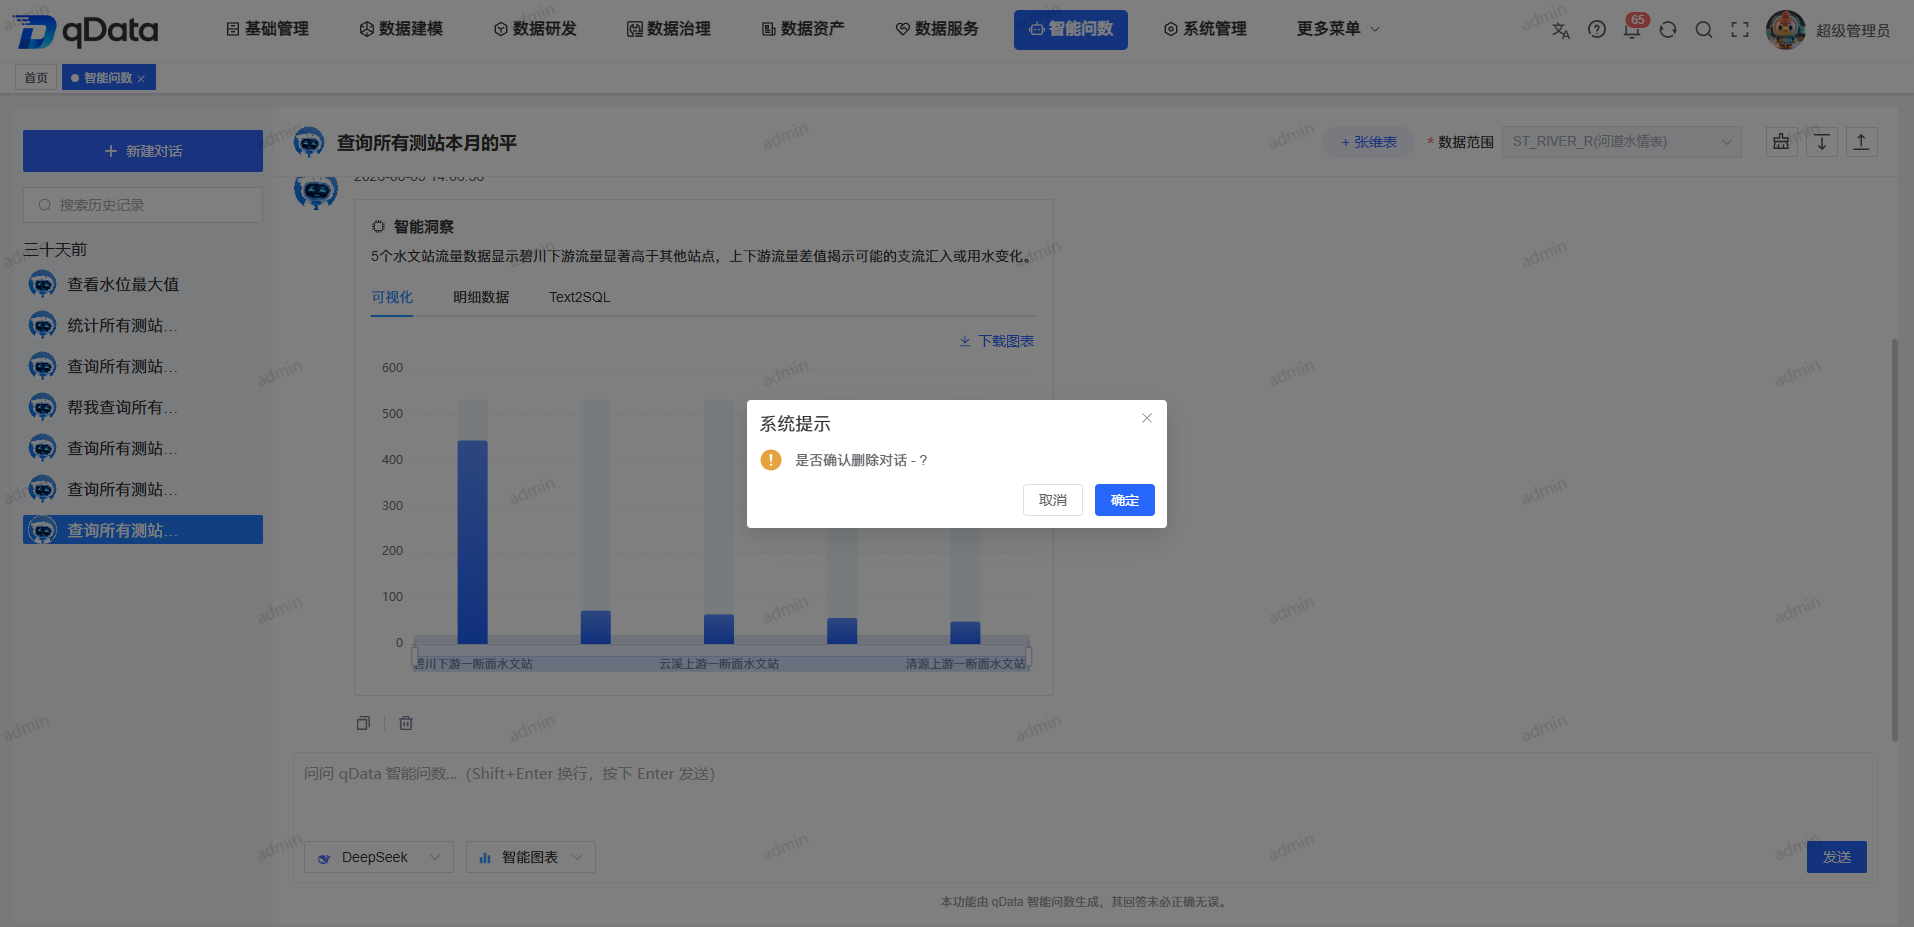
- Delete message: After clicking delete, confirm in the "Are you sure you want to delete this conversation?" prompt; when canceling, the original message remains unchanged.
- Refresh the last user message: Keep the original message and resend it with the original question to generate a new message record.
- Edit the last user message: Truncate the message after the user message and backfill the original question into the input box; modify and resend to form a new follow-up message.
- Scroll message: Use the upper and lower entrances on the upper right side of the page to scroll to the top or bottom of the message.
Clear current session messages
- Click Clear Entry in the upper right corner of the page.
- Check the prompt "Are you sure you want to clear the conversation messages?"
- Click OK when you need to continue.
- Confirm that the current message area has been cleared and the session remains.
- When clearing is no longer needed, click Cancel.
Search and switch historical conversations
- Enter the title keyword in [Search History] on the left.
- Locate the target session in the filtered results.
- Click on the target session.
- View the data range and messages of the session.
- Clear the search content when you need to restore the complete list.
Historical conversations can be displayed in groups such as [Top] [Today] [One day ago] [Three days ago] [Seven days ago] [Thirty days ago] and other groups. These time labels represent a range of differences from the current time and should not be interpreted as strictly calendar days.
Pin, rename and delete historical conversations
- Move the mouse over the target history session.
- Check to pin or unpin, modify the title and delete the entry.
- When you need to pin it to the top, click the pin entry.
- Confirm that the conversation enters the [Top] group.
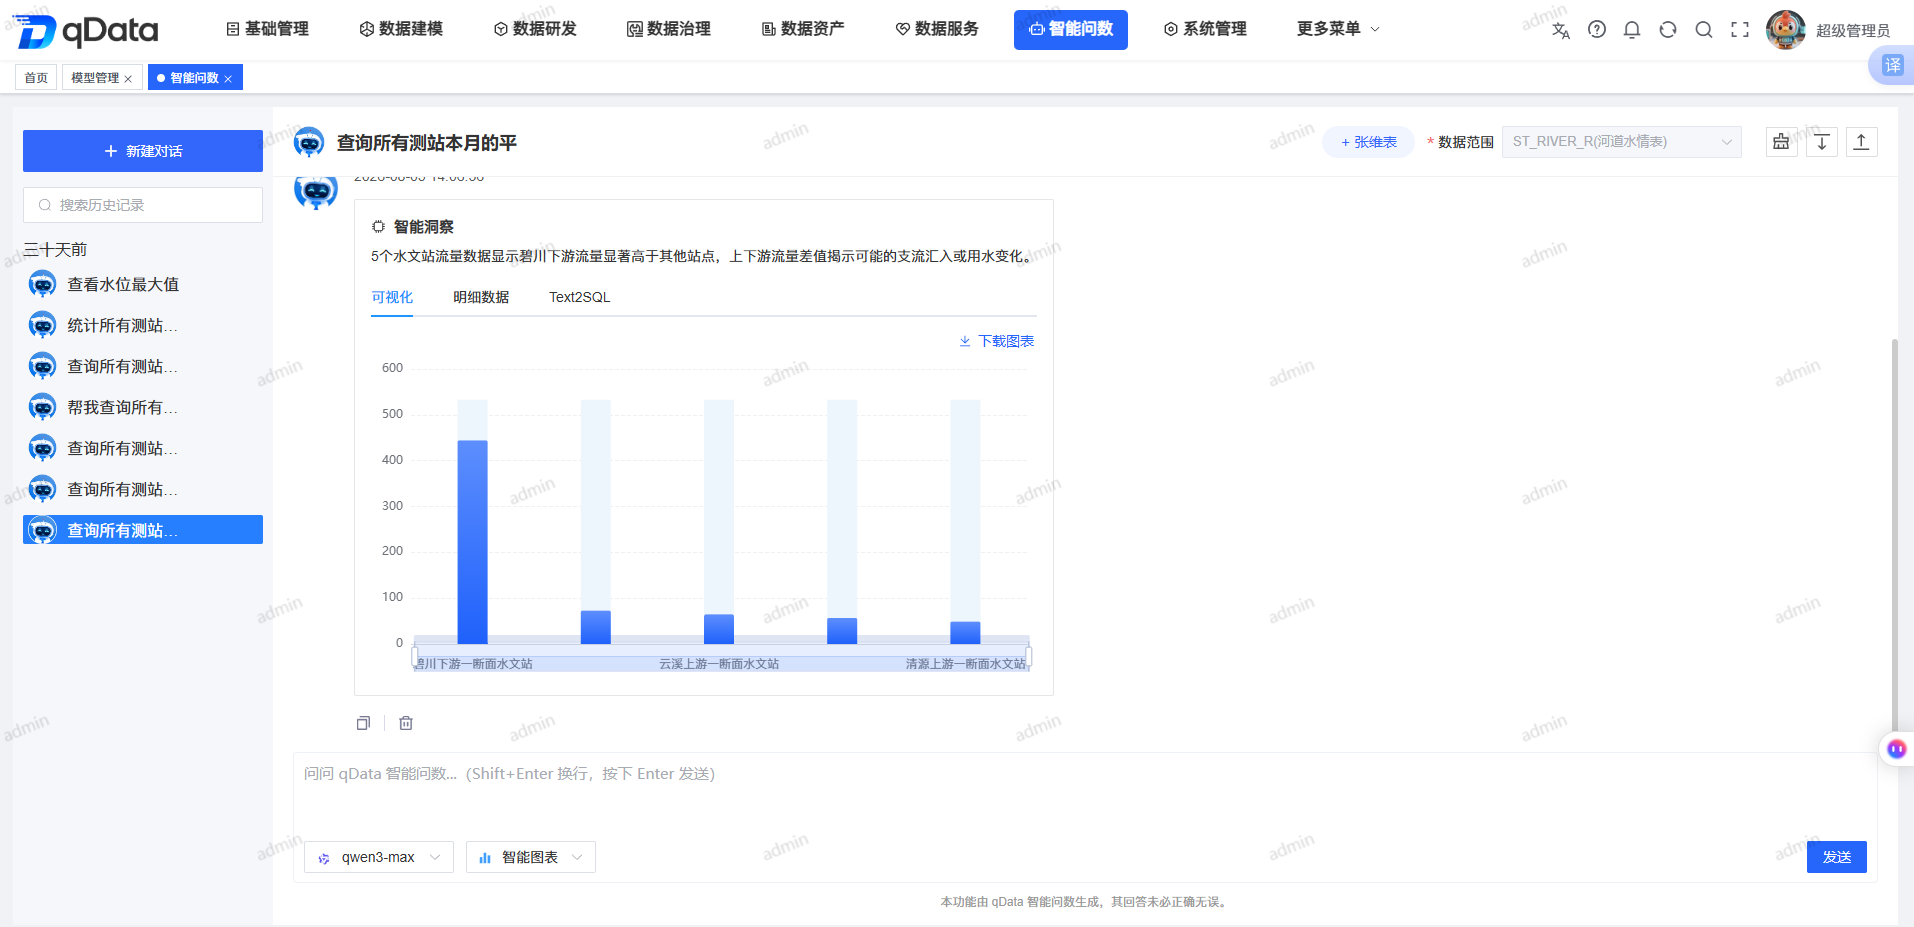
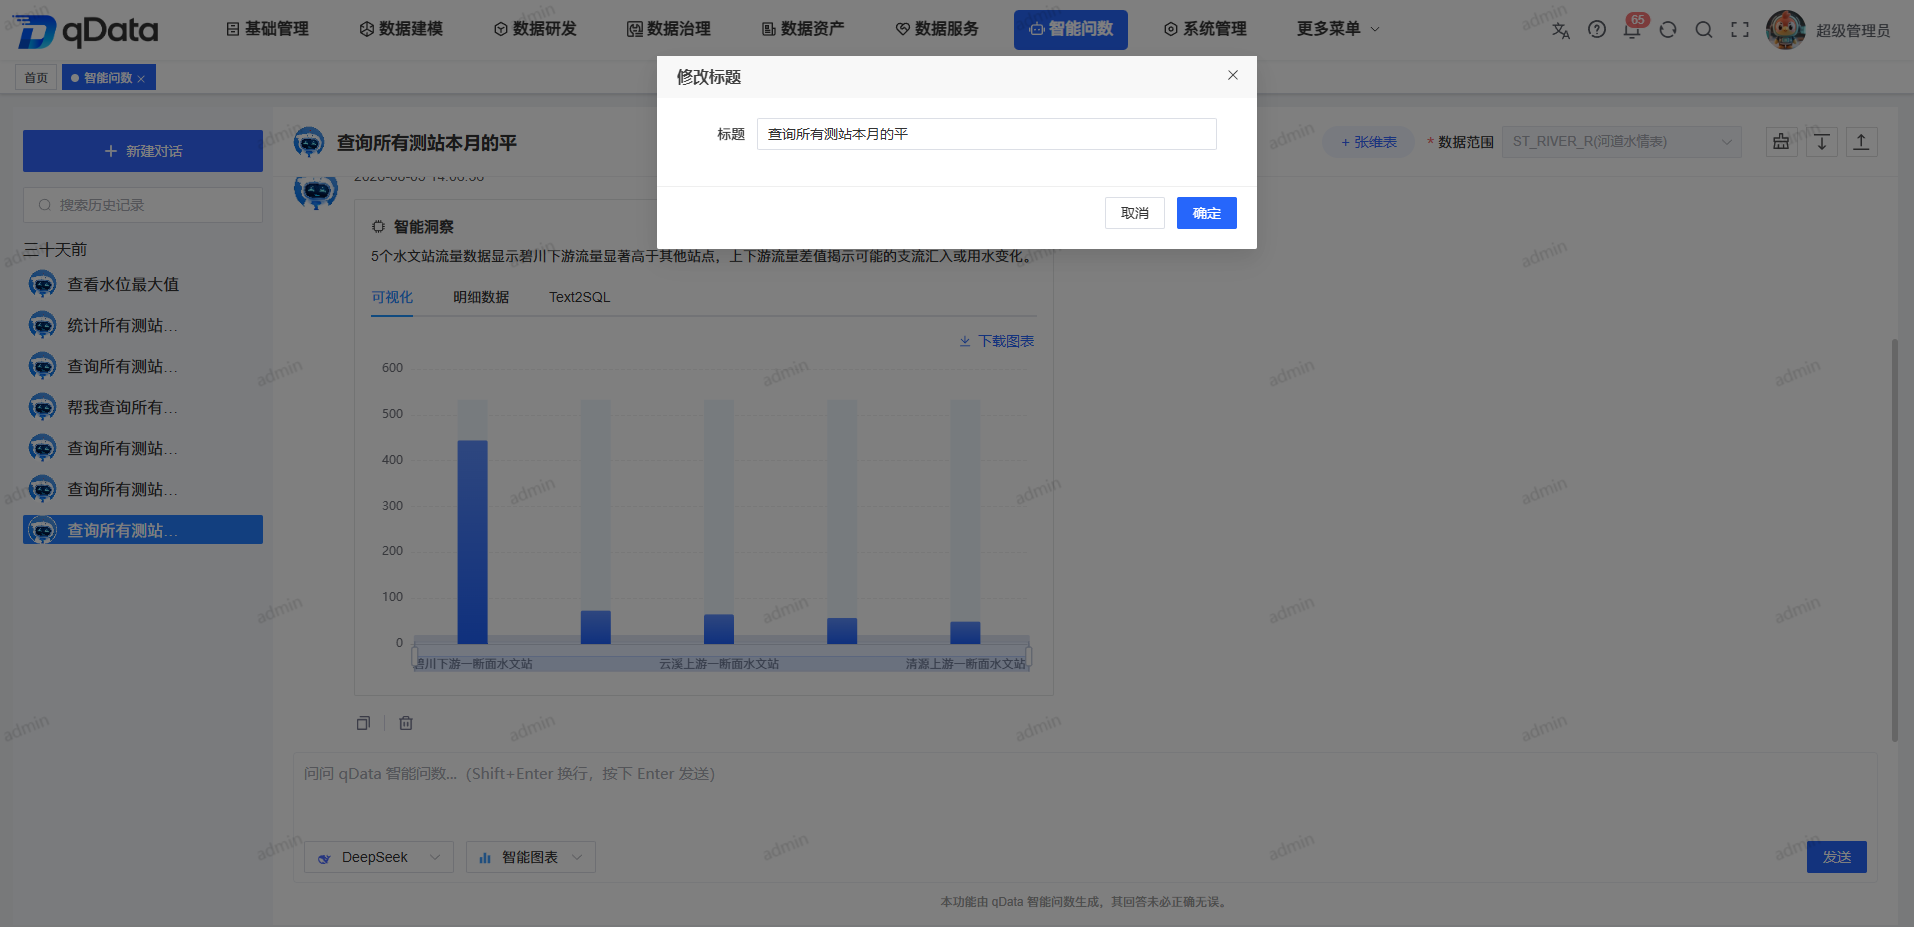
When modifying the title:
- Click the modify title entry of the target session.
- Edit the title in the [Modify Title] pop-up window.
- Click OK.
- The confirmation page prompts "Rename successful."
- Confirm that the left list and the current session title are updated simultaneously.
When deleting a session:
- Click the delete entry of the target session.
- Check the target title in the "Are you sure you want to delete the conversation - <conversation title>?" prompt.
- Click OK.
- The confirmation page prompts "Conversation has been deleted".
- Confirm that the history list has been refreshed; if the current session is deleted, the main area will return to a blank state.
FAQ
Why is there no record added to the history list immediately after clicking [New Conversation]?
[New conversation] only enters the front-end blank state. The system does not create a background session until the data range is configured and the question is effectively sent for the first time.What should I do if the system prompts that the association cannot be automatically recognized?
Enter [Set Association Relationship], select the dimension table and dimension table field for the fact table field, save at least one complete mapping, and then resend the question.After stopping the generation, will the existing content be lost?
will not. After clicking [Stop], the page exits the generation state and retains some of the results that have been generated before stopping.
Summarize
[Intelligent Questioning] Centralize data range configuration, natural language questioning, intelligent insights, charts, details and SQL verification in the same session. When using it, please make sure that the data range of is complete, that the model and answer method used in this transmission are correct, and that the results have been verified with details and Text2SQL before downloading, exporting or copying.