Logical Model Management
Definition
This module is used to build and manage data models at the business logic layer. It supports flexible configuration of table structures and fields, helping users implement standardized data modeling.
Logical Models support extracting table structures from various relational databases, such as MySQL, Oracle, SQL Server, and Dameng, for modeling, and can associate Standard Data Elements to implement unified field-level specifications. At the same time, models can be materialized into physical tables with one click and deployed to specified data sources, connecting the full process from model design to data landing.
Notes
We recommend standardizing field naming and Data Element binding strategies before model design to ensure Logical Models have good maintainability and reusability.
Scope
To be supplemented.
1. Logical Model Page
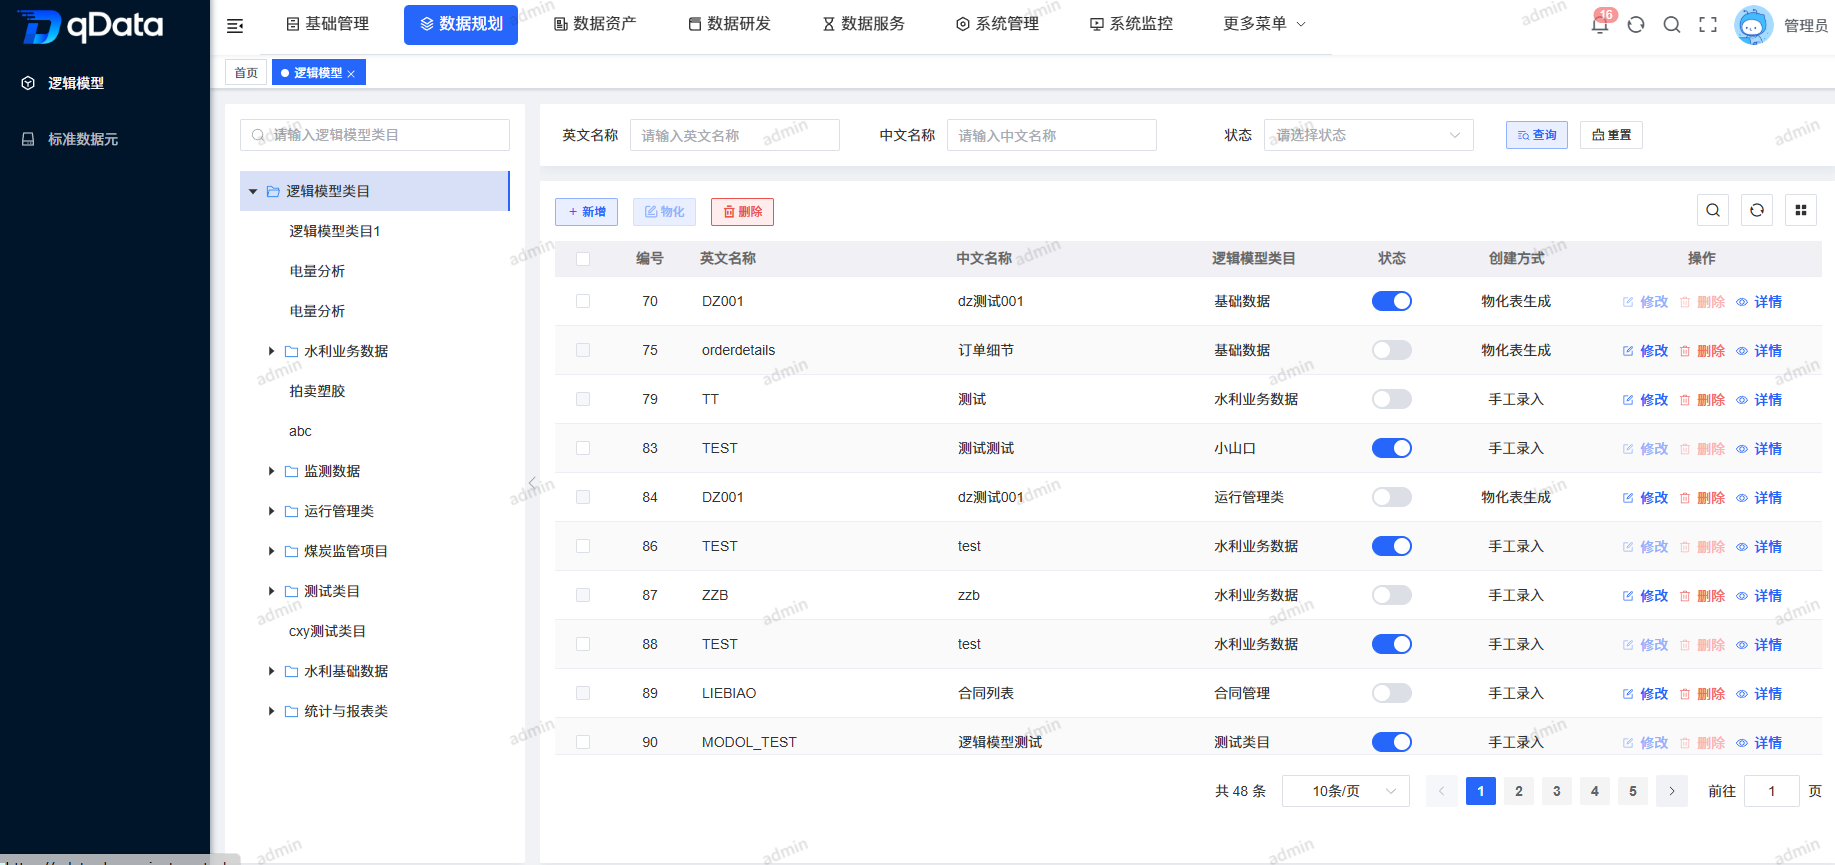
Click Data Standards under Logical Model to open the Logical Model page. The page uses a left-right layout: the left side displays Logical Model Categories in a tree structure, and the right side displays the Logical Model information list, including ID, English name, Chinese name, Logical Model Category, Status, creation method, and other fields.
2. Add Logical Model
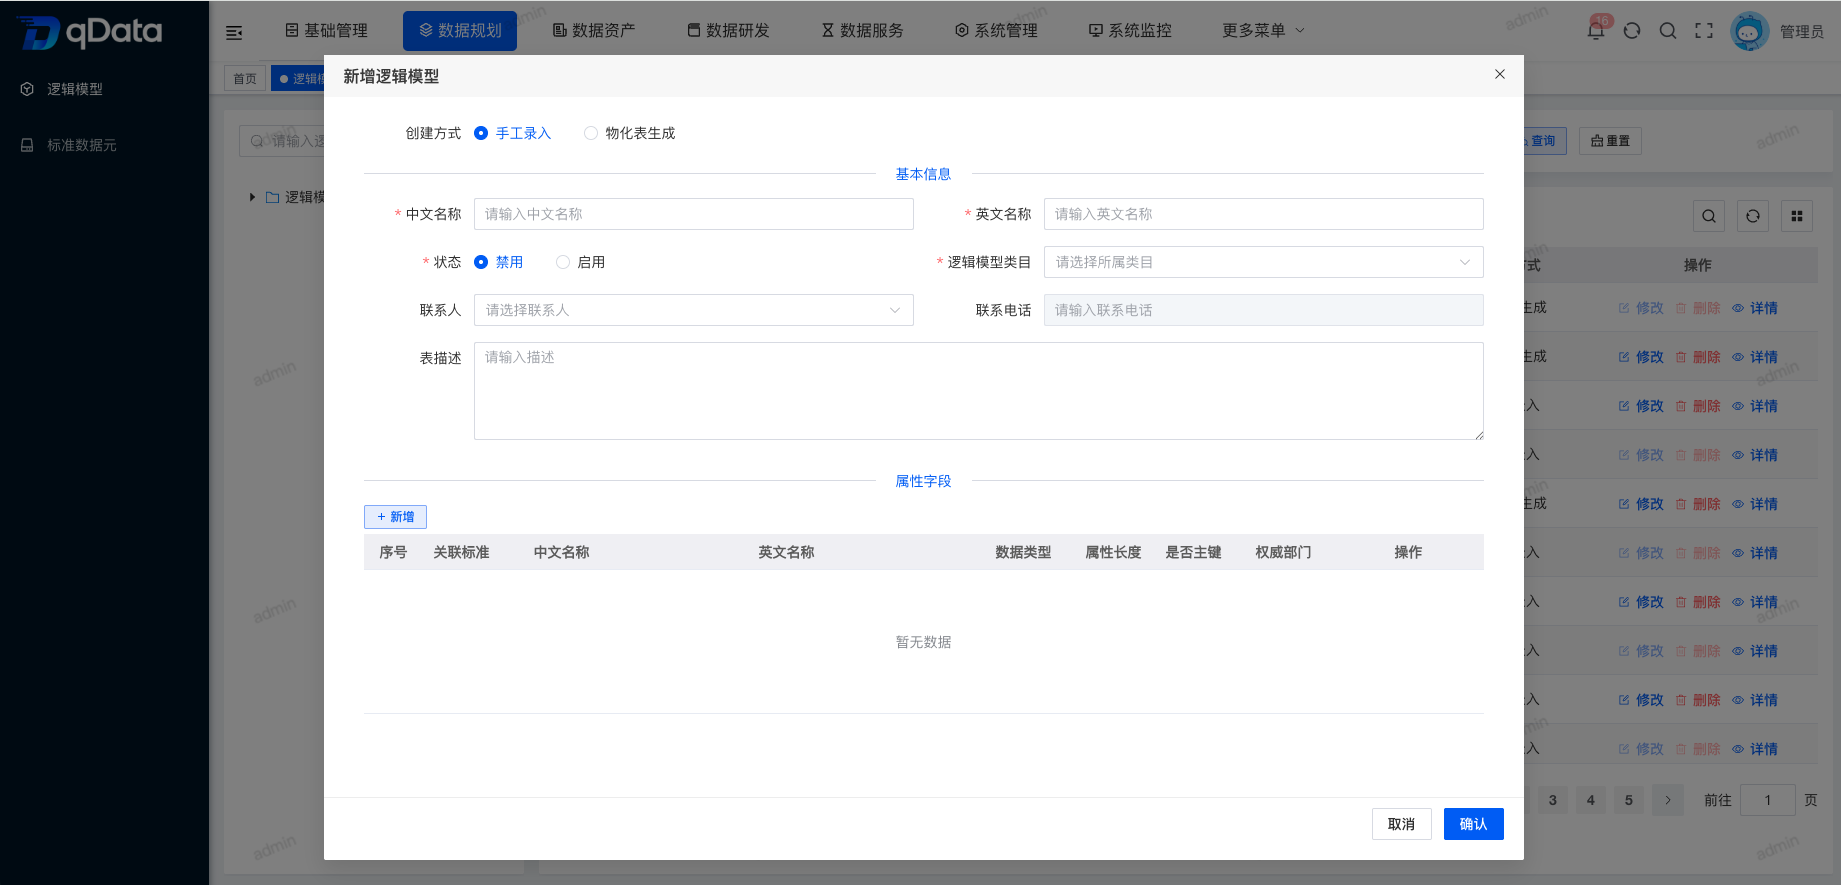
Click Add on the page, fill in the Logical Model information in the dialog, and click OK to complete adding the Logical Model. Logical Model creation includes the following two methods:
2.1. Manual Input
2.1.1. Enter Basic Information
After selecting the manual input creation method, fill in the basic information.
2.1.2. Add Attribute Fields
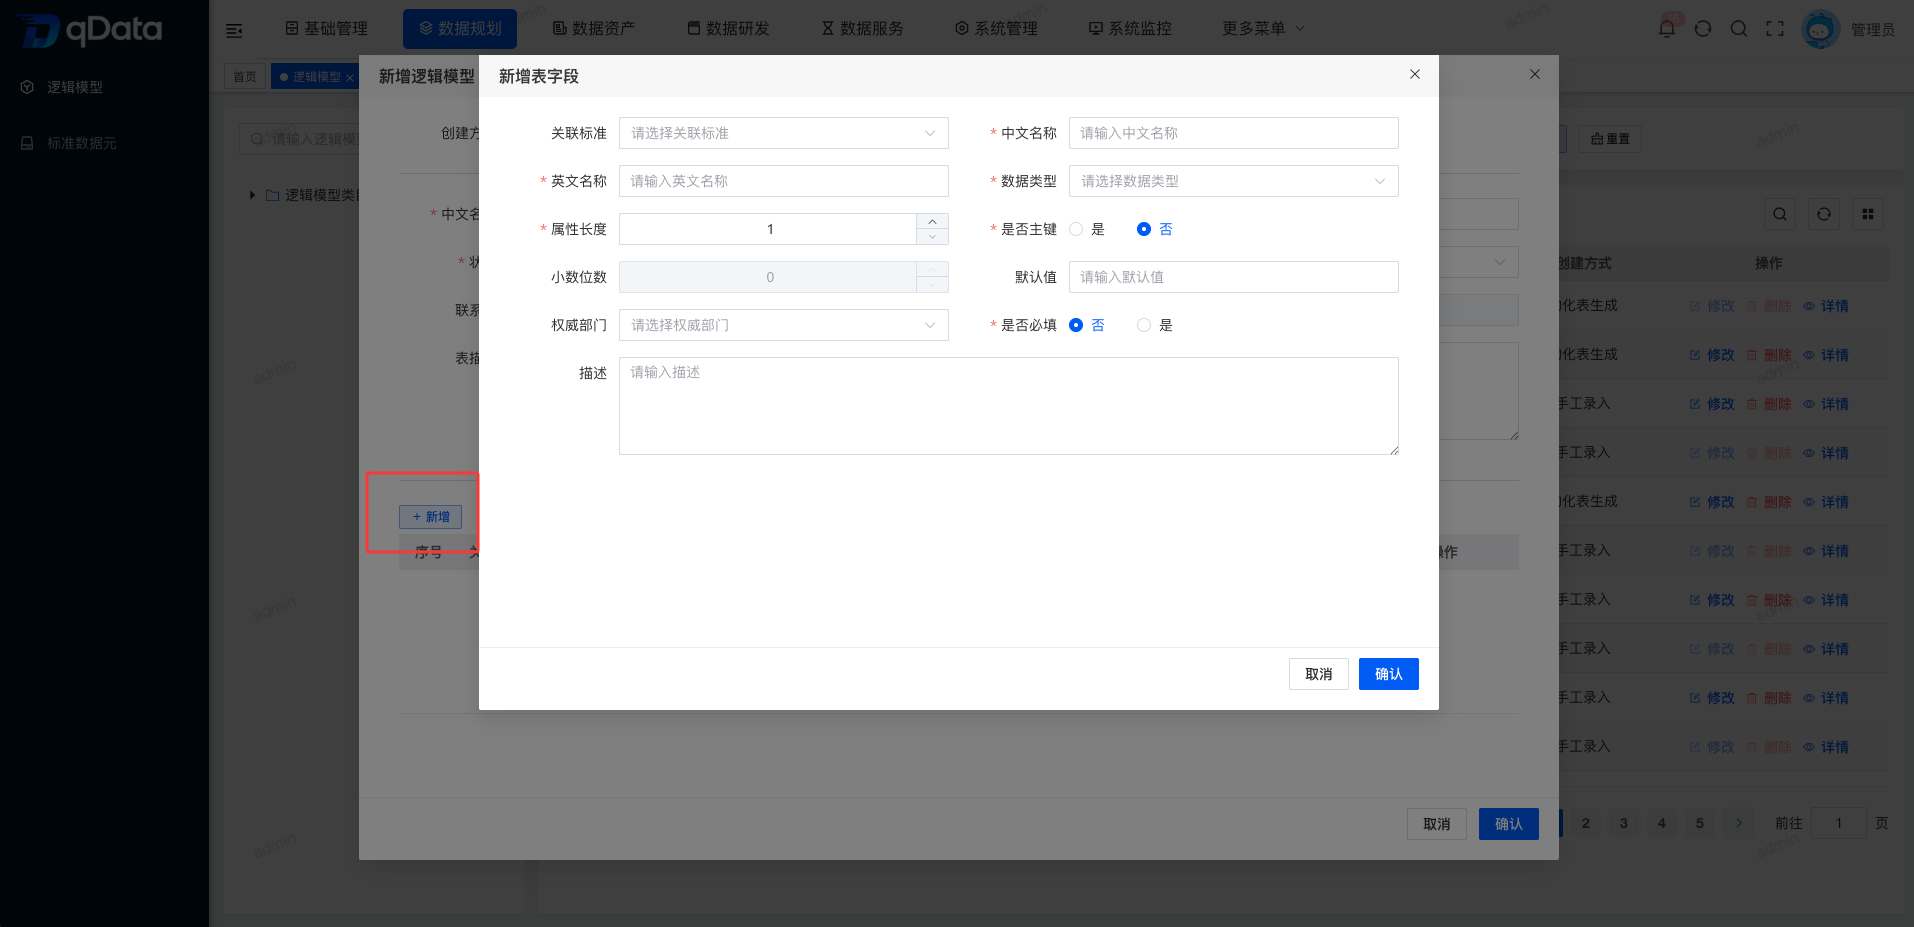
After filling in the basic information, click Add attribute fields, fill in field information in the Add Table Fields dialog, and click OK to complete adding fields.
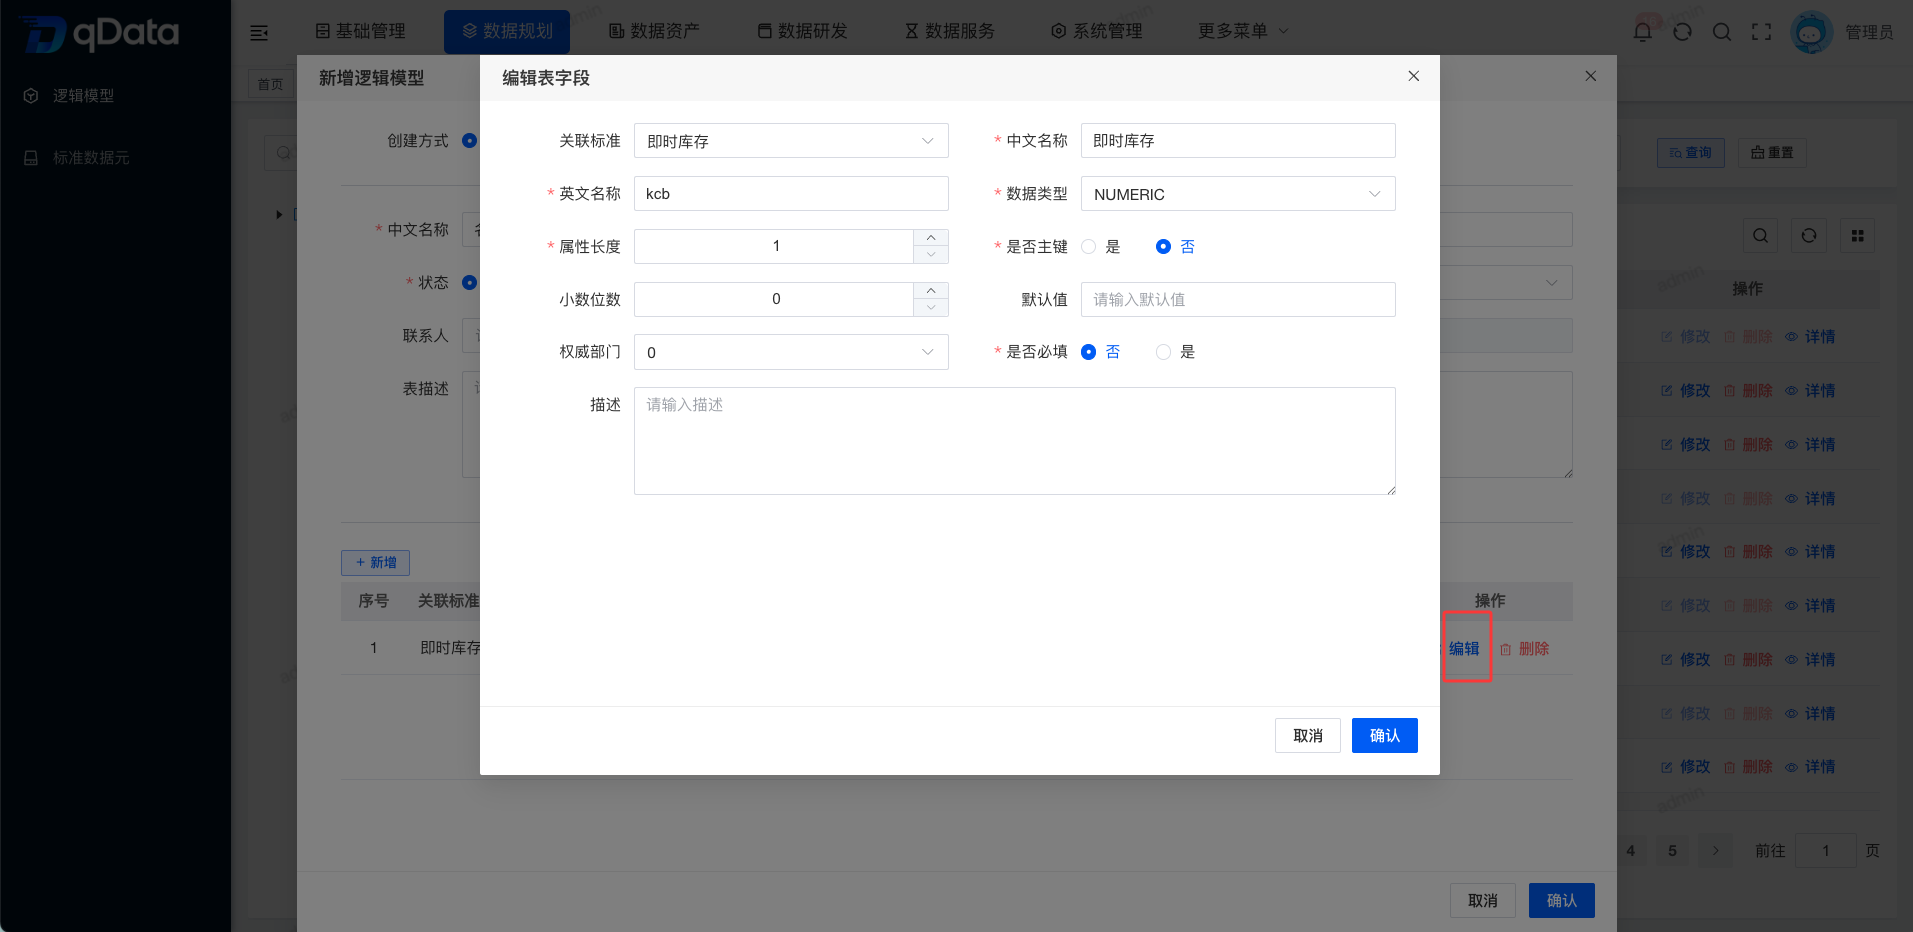
2.1.3. Edit Attribute Fields
Select the attribute field to edit, click Edit in the operation column, edit the existing attribute field information in the dialog, and click OK to complete editing the attribute field information.
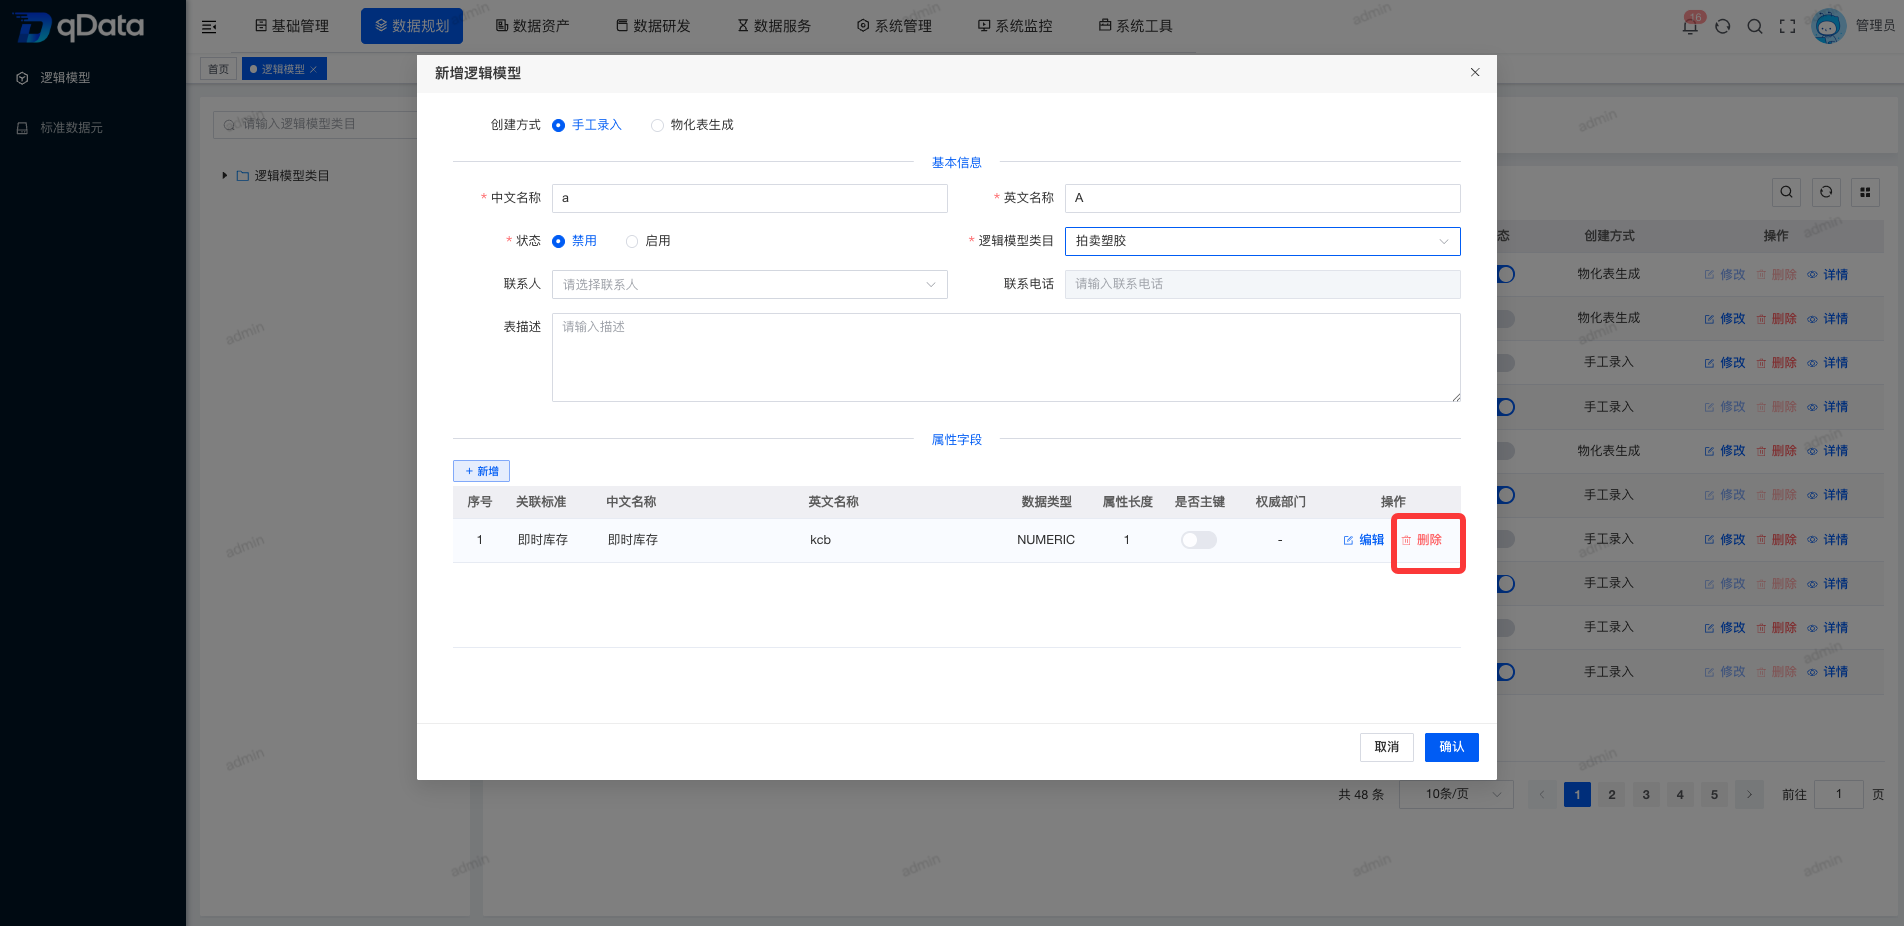
2.1.4. Delete Attribute Fields
Select the attribute field to delete, click Delete in the operation column, and click OK. The system will remove the attribute field information.
2.2. Materialized Table Generation
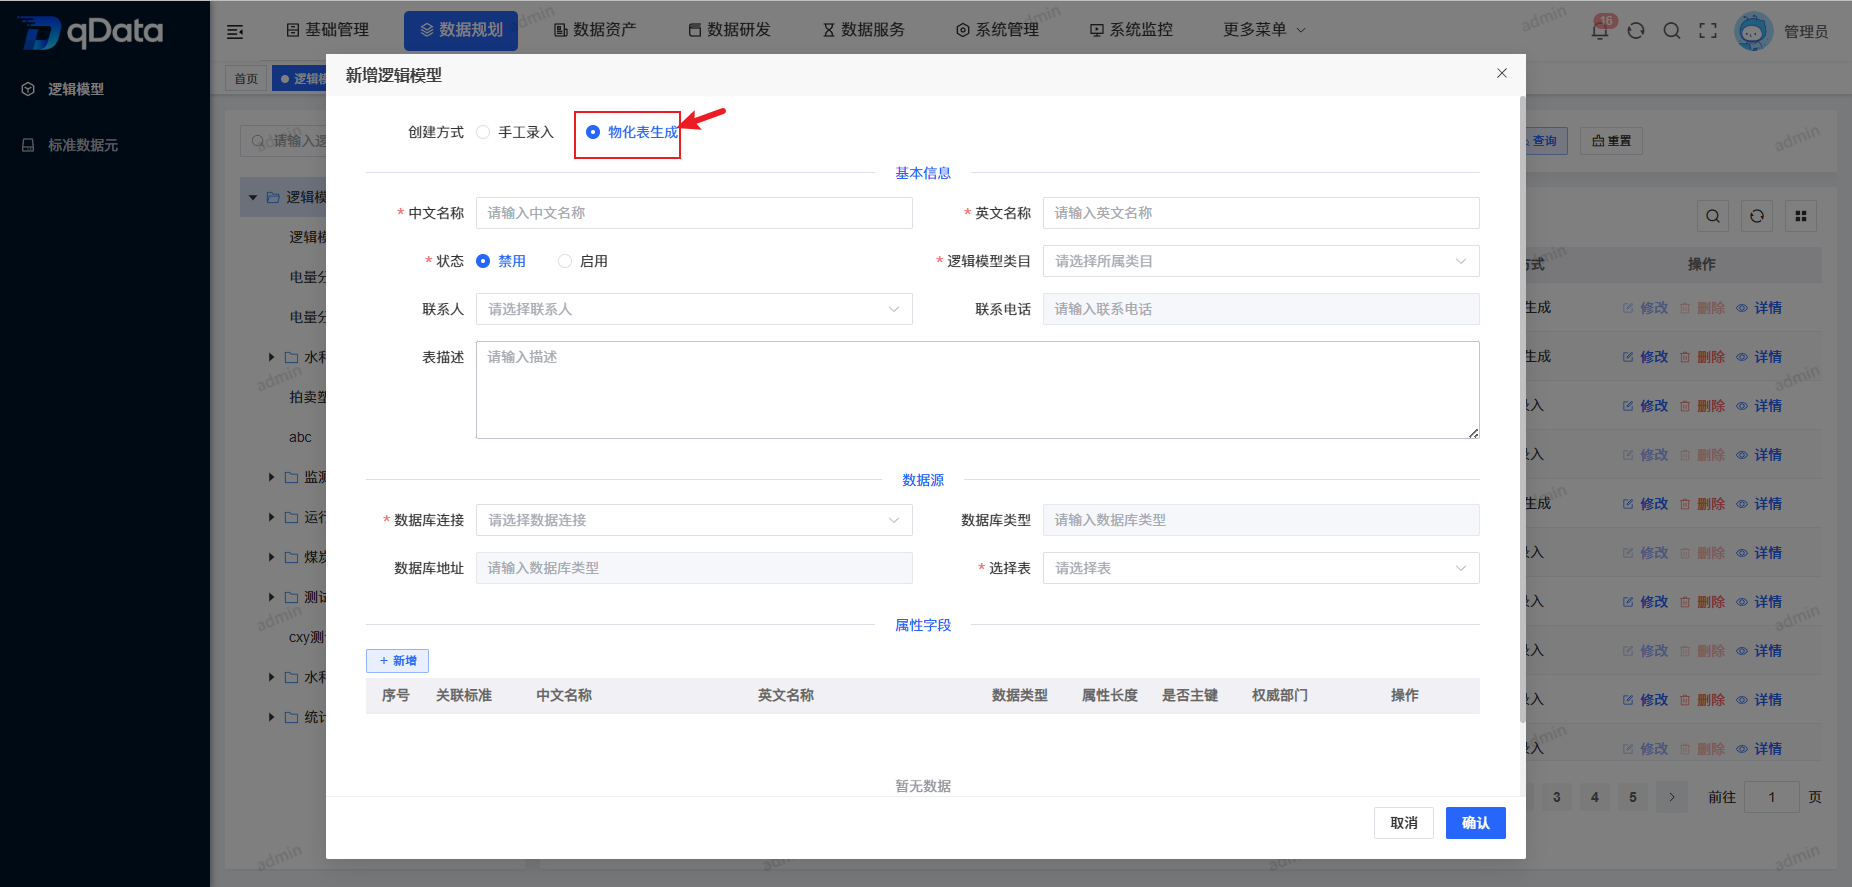
2.2.1. Enter Basic Information
After selecting the materialized table generation creation method, fill in the basic information.
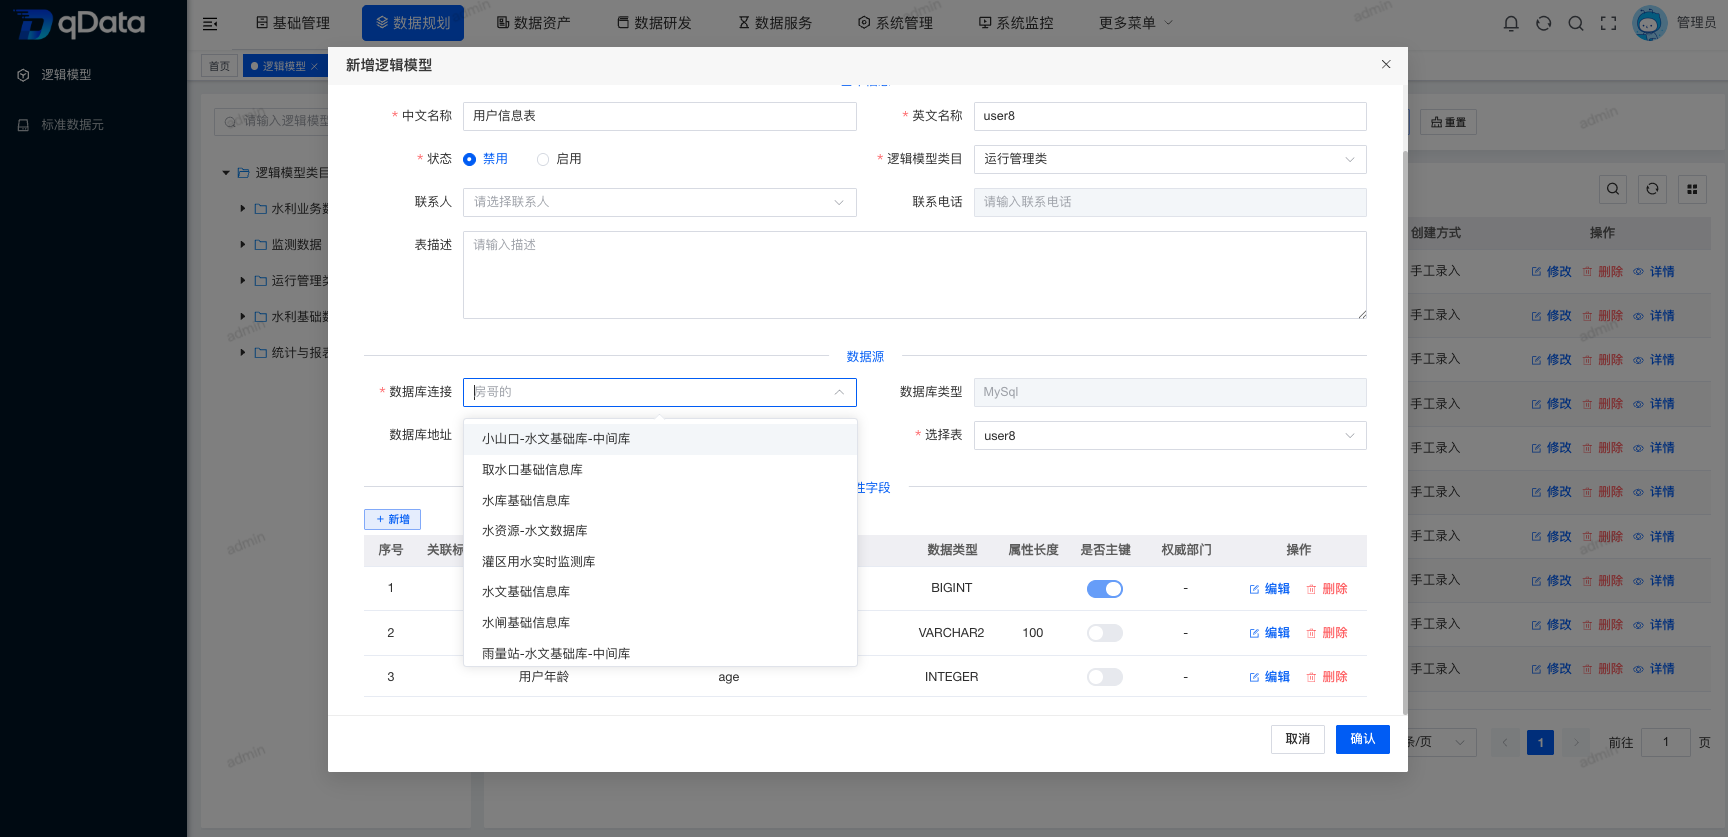
2.2.2. Data Source
After filling in the basic information, select the required data source information.
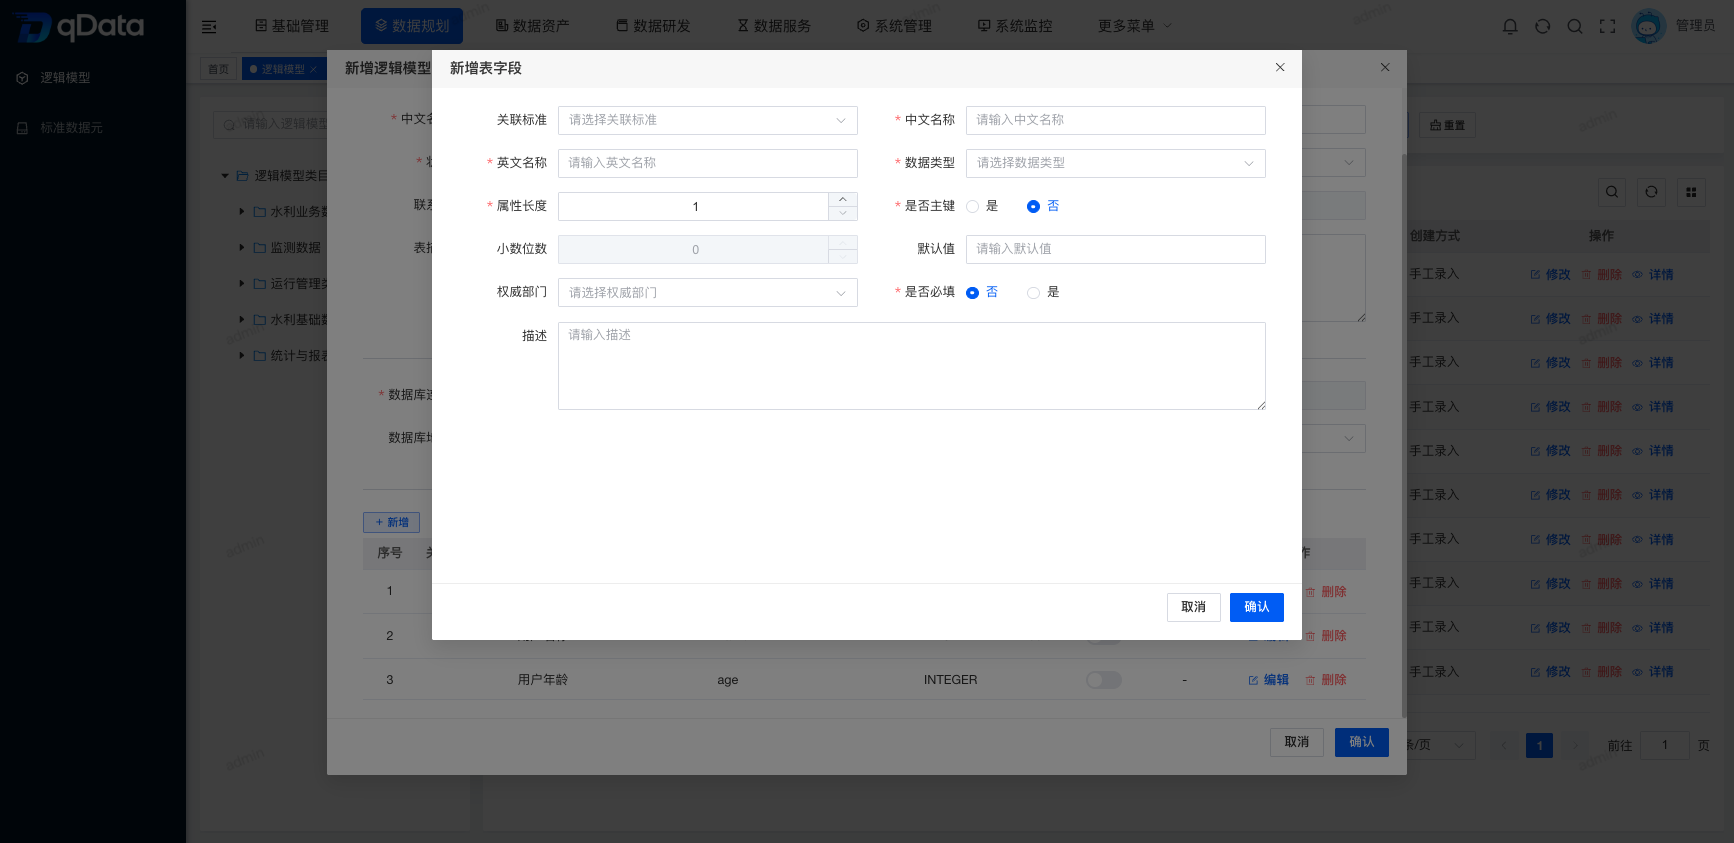
2.2.3. Add Attribute Fields
After selecting the data source, click Add attribute fields, fill in field information in the Add Table Fields dialog, and click OK to complete adding fields.
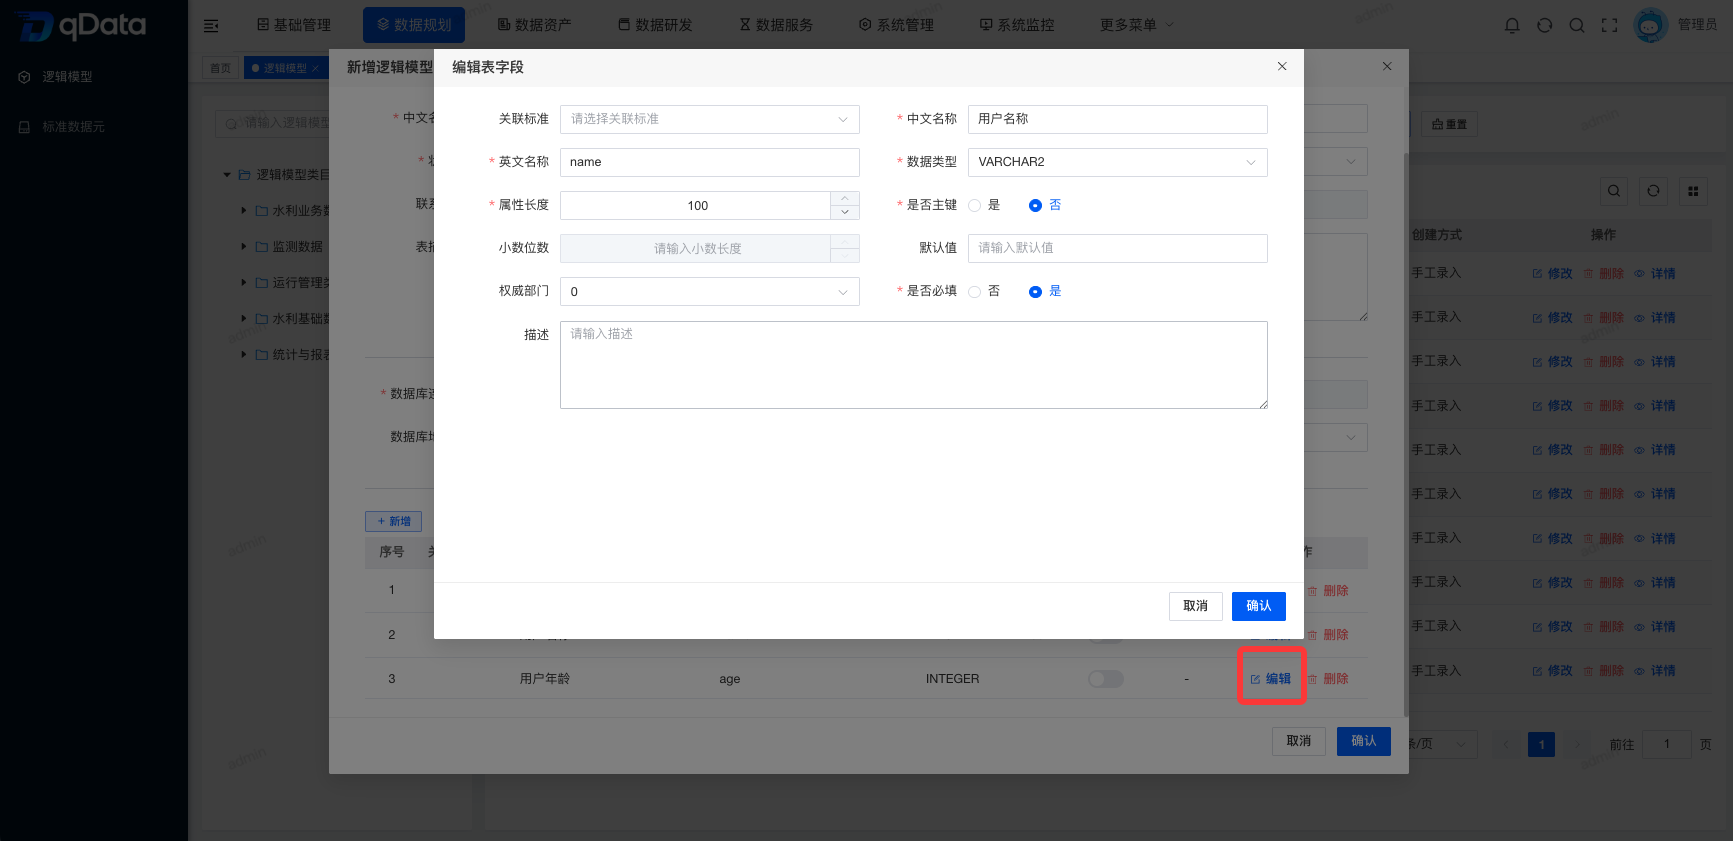
2.2.4. Edit Attribute Fields
Select the attribute field to edit, click Edit in the operation column, edit the existing attribute field information in the dialog, and click OK to complete editing the attribute field information.
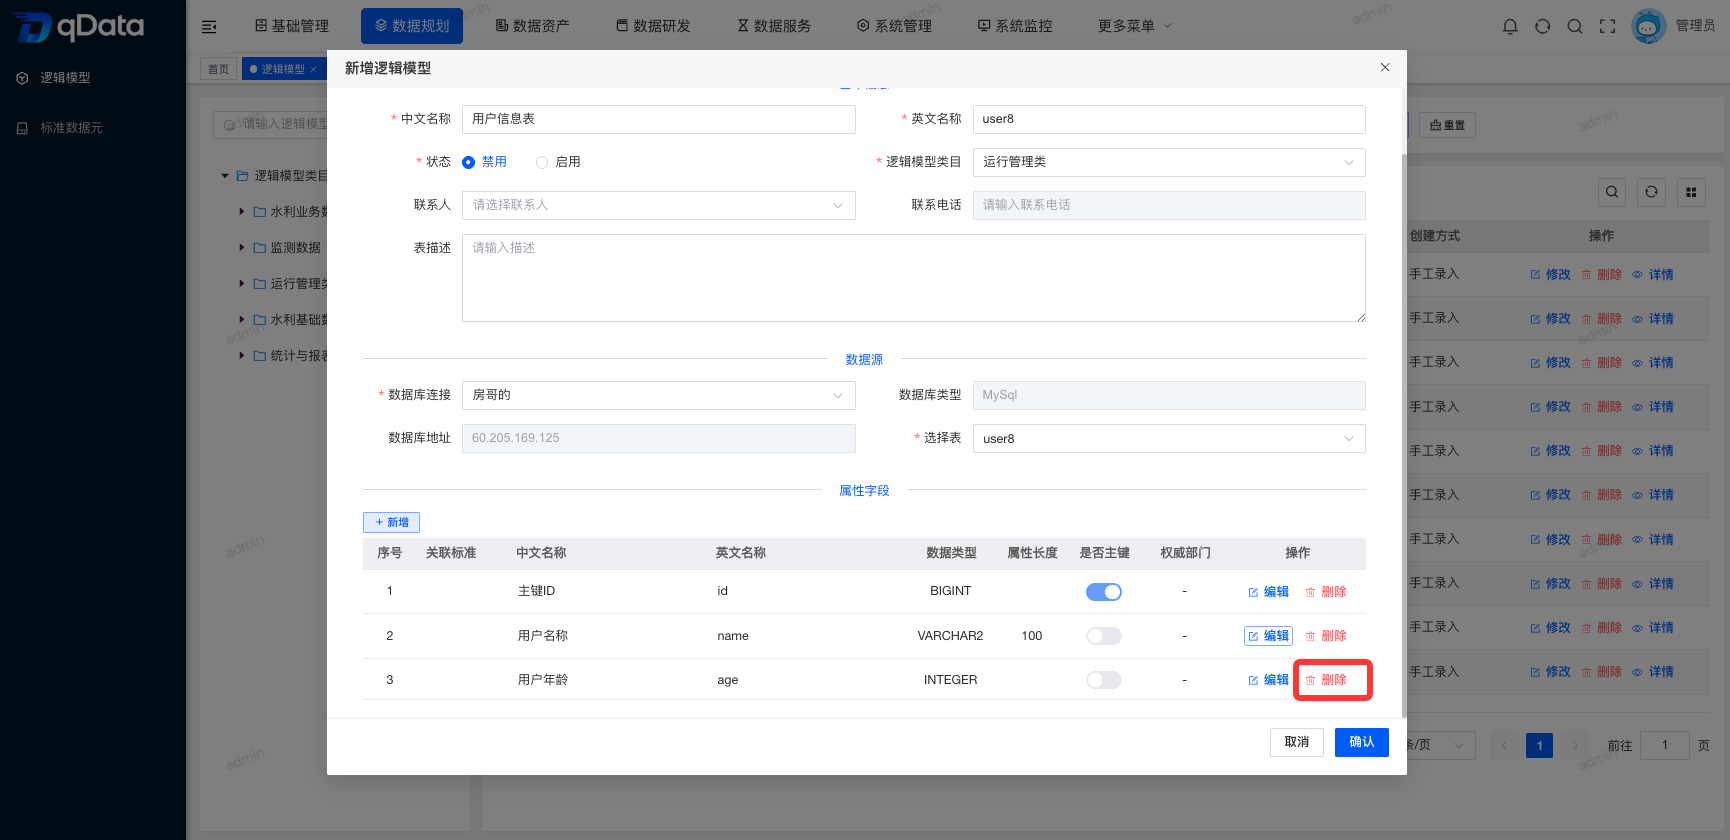
2.2.5. Delete Attribute Fields
Select the attribute field to delete, click Delete in the operation column, and click OK. The system will remove the attribute field information.
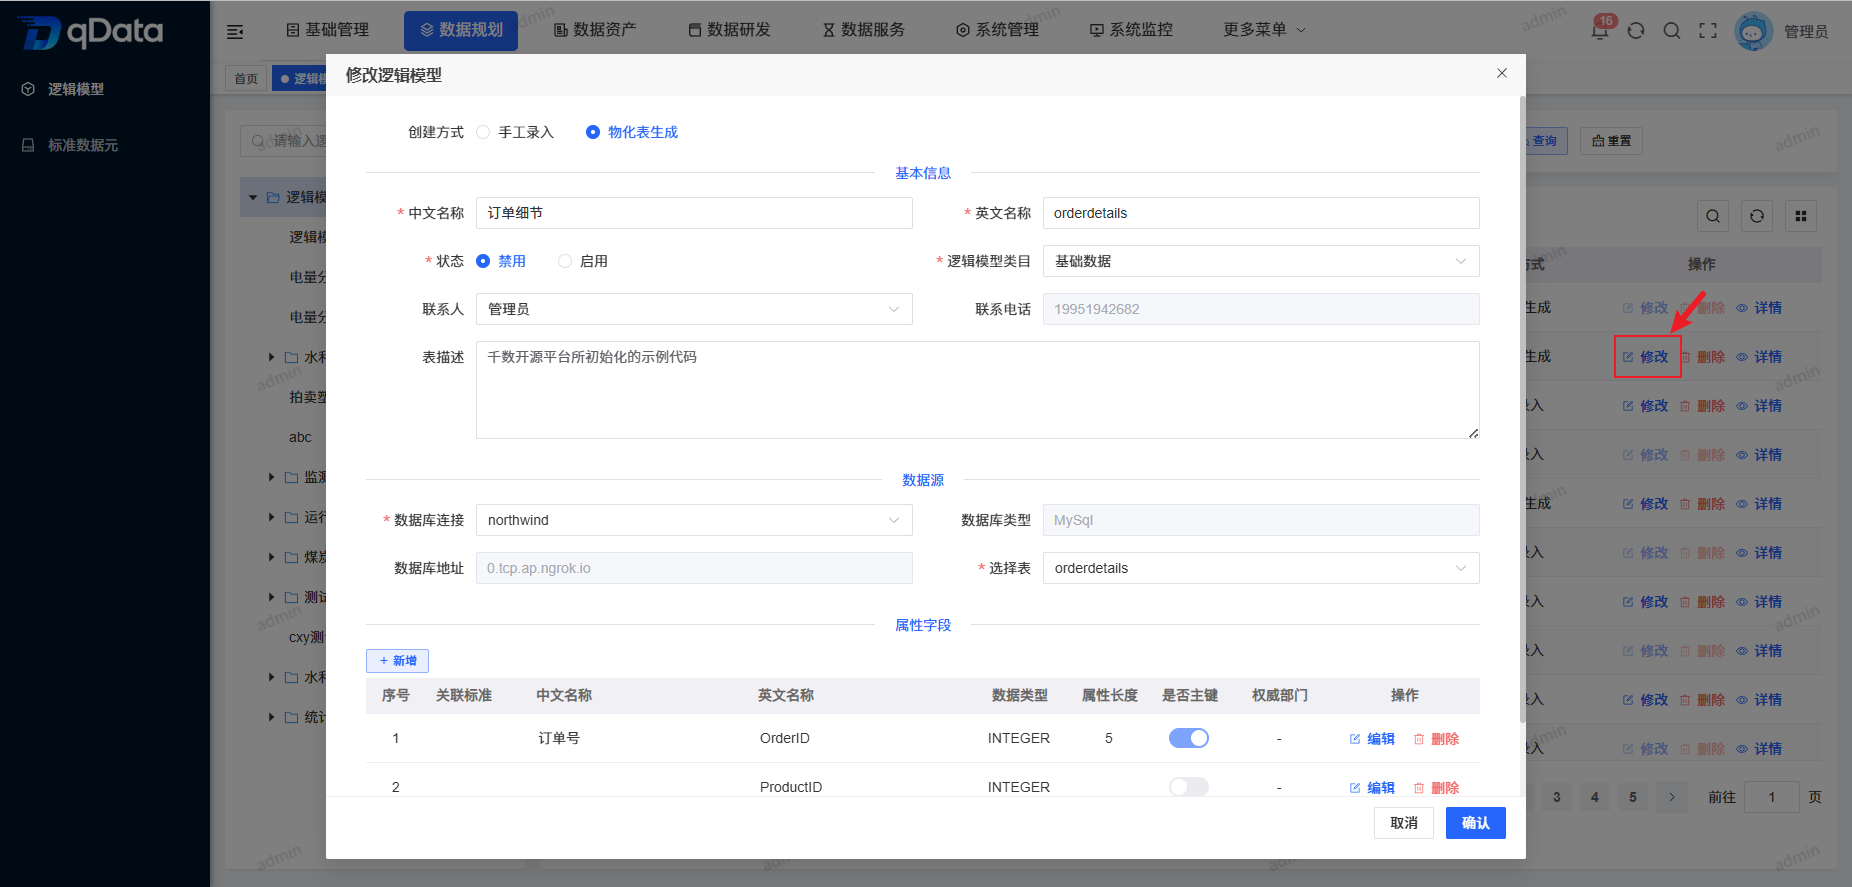
3. Edit Logical Model
Select the Logical Model to edit, click Edit in the operation column, edit the existing Logical Model information in the dialog, and click OK to complete editing the Logical Model. (Note: editing is the same as Add Logical Model; the Logical Model to edit must be disabled)
4. Delete Logical Model
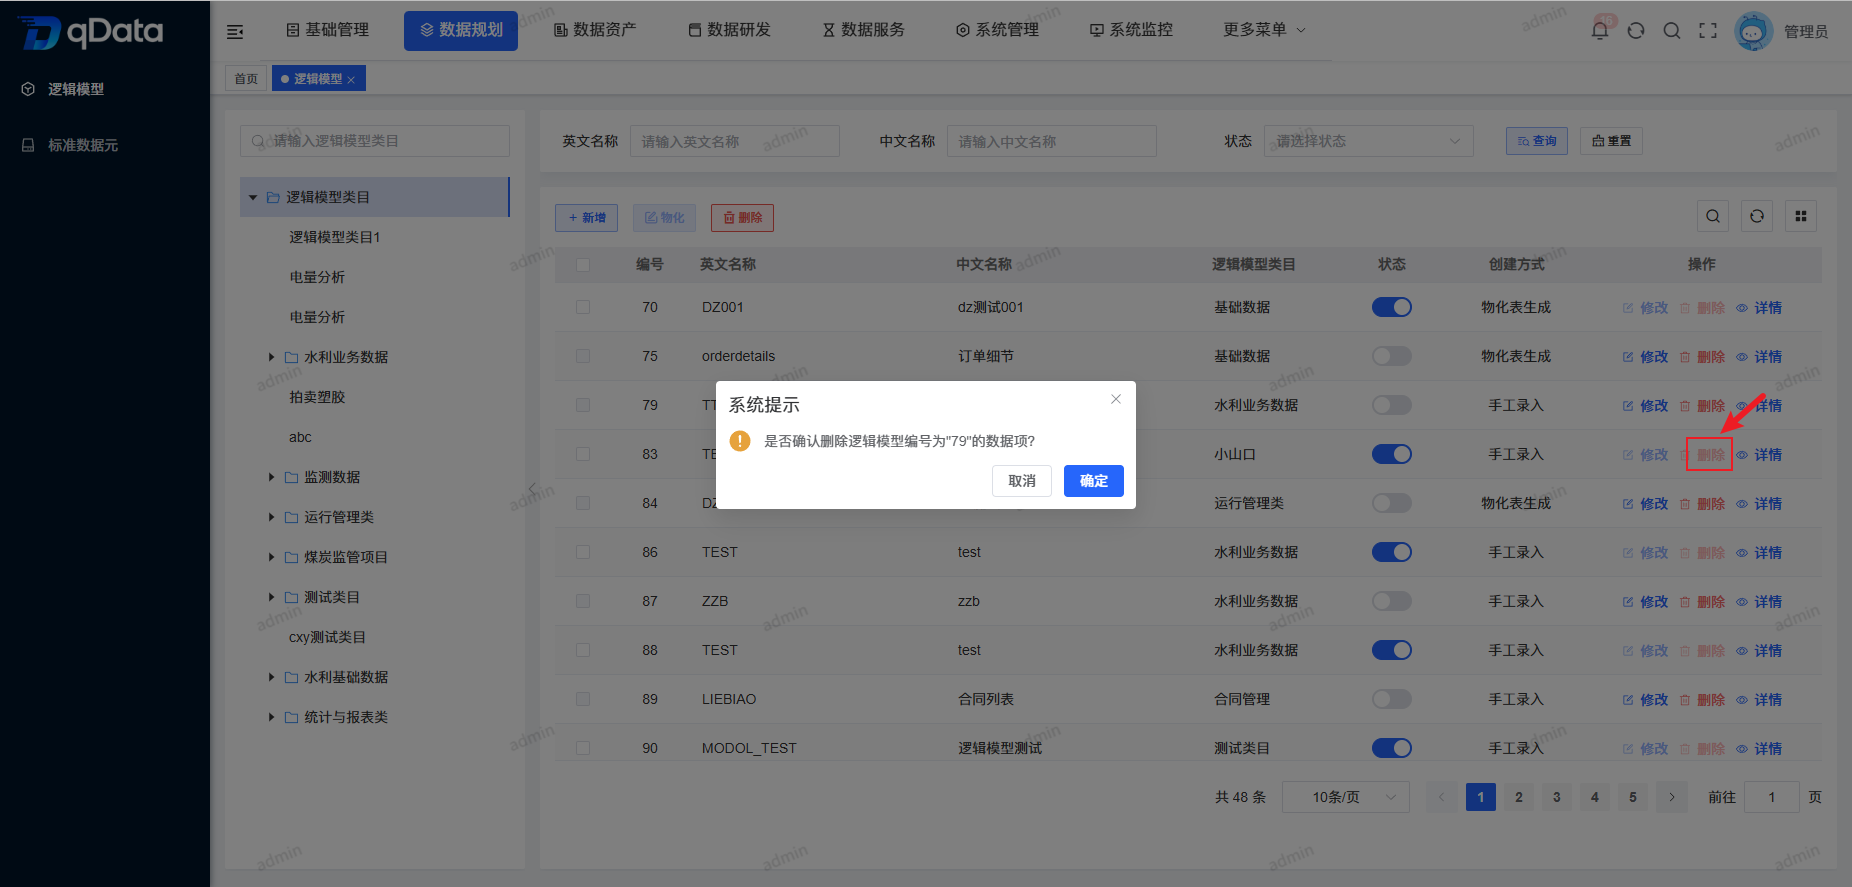
Select the Logical Model to delete, click Delete in the operation column, and click OK. The system will delete the tag information. (Note: the Logical Model to delete must be disabled)
5. Bulk Delete Logical Model
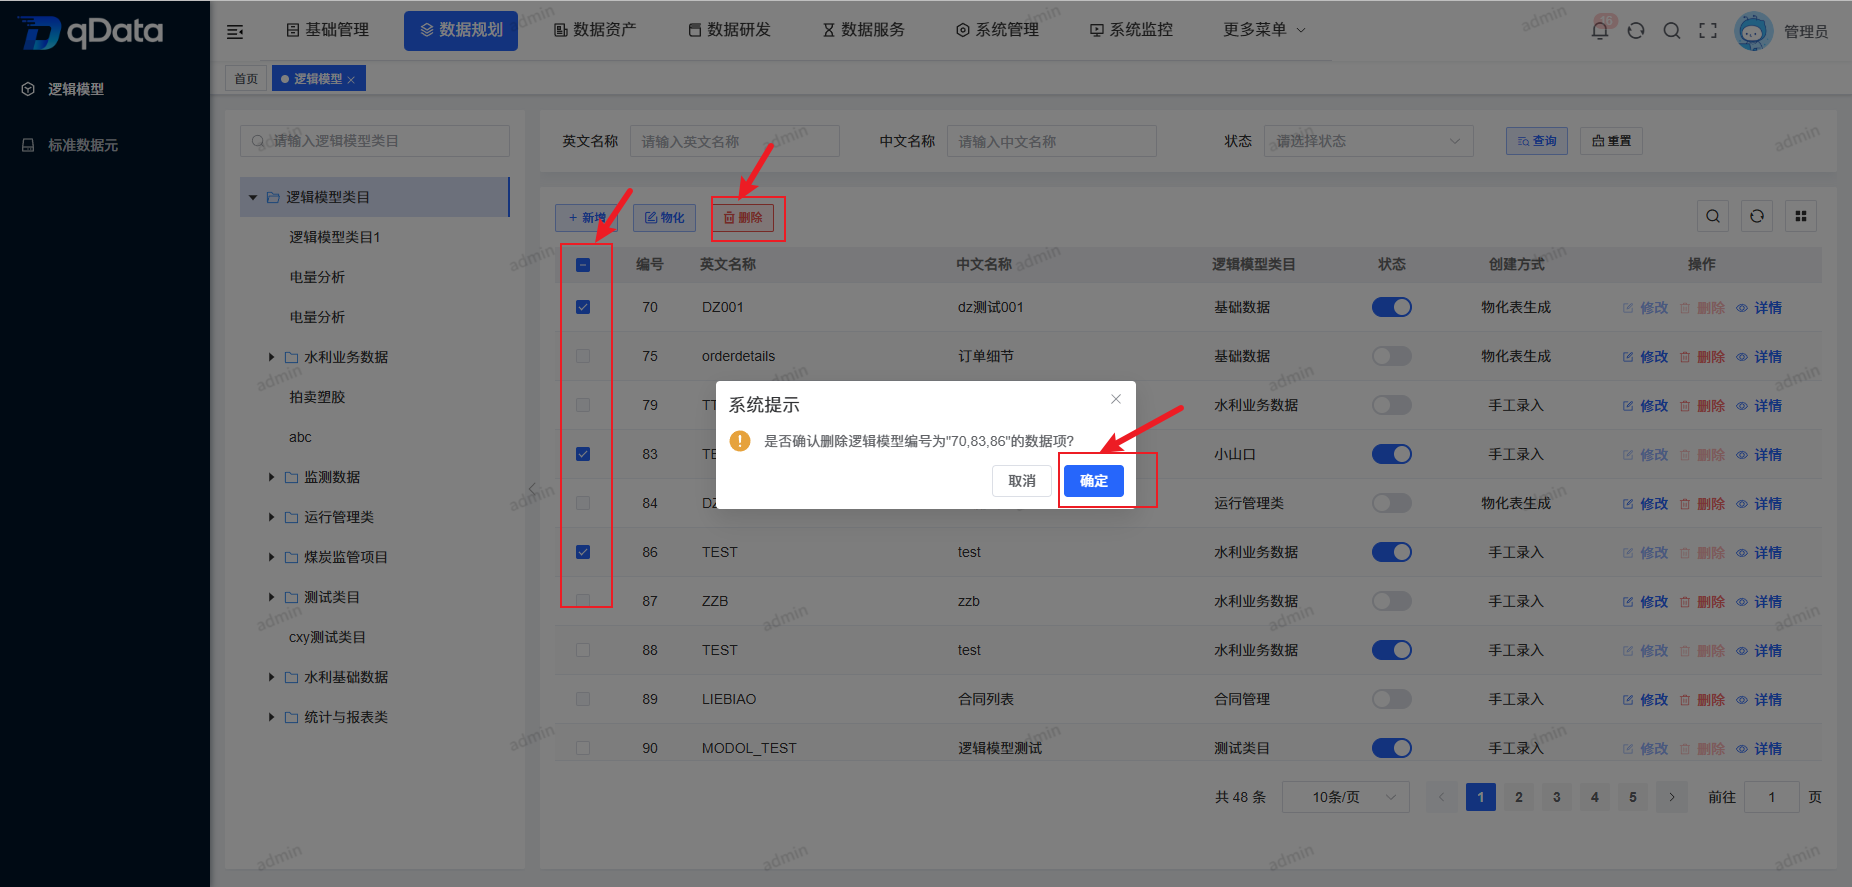
Select multiple Logical Model checkboxes in the page list, click Delete, confirm the deletion in the dialog, and click OK to complete bulk deleting Logical Models. (Note: the Logical Models to bulk delete must be enabled)
5. Logical Model Details
Select the Logical Model to view, click Details in the operation column, and you can view Logical Model Details.
5.1. Attribute Fields
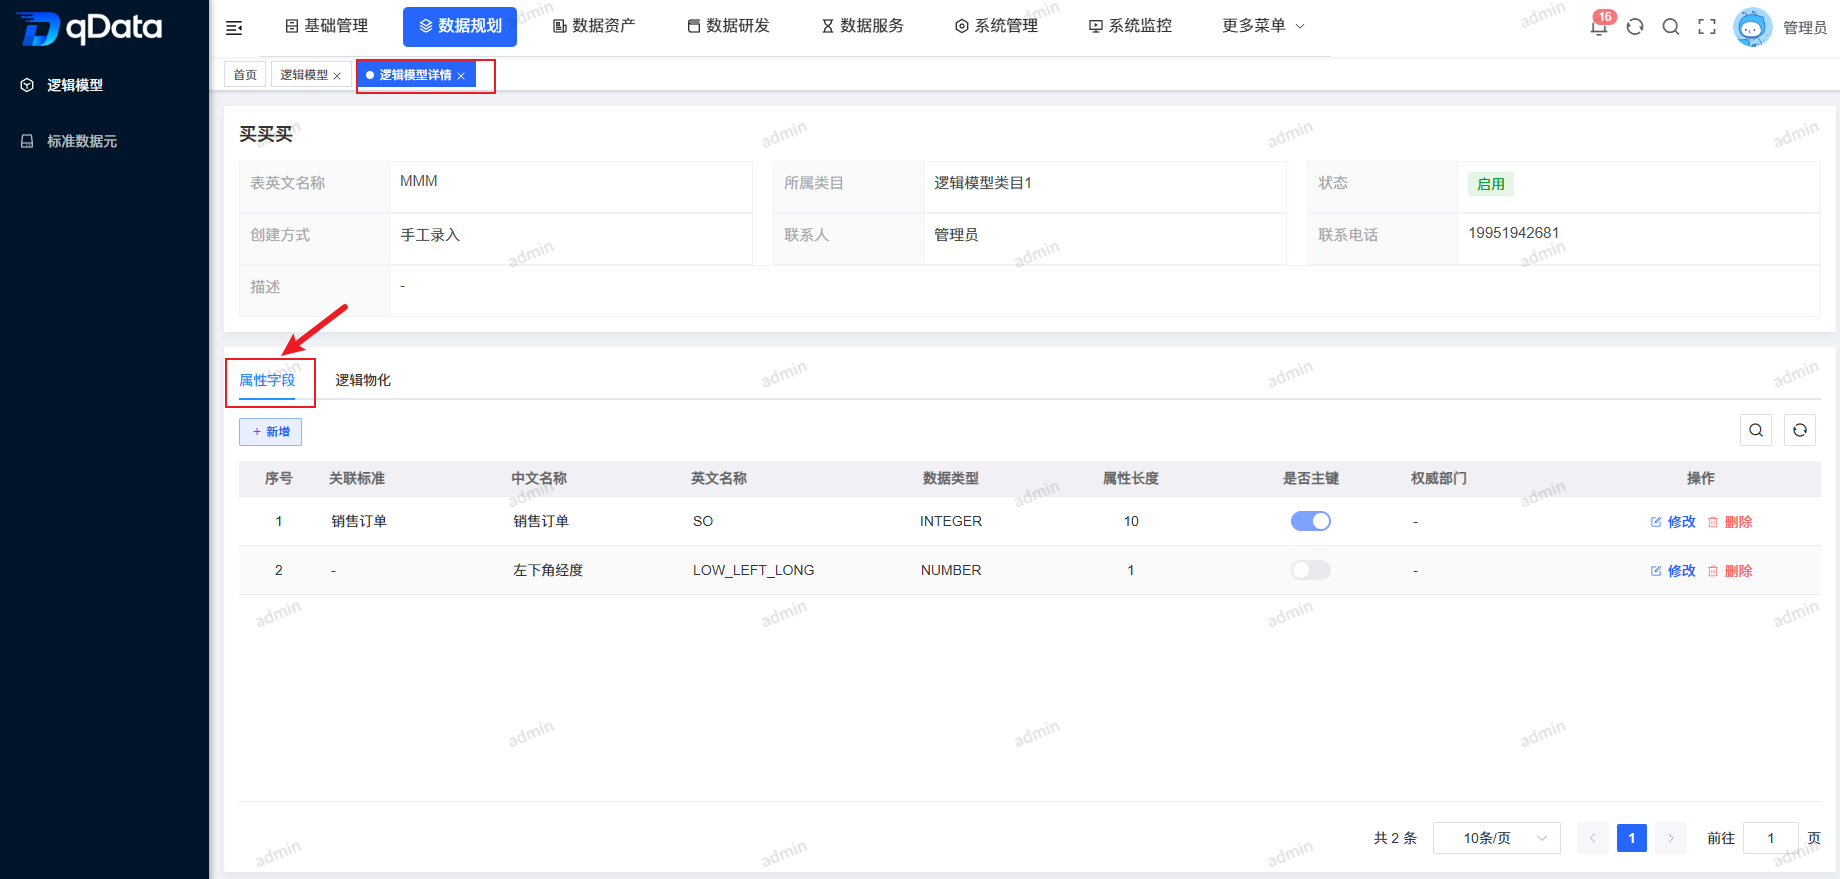
On the Logical Model Details page, click Attribute Fields to view fields including sequence number, associated standard, Chinese name, English name, data type, attribute length, primary key flag, authority department, and more.
5.1.1. Add Attribute Fields
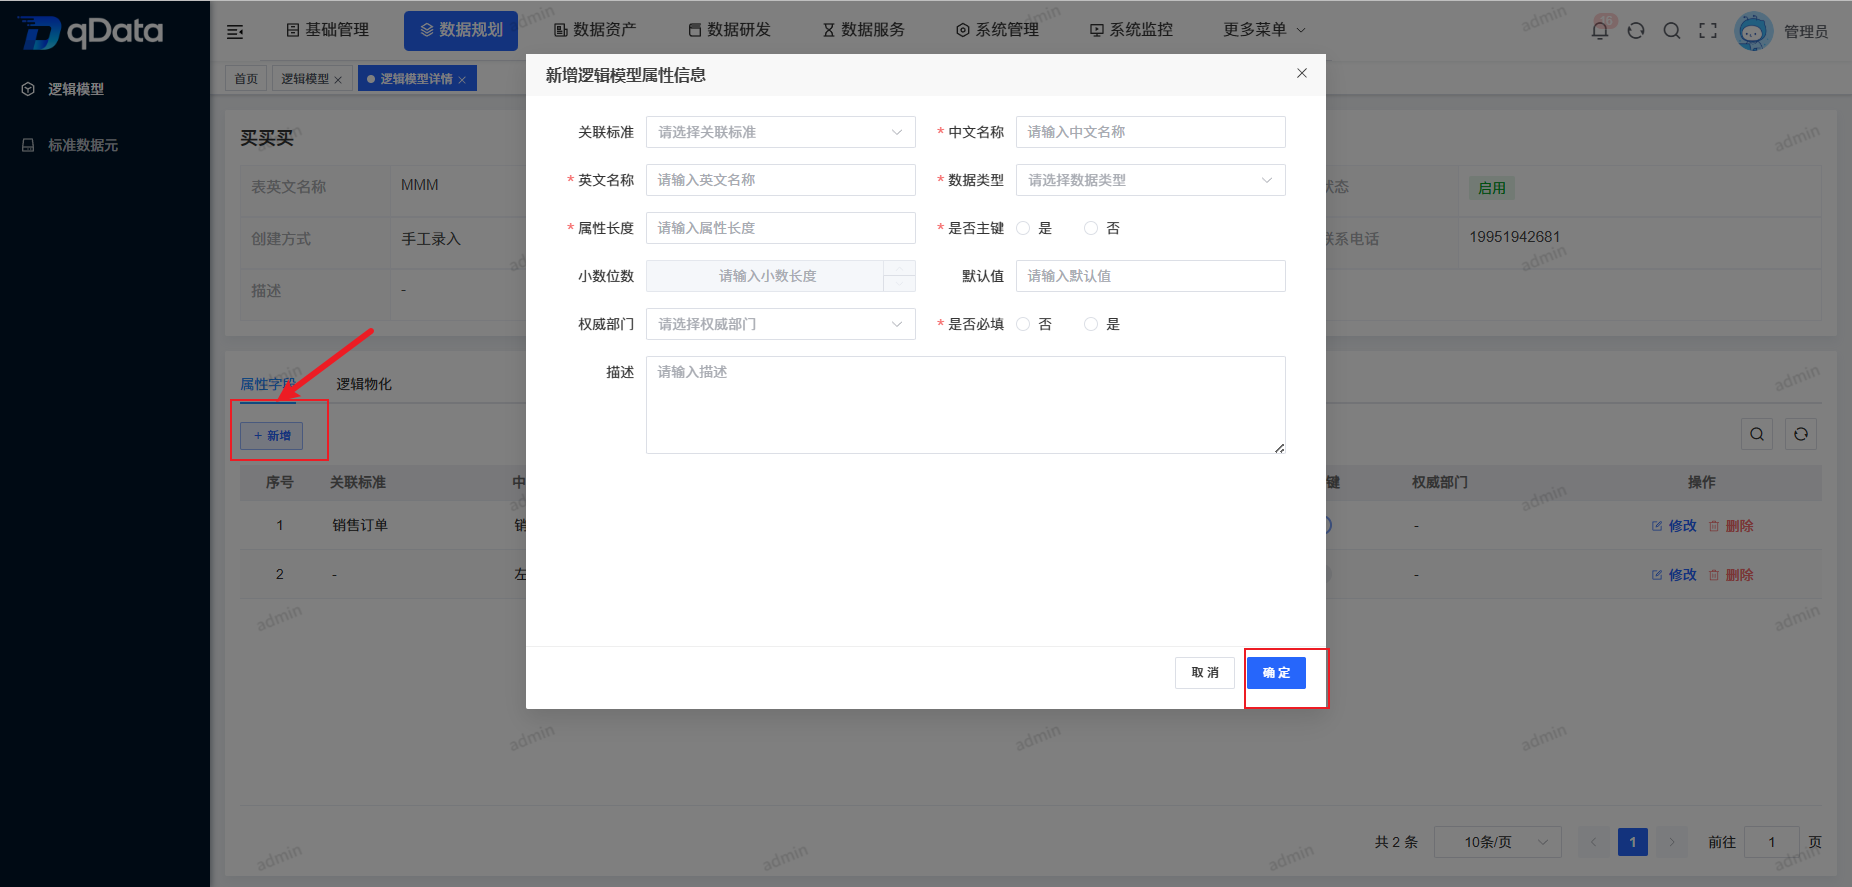
After selecting the data source, click Add attribute fields, fill in field information in the Add Table Fields dialog, and click OK to complete adding fields. (Same as 2.2.3)
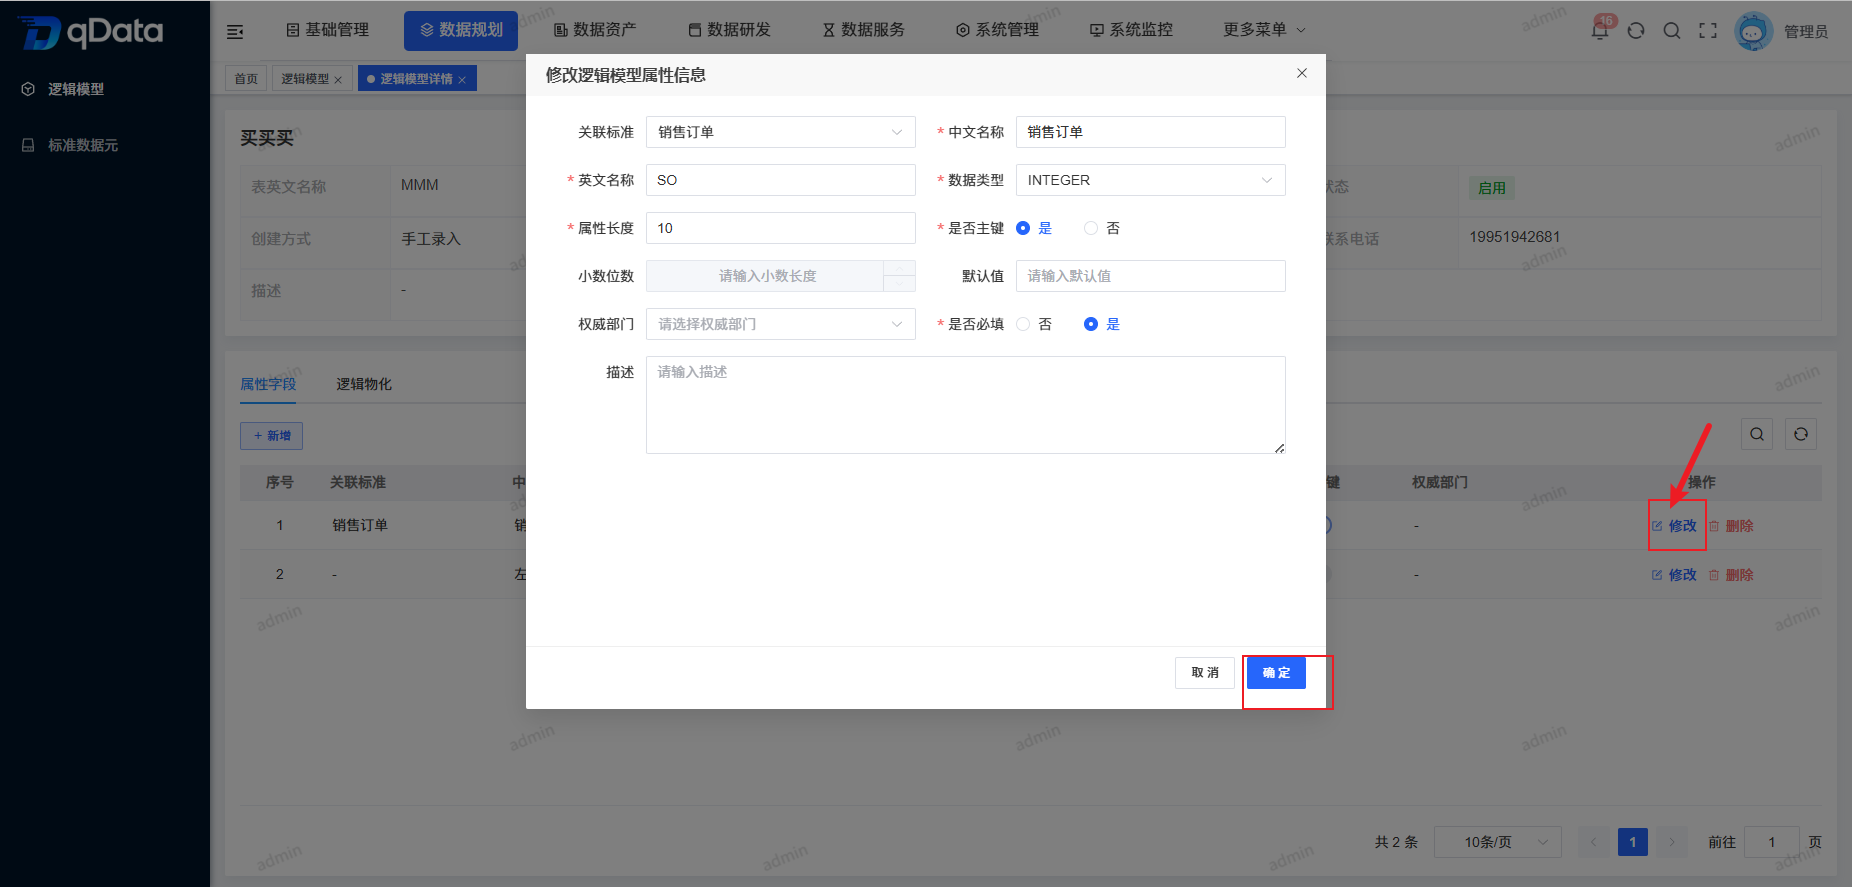
5.1.2. Edit Attribute Fields
Select the attribute field to edit, click Edit in the operation column, edit the existing attribute field information in the dialog, and click OK to complete editing the attribute field information. (Same as 2.2.4)
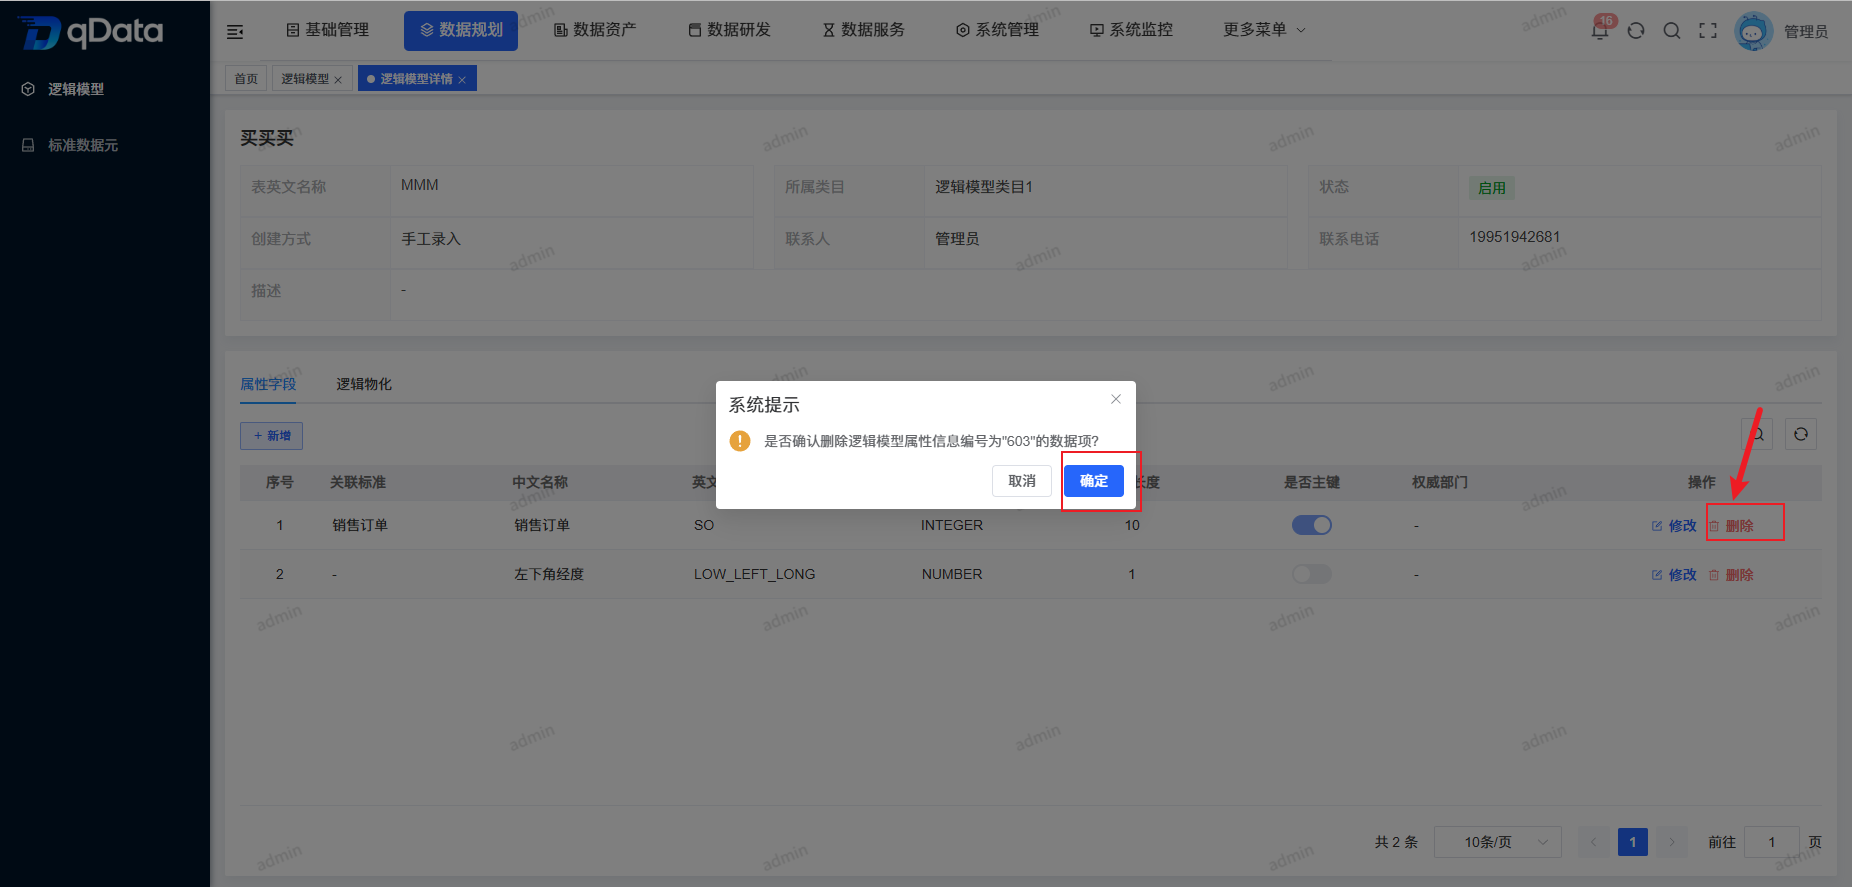
5.1.3. Delete Attribute Fields
Select the attribute field to delete, click Delete in the operation column, and click OK. The system will remove the attribute field information. (Same as 2.2.5)
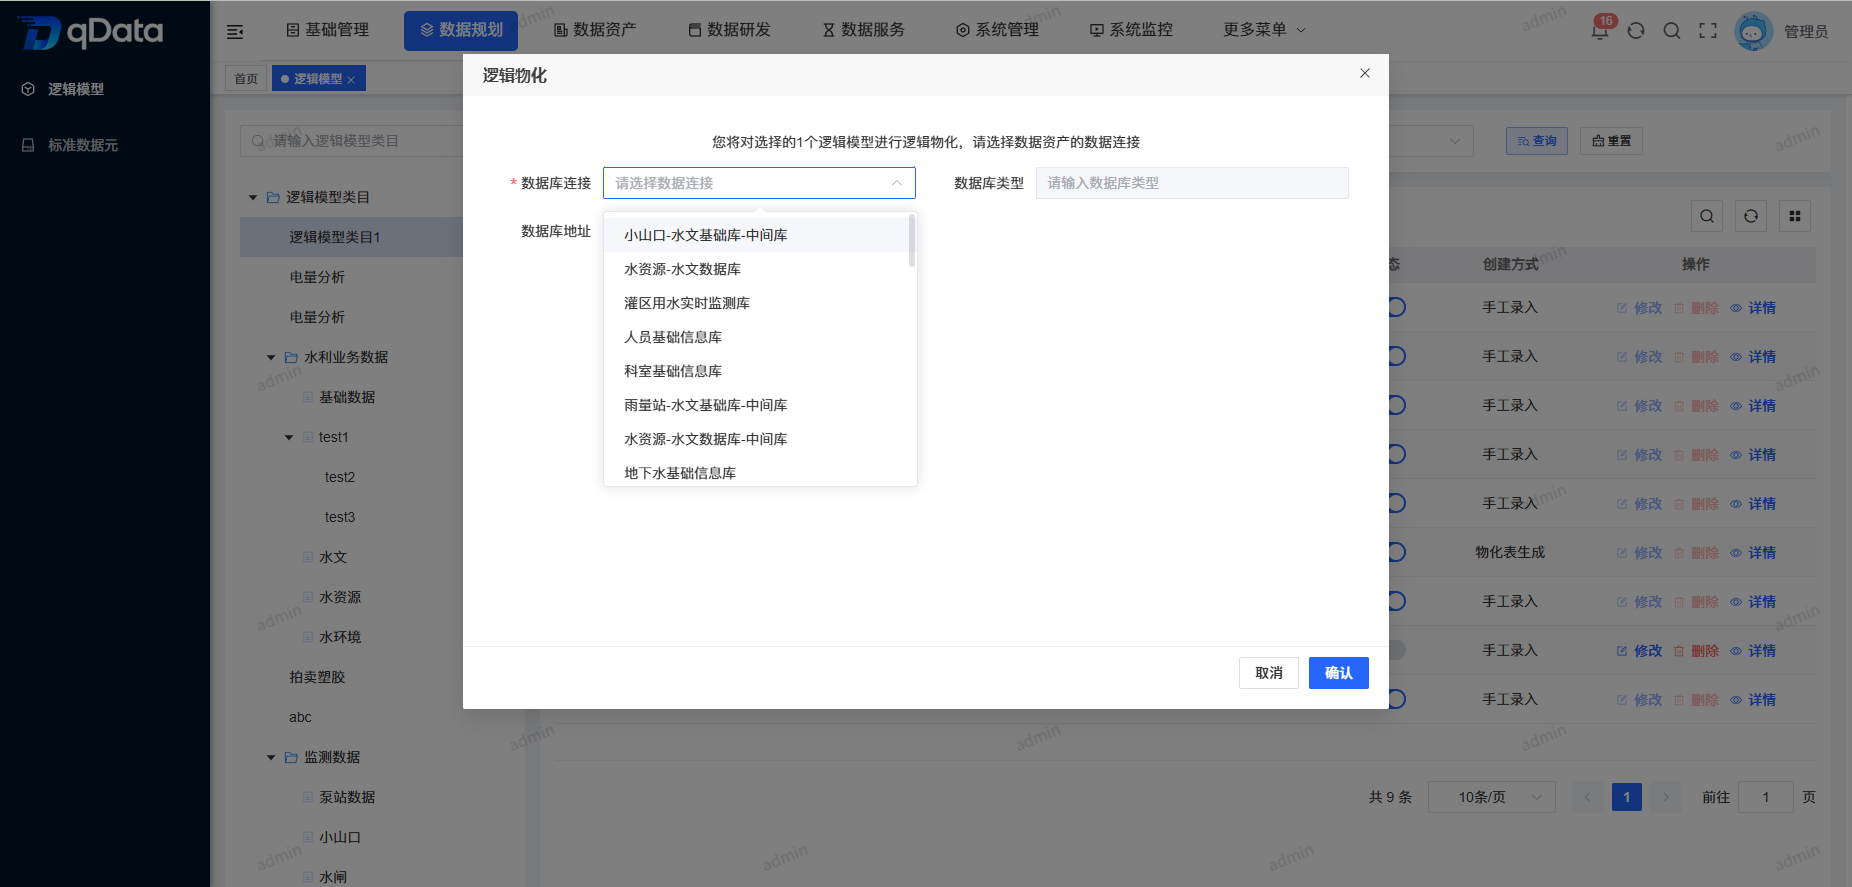
5.2. Logical Materialization
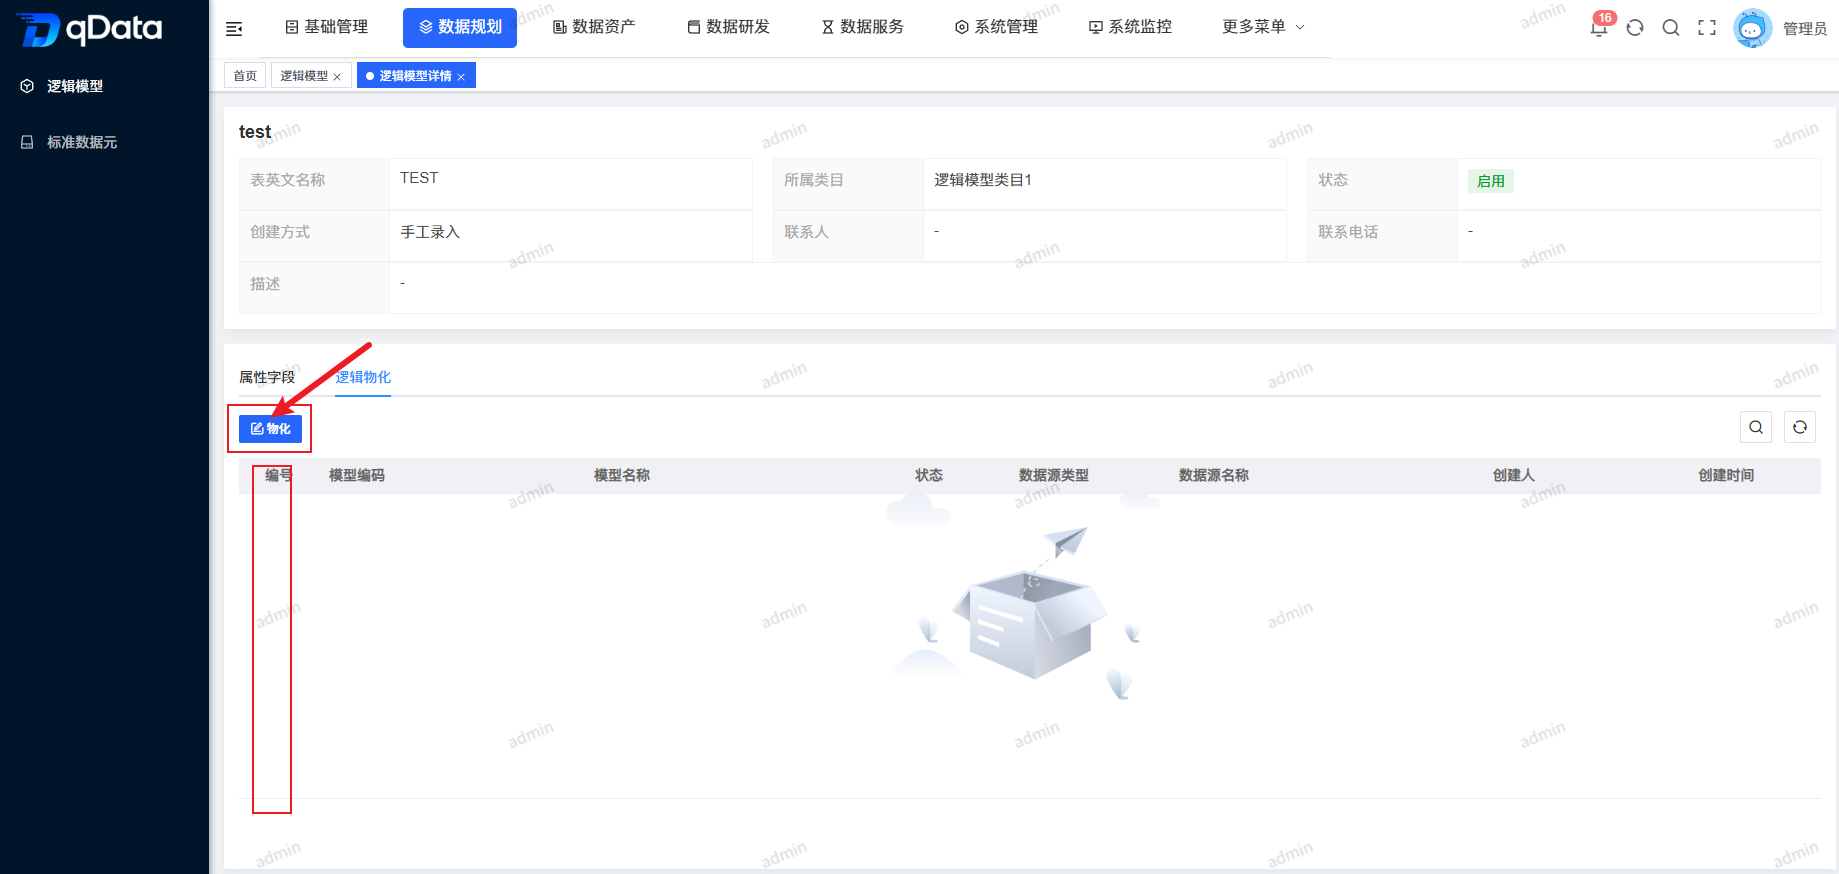
On the Logical Model Details page, click Logical Materialization to view fields including ID, model code, model name, Status, data source type, data source name, creator, creation time, and more.
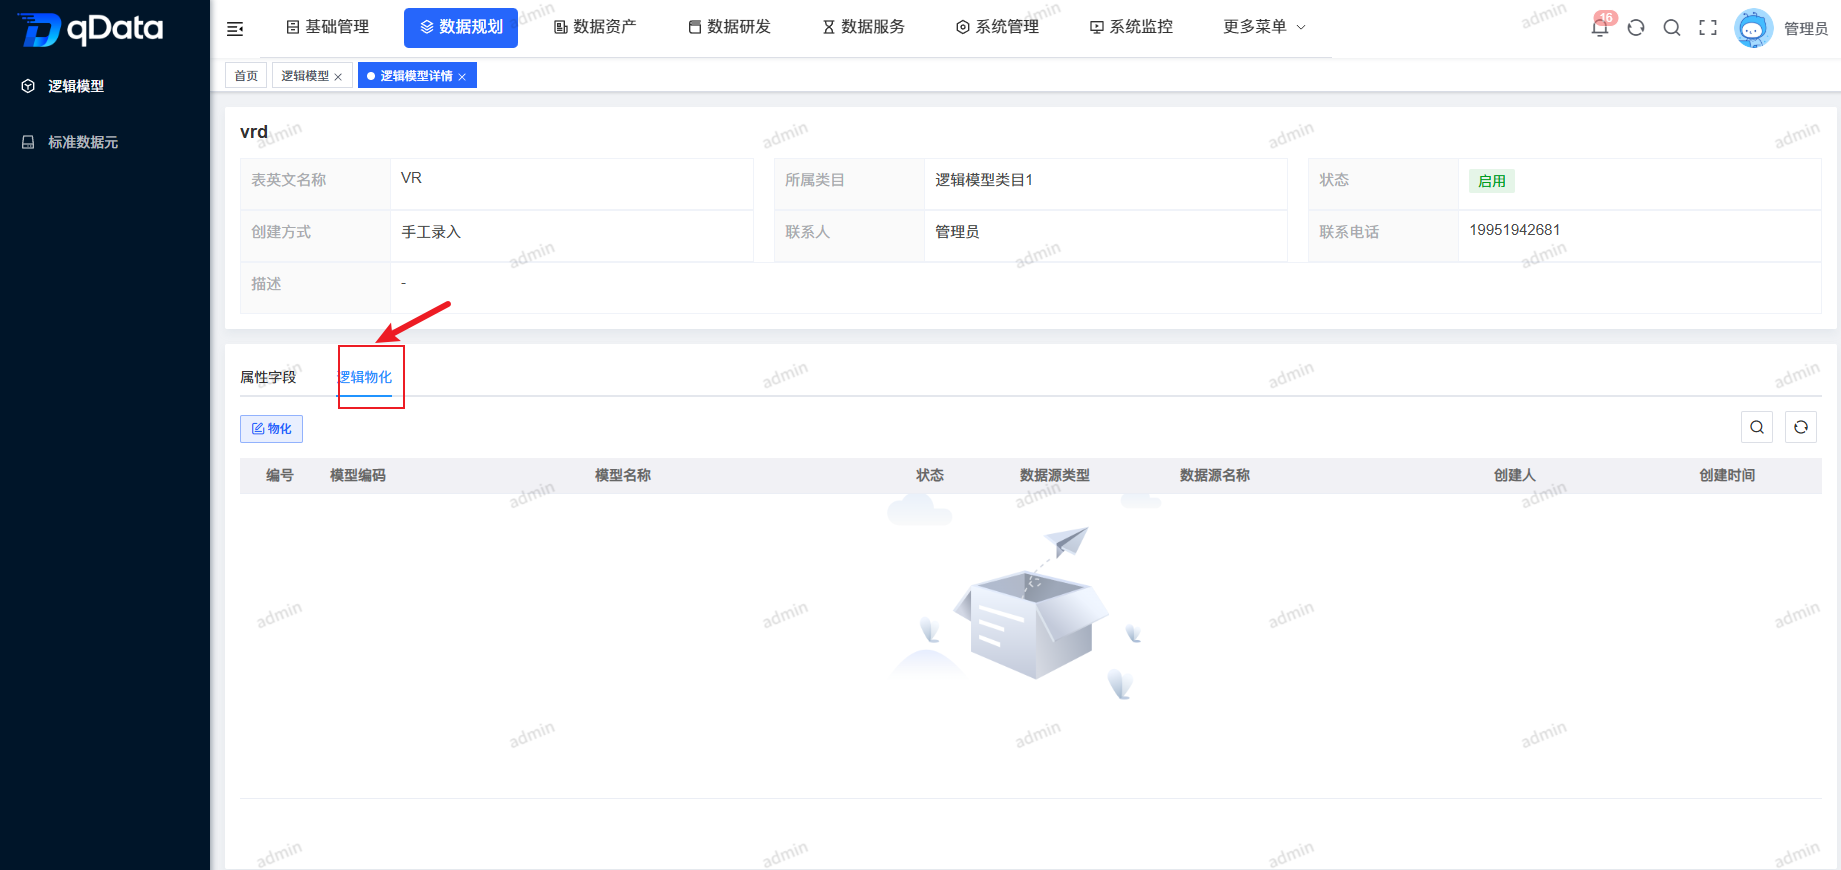
5.2.1. Materialization
In Logical Materialization on the Logical Model Details page, click Materialize, fill in related information in the dialog, and click Confirm to complete materialization.
6. Bulk Logical Model Materialization
Select multiple Logical Model checkboxes in the page list, click Materialize on the page, fill in related information in the dialog that appears, and click OK to complete bulk Logical Model materialization. (Note: the Logical Models to materialize must be enabled)
7. Enable/Disable
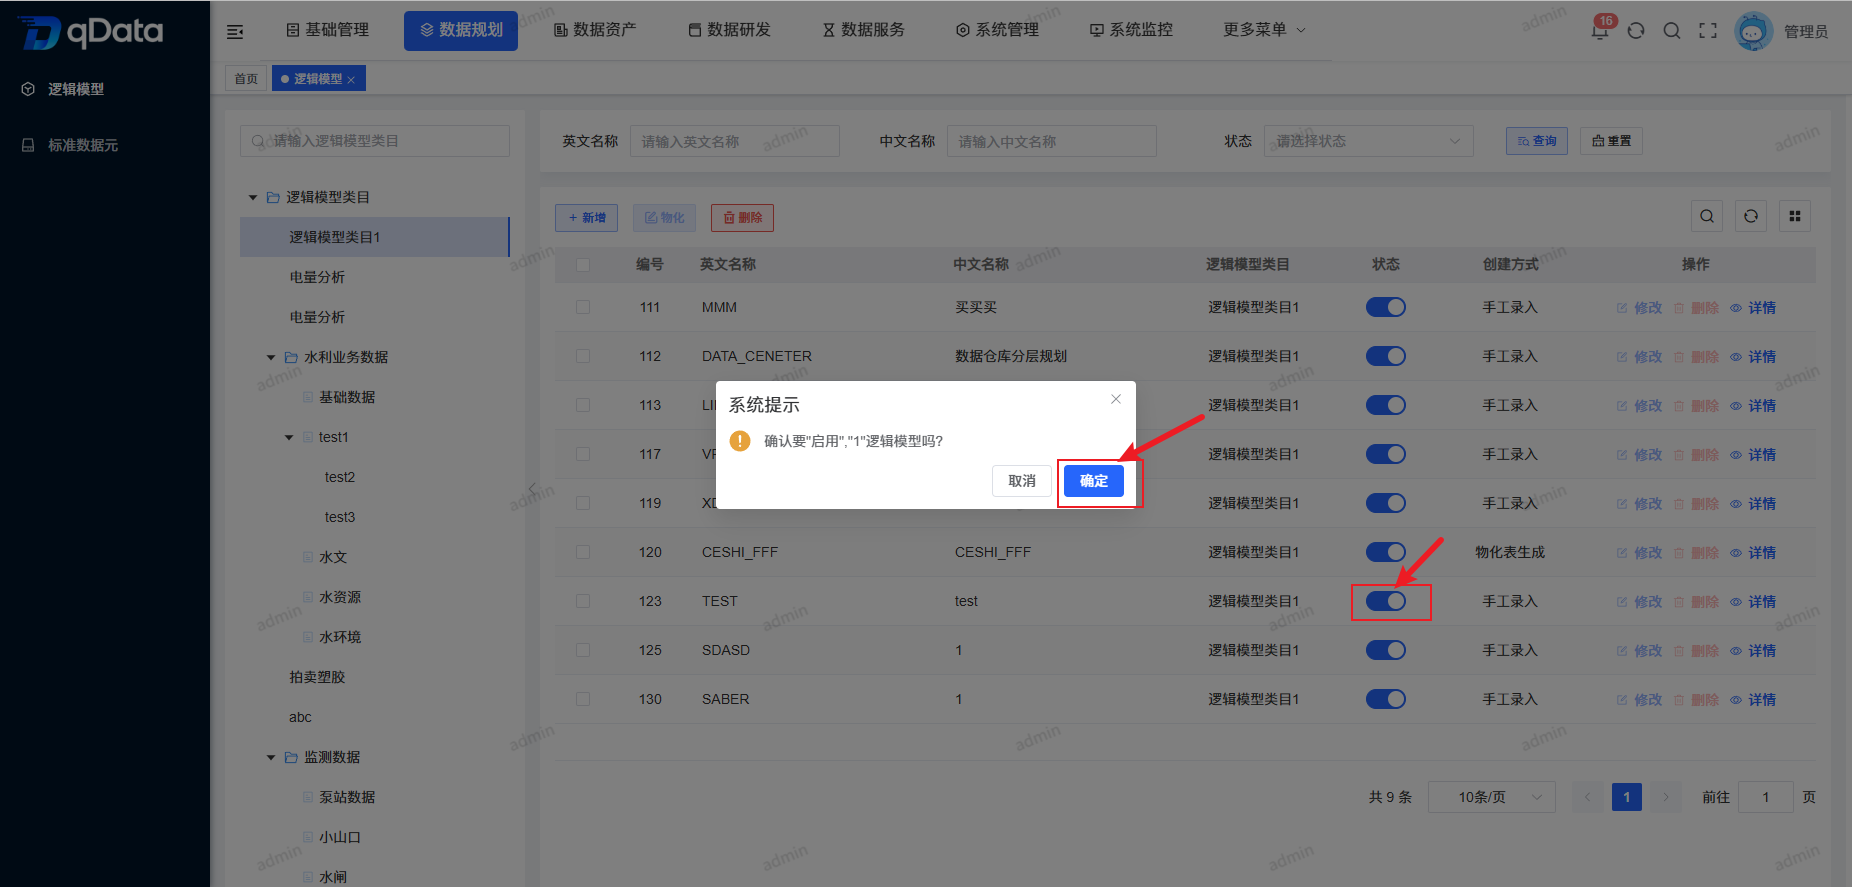
Select the Logical Model to enable or disable, and click the switch in the status column to complete Enable/Disable.