
Service Classification
Feature overview
Functional positioning
Service Classification is the upstream basic page of API management. It is used to organize data service categories by parent-child hierarchy and display category name, description, status, sorting and creation information. API configurers can later use these categories to locate or select the category to which the API belongs in [API Management].
Simple understanding: First organize the API into a classification tree according to business themes, and then you can quickly locate it by category when searching and configuring the API.
Usage suggestions
After entering the page, wait for the category list to be loaded, and then check the parent-child hierarchy based on the expansion arrow and indentation relationship. When preparing to maintain a classification, you can first check the parent category, classification name, status, sorting, description and remarks before deciding whether to continue the operation.
Main features
- Inventory Information Check: Open the "Modify Data Service Category" pop-up window to view the field echo, and click [OK] to return to the list when leaving the fields unchanged.
- Maintenance portal display: View query, status switch, row-level [Add] [Delete], batch [Delete] and [Expand] and other portals.
- API Category Support: Provides service classification results for [API Management] to facilitate organization and selection of APIs by category.
Scope
[Service Classification] is used to view the hierarchical structure and current basic information of data service categories. This page only explains the list display, adding pop-up window cancellation, inventory category echo and return to list behaviors confirmed on the current page. Query results, new saves, field updates, subcategory additions, deletions, batch deletions, status switching, and automatic linkage results to existing APIs are beyond the scope of this page. The current page is demonstrated using the super administrator account, and other role permissions are not defined accordingly.
Preliminary steps
Preconditions
- Logged in to the qData platform.
- The current account can access the [Data Service] module and [Service Classification] menu.
- The current account can see the [Service Category] menu.
- If you need to view the modification pop-up window, there are inventory records that can be viewed in the category list.
Navigation path
Data Service > Service Classification
Page overview
After entering [Service Category] and waiting for the data to be loaded, the page displays the "Data Service Category" and "Superior Category" query area, [Query] [Reset], [Add], Batch [Delete] and [Expand] entrances above the list, as well as the service classification level list.
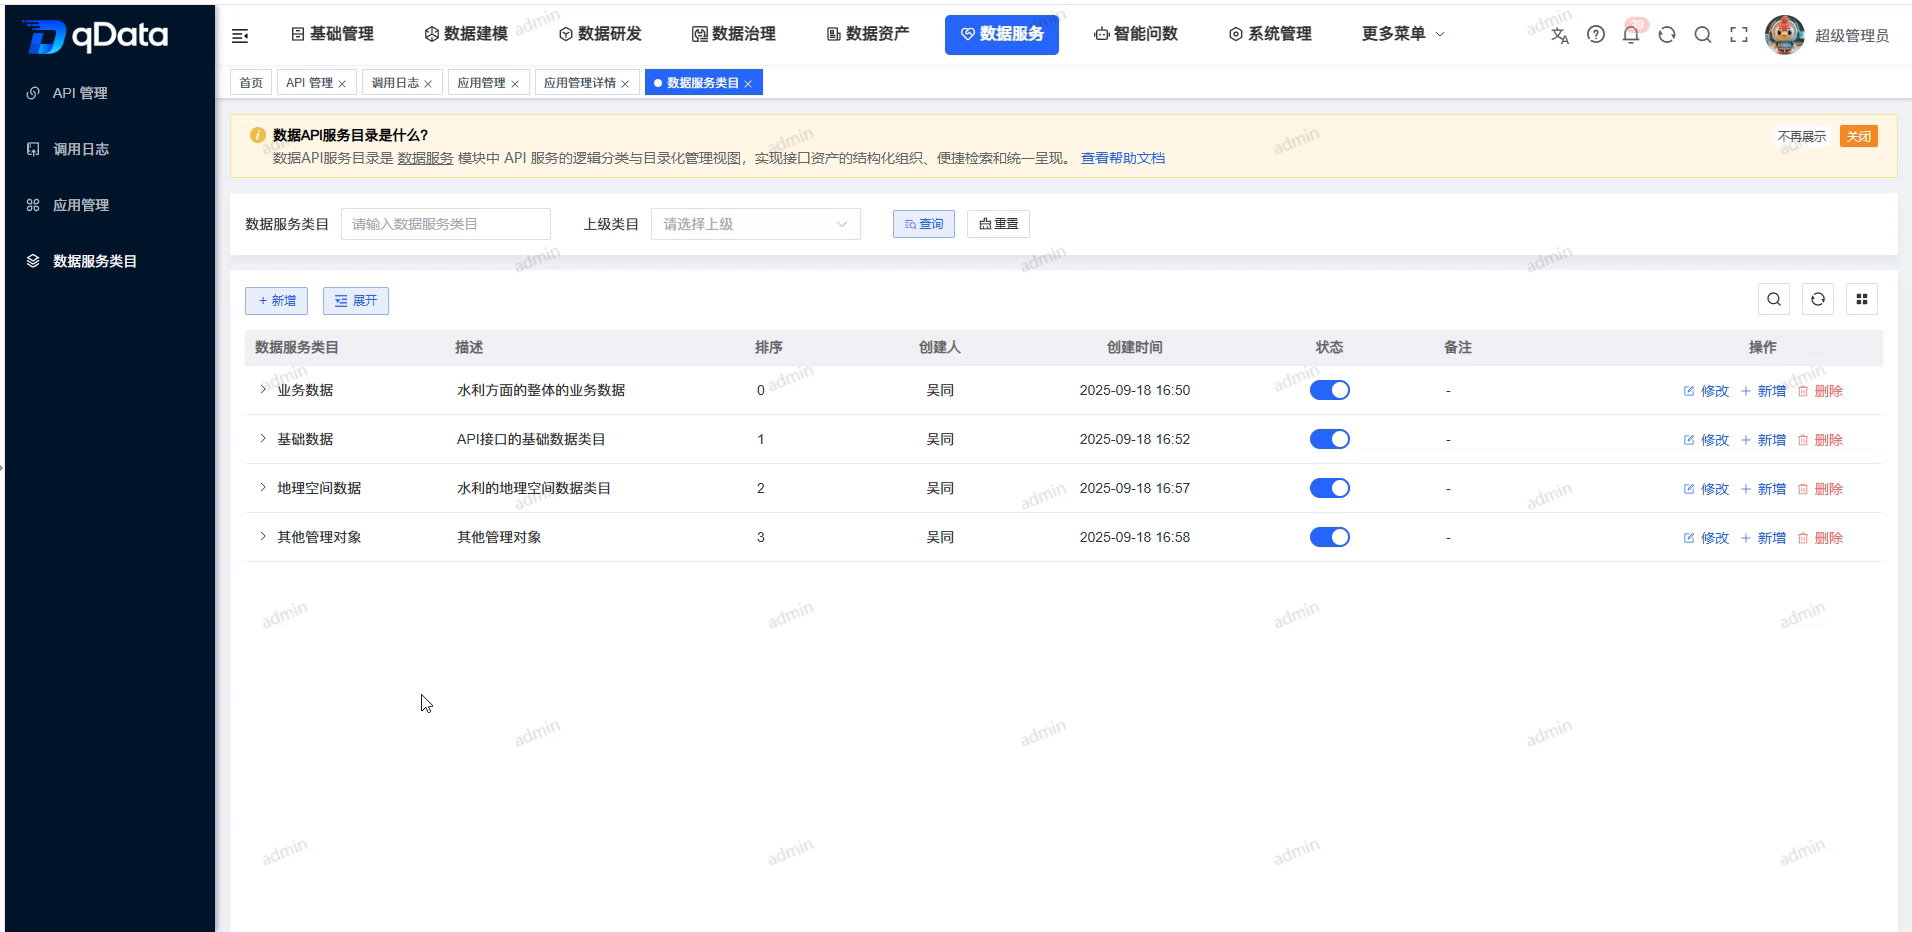
When the page is switched, "No records yet" may be displayed briefly, and then the category list is loaded; this is a loading transition and does not mean that the business is stable and empty.
Recommended operating procedures
View the classification system: Enter [Service Classification] -> Wait for the list to be loaded -> View the parent-child hierarchy according to the expansion arrow and indentation -> Check the status, sorting and description.
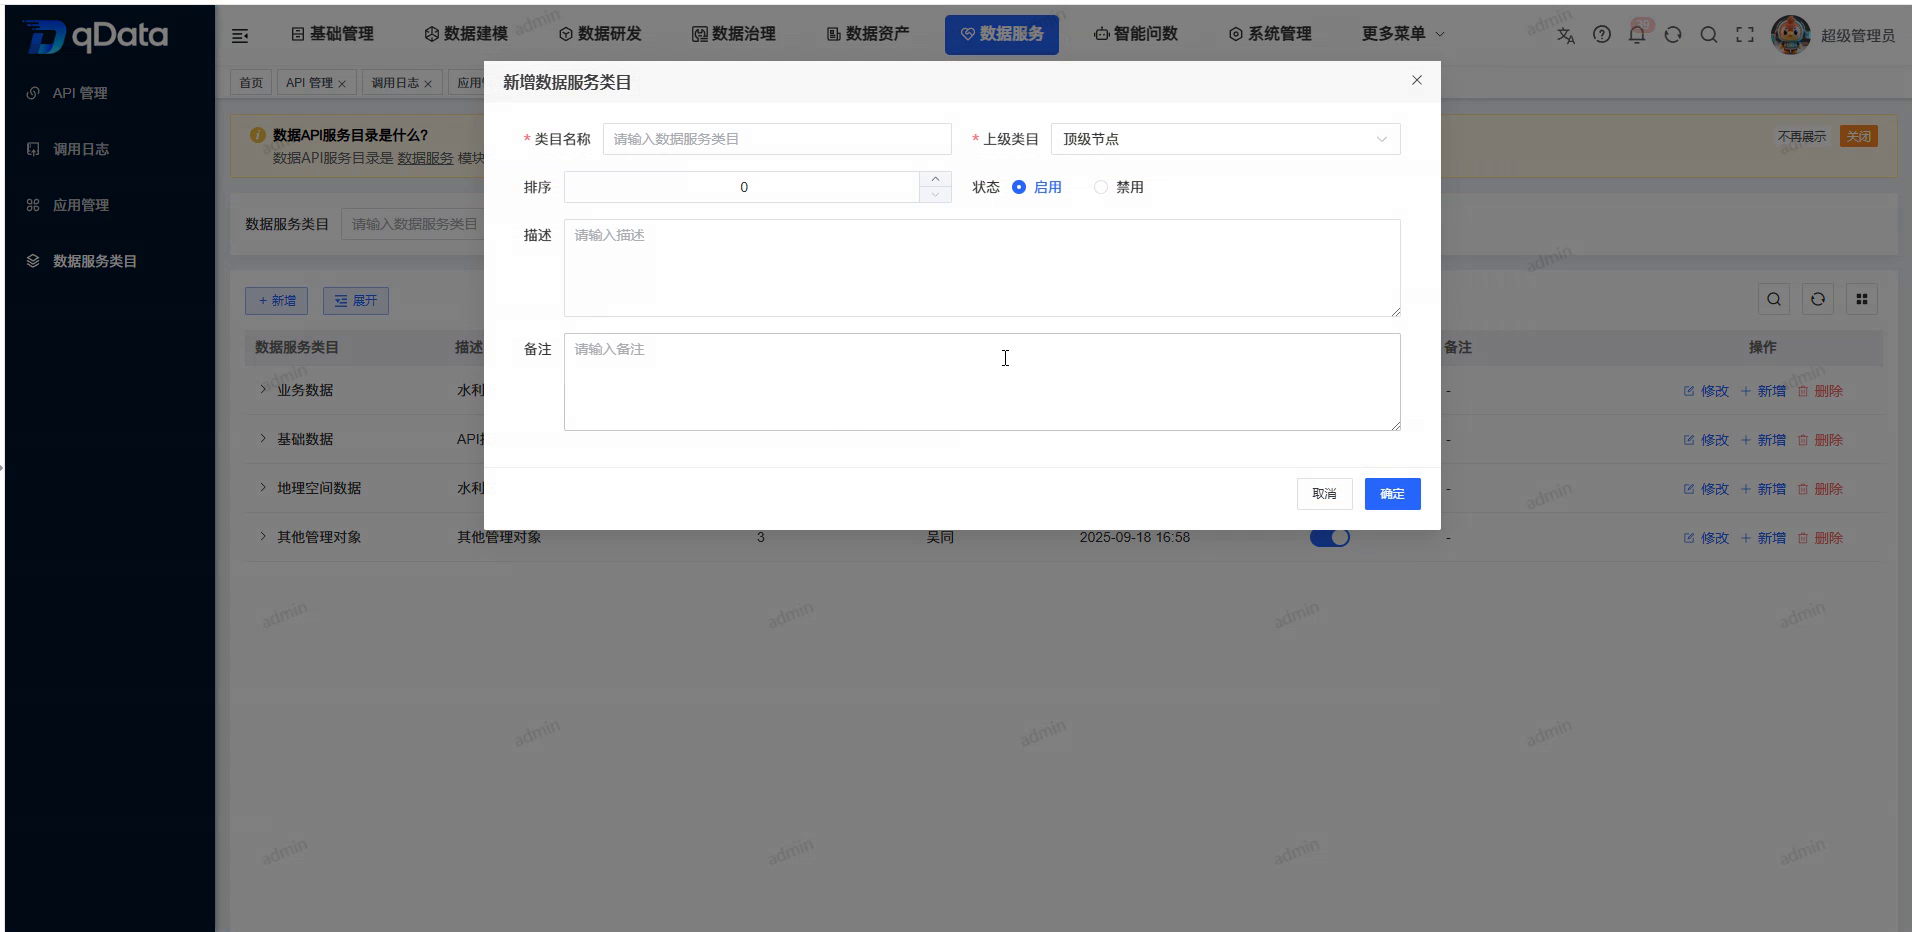
Prepare to add a new category: Click [Add] above the list -> View the upper category, name, status, sorting, description and remarks fields -> Click [Cancel] to return to the list if it is not currently submitted.
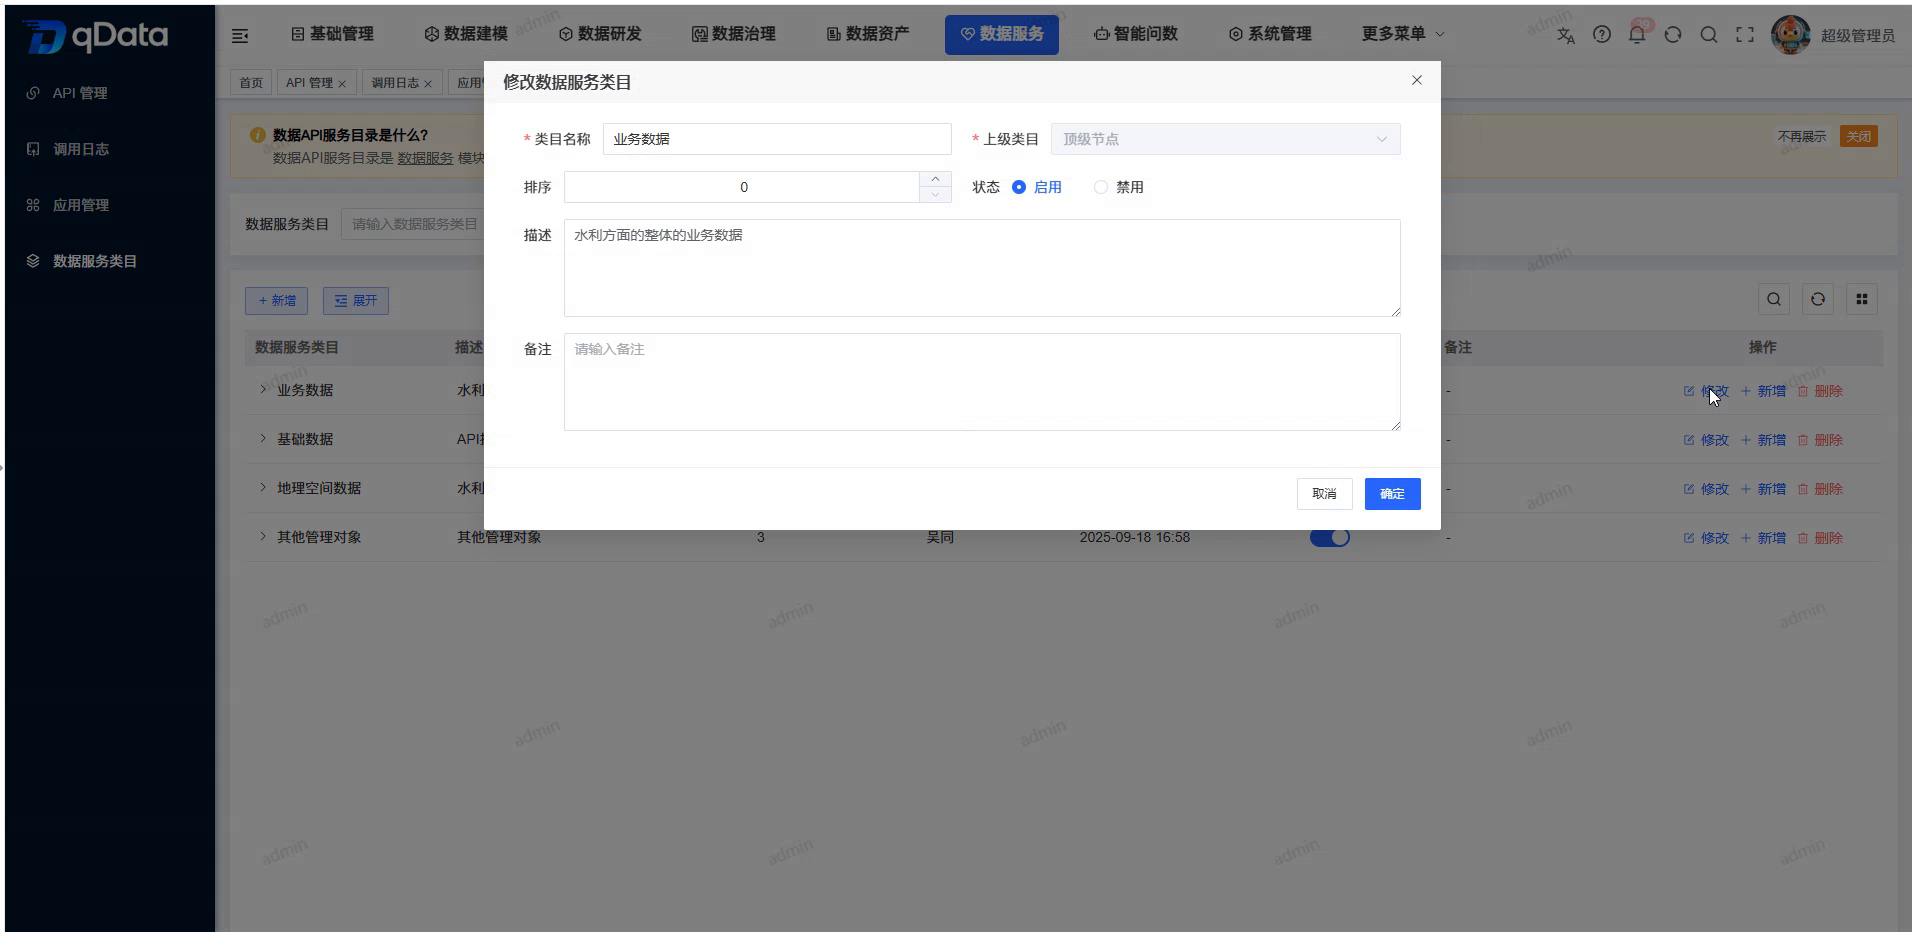
Check the stock classification: Positioning target classification -> Click [Modify] -> Check the backfilled fields -> Click [OK] to return to the list while leaving the fields unchanged.
Functional operation instructions
View a hierarchical list of service categories
- Enter the [Data Service] module.
- Click the [Service Classification] menu on the left.
- View the activated [Service Category] tab at the top.
- Wait for the category list to be loaded.
- View the category name, description, status, sorting, notes, creator and creation time.
- View the parent category and child categories according to the expansion arrow and indentation relationship.
View the add category form and cancel
- Click Add above the list.
- View the “Add Data Service Category” pop-up window.
- Check the "Superior Category" field and the default value "Top-Level Node".
- Check the "Data Service Category" field and required identification.
- Check the "Status" field and the default value "Enabled".
- Review the Sort field and its default value of 0.
- Review the Description and Notes fields.
- Click [Cancel].
- Close the pop-up window and return to the service category list.
View the inventory classification echo and return to the list
- Locate the "water resources" record in the category list.
- Click [Modify] on the right side of the record.
- Check the "Modify Data Service Category" pop-up window.
- View the upper-level category "Business Data".
- View the data service category "Water Resources".
- Check the status "Enabled".
- Look at the sort value 0.
- View the description "Water Resources Business Data Category".
- Leave existing fields unchanged.
- Click [OK].
- View the page to return to the service classification list.
FAQ
- None
Summarize
[Service Classification] is used to view the service classification level and basic information, view the add classification form and cancel it, and return to the list after viewing the inventory classification field echo. When using it, focus on checking the superior category, classification name, hierarchical relationship, status and sorting ; query results, new saves, field updates, deletions, status switching and downstream linkage results are not within the scope of this page.